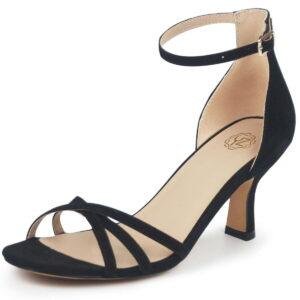
Introduction
High heel shoes are made by shaping leather or synthetic materials over a foot-shaped form, called a last, then adding a strong heel, sole, lining, and finish. The work combines shoe design, pattern cutting, sewing, molding, adhesives, and careful quality checks.
In the United States, a factory may divide this process among designers, pattern makers, stitchers, assemblers, and quality inspectors. A small workshop may have one person do nearly every step. Either way, the shoe must do two jobs at once: look good and support the foot without letting the heel twist or detach.
This guide explains how high heels are designed and built, what each part does, and which steps are practical for a home maker.

What Parts Make Up a High Heel Shoe?
A high heel is more than an upper attached to a sole. Each part has a specific job.
| Shoe part | What it does |
|---|---|
| Upper | Covers the foot and creates the shoe’s outer shape |
| Lining | Adds comfort and covers the inside of the upper |
| Toe puff | Helps the toe keep its shape |
| Counter | Supports the heel area around the back of the foot |
| Insole board | Forms the base inside the shoe |
| Shank | Supports the area between the heel and the ball of the foot |
| Heel | Raises the rear of the shoe and carries much of the load |
| Outsole | Protects the bottom of the shoe and contacts the ground |
| Top lift | Covers the bottom of the heel and wears against the ground |
| Insole cover | Covers the foot-facing side of the insole |
The upper may use leather, suede, fabric, microfiber, polyurethane, or another man-made material. Leather is common because it can stretch, mold, and hold stitches well. Synthetic materials can offer consistent color and lower cost, but their cutting and bonding needs vary.
The last controls the shoe’s shape. It sets the toe width, instep height, heel position, and overall fit. A high heel cannot be designed correctly without a suitable last.
The shank is especially important. It sits under the waist of the shoe, between the heel and the ball of the foot. It helps prevent the shoe from bending in the wrong place.
How Are High Heel Shoes Designed?
The process begins with a design, but the design must work around the foot and the last. A narrow toe, tall heel, or thin strap can change fit, balance, and comfort.
1. Choose the last
The maker first selects or creates a last. A last for a pump may have a different toe shape and instep than a last for a sandal or ankle boot.
The last determines:
- Toe shape
- Heel height and pitch
- Foot opening
- Instep volume
- Width
- Heel seat position
- Overall shoe length
The heel height is measured from the ground to the heel seat, but the visible height is not the only concern. The pitch also matters. Pitch describes how the foot is angled inside the shoe.
A taller heel moves more body weight toward the front of the foot. The last, shank, heel, and upper must work together to keep the foot from sliding forward.
2. Draw the shoe design on the last
A designer marks the main lines directly on the last. These lines show the vamp, quarters, throat, topline, straps, seams, and other features.
This step is called making the model or design form. It helps the pattern maker turn a three-dimensional shape into flat pieces.
3. Create the patterns
The pattern maker covers the last with paper or tape. The covering is removed and flattened. Its sections become the working patterns for the upper and lining.
Patterns must include:
- Seam allowance
- Fold lines
- Stitch marks
- Matching marks
- Center lines
- Edge turns
- Placement for straps or decorations
A small error can cause wrinkles, uneven seams, or a poor fit. High heels often have less room for error because the upper is tight and the foot sits at an angle.
4. Make a test sample
Before cutting expensive material, the maker creates a sample. The sample may use inexpensive leather, fabric, or a similar test material.
The maker checks whether:
- The foot opening feels secure
- The heel sits straight
- The toe has enough room
- The upper wrinkles
- The straps pull in the right direction
- The shoe stays on during walking
- The design can be manufactured efficiently
A pattern may need several changes before it is ready for production.
What Materials Are Used to Make High Heels?
High heel shoes use a mix of flexible, rigid, and shock-resistant materials. The right choice depends on the design, price, weight, and expected use.
Upper materials
Common upper materials include:
- Full-grain or corrected-grain leather
- Suede
- Satin and other textiles
- Microfiber
- Polyurethane
- Synthetic leather
- Mesh
- Patent-finished materials
The material must bend at the forefoot without cracking. It must also hold its shape around the toe and heel.
Structural materials
Structural parts may include:
- Leatherboard
- Fiberboard
- Thermoplastic materials
- Foam
- Metal shanks
- Plastic toe puffs
- Heel counters
- Reinforcement tape
A toe puff stiffens the front of the shoe. A counter supports the back. These parts are often hidden between the upper and lining.
Sole and heel materials
Soles may use leather, rubber, thermoplastic rubber, polyurethane, or other compounds. Heels can use:
- Stacked leather
- Wood
- Plastic
- Rubber
- Resin
- Metal
- Composite materials
A narrow stiletto heel often has a rigid core covered with leather, plastic, or another finish. The heel tip, called the top lift, is usually made from a wear-resistant material.
Adhesives and thread
Shoe makers use adhesives made for footwear. These products can bond leather, rubber, fabric, and synthetic materials, but no single adhesive works well for every combination.
Thread may be polyester, nylon, cotton, or another fiber. The thread size and stitch length must match the material. Thick thread can damage thin leather, while weak thread can pull through during wear.
How Do You Make High Heel Shoes Step by Step?
A high heel shoe is usually assembled in a set order. The exact method changes by shoe type, material, and factory.
Step 1: Cut the materials
The maker places the upper patterns on the chosen material. The pieces are cut by hand, die, knife, or computer-controlled cutting system.
The pieces may include:
- Vamp
- Quarters
- Tongue
- Straps
- Backstay
- Facing
- Lining
- Decorative panels
Leather has a natural grain and may stretch more in one direction than another. A skilled cutter places each piece to control stretch and match the visual grain.
The maker also cuts the toe puff, counter, insole board, outsole, and other components.
Step 2: Prepare and reinforce the upper
Edges may be skived, or thinned, so that seams do not become bulky. Some pieces receive reinforcement tape or backing.
The maker may also:
- Fold raw edges
- Add foam
- Attach buckles
- Punch holes
- Add eyelets
- Apply decorative details
- Mark stitch lines
The upper is then ready for sewing.
Step 3: Sew the upper
The cut pieces are joined with a sewing machine or by hand. The order depends on the pattern.
For example, a pump may have a vamp joined to side sections. A sandal may require several straps and a heel band. A shoe with a closed toe needs more shaping than a simple open-toe design.
Stitching must remain even. Seams should lie flat, and thread ends should be trimmed and secured.
Step 4: Prepare the insole and last
The maker attaches or positions the insole board on the bottom of the last. The shank is placed in the waist area.
The heel position is checked at this stage. If the heel is not centered under the heel seat, the finished shoe may lean, twist, or feel unstable.
Some shoes use a temporary hold to keep the upper aligned during lasting.
Step 5: Last the upper
Lasting means pulling and fixing the upper around the last. This gives the shoe its final three-dimensional shape.
The maker usually works in this order:
- Align the upper at the toe.
- Pull the material over the toe and secure it.
- Align the sides.
- Pull the upper around the waist.
- Set the heel area.
- Remove wrinkles and excess material.
- Secure the upper to the insole board.
Factories may use lasting machines. Small workshops often use lasting pliers, tacks, and adhesive.
The maker must control tension. Too little tension creates wrinkles. Too much tension can distort the upper or make the shoe too tight.
Step 6: Attach the heel
The heel is positioned under the heel seat. It must line up with the center of the shoe and sit flat against the insole structure.
Depending on the construction, the heel may be attached with:
- Screws
- Nails
- Cement
- Internal reinforcement
- A combination of methods
A tall or narrow heel needs careful attachment because it receives repeated bending and impact. The heel should not rock when the shoe is placed on a flat surface.
Step 7: Attach the outsole
The bottom is prepared by roughing, cleaning, and applying the correct adhesive. Roughing removes surface glaze and helps the bond.
The outsole is then positioned from the front toward the heel. The maker presses it firmly and allows the adhesive to cure for the required time.
Some shoes use a stitched construction. Others use cemented construction, molded soles, or a mixture of methods.
Step 8: Add the heel tip
The heel tip, or top lift, is attached to the bottom of the heel. It must sit evenly and make full contact with the ground.
A worn or loose top lift can make a heel unstable. It should be replaced before the heel core becomes damaged.
Step 9: Finish the shoe
Finishing may include:
- Removing glue marks
- Trimming thread
- Smoothing edges
- Polishing leather
- Cleaning the outsole
- Adding an insole cover
- Inserting a temporary shoe tree
- Brushing suede
- Applying protective treatments
The shoe is then removed from the last. The maker checks the shape and fit again.
Step 10: Inspect the finished pair
Both shoes should match in:
- Length
- Width
- Color
- Heel height
- Heel position
- Stitching
- Surface finish
- Opening shape
The shoes should stand evenly on a flat surface. The heels should not lean outward or inward. The upper should not show severe wrinkles or open seams.
How Do You Make High Heels at Home?
You can make a simple pair at home, but a complete high heel is a demanding project. The hardest parts are accurate pattern work, controlled lasting, and secure heel attachment.
A practical beginner project is a low platform, wedge, or sandal with a purchased sole unit. A narrow stiletto is less suitable because its heel attachment needs precise tools and strong structural support.
Basic tools
You may need:
- A suitable shoe last
- Upper material
- Lining material
- Paper or tape for patterns
- Sharp scissors or a craft knife
- Leather skiving tool
- Sewing machine suitable for the material
- Lasting pliers
- Sandpaper or a roughing tool
- Footwear adhesive
- Small hammer
- Clamps
- Insole board
- Shank
- Heel and top lift
- Outsole
- Eye protection and gloves
Use tools only as intended. Knives, solvent-based adhesives, heated tools, and power equipment can cause serious injuries.
A safer home workflow
- Start with a paper pattern. Check the design on the last before cutting leather.
- Make a test upper. Use scrap material to find wrinkles and fit problems.
- Cut the final pieces. Mark the center line and matching points.
- Sew the upper. Keep the seams flat and secure.
- Prepare the insole. Add the shank and confirm the heel location.
- Last the upper. Work slowly from the toe to the heel.
- Attach the heel mechanically when possible. Follow the heel maker’s instructions for screws, nails, or other fasteners.
- Bond the outsole. Prepare both surfaces and allow full curing time.
- Add the top lift. Check that it sits level.
- Test the shoe indoors. Begin with short periods on a clean, flat surface.
Do not rely on ordinary craft glue for a load-bearing heel. Do not wear a prototype outdoors until the heel, shank, sole, and upper have passed careful inspection.
If the heel rocks, shifts, separates, or makes a cracking sound, stop using the shoe. A professional shoe repair shop can inspect the construction.
What Makes High Heel Shoes Strong and Stable?
A strong high heel depends on the relationship between the heel, shank, insole, upper, and outsole. One strong part cannot correct a weak connection elsewhere.
Heel alignment
The heel should sit under the heel seat. A heel that is placed too far forward or backward changes balance and increases stress on the upper and sole.
Heel attachment
Adhesive can help hold a heel, but a tall heel often needs a suitable mechanical attachment as well. The correct method depends on the heel design and the materials.
Shank support
The shank supports the waist of the shoe. Without enough support, the shoe may flex too much or collapse near the arch.
Counter support
The counter helps hold the heel in place. A weak counter can allow the foot to slide or the back of the shoe to fold down.
Sole grip
A smooth sole may slide more easily on some surfaces. A suitable outsole material and a well-finished contact surface can improve traction, but no sole prevents every slip.
Fit
A loose shoe lets the foot move inside the upper. A very tight shoe creates pressure and may distort the shoe. The fit should hold the heel without squeezing the toes.
The safest approach is to check the finished shoe in stages rather than waiting until the end.
Common Problems When Making High Heel Shoes
| Problem | Likely cause | Useful check |
|---|---|---|
| Wrinkles near the toe | Uneven lasting tension or poor pattern shape | Recheck the toe pattern and pull evenly |
| Heel leans | Heel seat or heel attachment is off-center | Set the shoe on a flat surface |
| Foot slides forward | Poor fit, smooth lining, or steep pitch | Check the last and opening placement |
| Sole separates | Dirty surface, wrong adhesive, or poor pressure | Clean, rough, bond, and clamp correctly |
| Stitching pulls out | Weak thread, poor seam allowance, or excess tension | Test the seam on scrap first |
| Shoe feels too tight | Upper was lasted too tightly or pattern is small | Compare with the last and test upper |
| Shoe rocks | Uneven heel or outsole | Check the heel base and top lift |
| Glue shows on the upper | Too much adhesive or poor masking | Apply a thin, controlled layer |
| Pair does not match | Cutting, lasting, or heel placement differs | Compare both shoes side by side |
Do not solve every problem by adding more glue. Extra adhesive can create hard spots, stains, and poor flexibility. Find the failed step first.
A shoe that looks correct may still be unsafe if the heel attachment is weak. Visual inspection should be paired with gentle hand checks and a short indoor wear test.
High Heel Construction Methods Compared
Different construction methods change the shoe’s flexibility, repair options, and production cost.
| Construction method | Main feature | Typical benefit | Main limitation |
|---|---|---|---|
| Cemented | Upper and sole are bonded | Light and efficient to produce | Bond can fail if surfaces are poorly prepared |
| Stitched | Sole or upper is sewn | Can offer strong visible construction | Requires suitable materials and accurate sewing |
| Molded | Sole is formed around or attached to the upper | Consistent shape in production | Harder to repair or alter |
| Combination | Uses stitching, adhesive, and fasteners | Can balance strength and speed | More steps and quality checks |
No method is automatically best for every high heel. The shoe’s shape, heel height, material, and intended use decide the right construction.
For a home project, a purchased sole and heel unit can reduce the most difficult structural work. That approach gives the maker more control over the upper while lowering the risk of a poorly supported heel.
Safety Tips for Making and Wearing High Heels
Making shoes involves sharp tools, fumes, heat, and heavy clamping pressure. Wear eye protection when cutting, sanding, hammering, or using power tools.
Use adhesives in the ventilation recommended by the product label. Keep them away from flames and store them in their original containers. Follow the product’s curing instructions instead of guessing from how the surface feels.
Wear gloves when handling rough leather, metal fasteners, or solvents, but keep gloves away from moving blades and sewing machine needles. Secure the material before cutting.
For finished shoes, inspect the heel and sole before each use. Stop wearing the shoes if you notice:
- A loose heel
- A split sole
- A lifted outsole
- A bent heel pin
- A cracked heel
- A missing top lift
- Unusual rocking or clicking
If a structural part fails, take the shoes to a qualified shoe repair professional. Do not repair a load-bearing heel with household tape or general-purpose glue.
Key Takeaways
- High heel shoes are built over a foot-shaped last.
- The main steps are design, pattern making, cutting, sewing, lasting, heel attachment, sole attachment, and finishing.
- The heel, shank, insole, counter, and outsole must work together.
- A tall or narrow heel needs careful alignment and strong attachment.
- Beginners should start with a wedge, platform, or sandal and a purchased sole unit.
- Test handmade shoes indoors before outdoor wear.
- A loose or leaning heel needs professional inspection.
FAQs
How long does it take to make a pair of high heels?
A factory can produce shoes through a planned production line, but the total schedule includes design, sampling, material preparation, assembly, and inspection. A home maker may need several days or longer for a first pair, especially when creating a new pattern.
Can you make high heels without a last?
A last is strongly recommended. Without one, it is difficult to control the toe shape, foot opening, heel position, and fit. A soft costume shoe may be made without a traditional last, but it will not have the same structure as a functional high heel.
What is the hardest part of making high heels?
For most makers, the hardest parts are creating an accurate pattern, lasting the upper without wrinkles, and attaching the heel securely. These steps affect both appearance and safety.
Can a regular sewing machine sew shoe uppers?
Some domestic machines can sew light leather, fabric, or synthetic uppers. Thick leather, multiple layers, and tight curves may require a walking-foot or industrial machine. Test the material and thread on scraps first.
How can you make high heels more comfortable?
Start with a last that matches the foot, use enough toe room, prevent the heel from slipping, and choose cushioning that does not make the shoe too tight. Comfort also depends on heel height, pitch, walking time, and individual foot shape. Persistent pain or numbness deserves attention from a qualified health professional.
Conclusion
Making high heel shoes involves much more than attaching a heel to a sole. The maker must shape the upper over a last, support the foot with a counter and shank, align the heel, bond or stitch the outsole, and inspect the finished pair.
For a first project, choose a simple design with a low wedge or stable heel. Build a test sample, use footwear-grade materials, and treat heel attachment as a structural task rather than a cosmetic one. If the finished shoe rocks, separates, or feels unstable, do not wear it until a skilled shoe repair professional checks it.
Madison Clark is a footwear expert and the voice behind MyStyleGrid.com. She specializes in honest shoe reviews, style tips, and practical guides to help readers find the perfect pair for any occasion. With years of experience in blogging and content creation, Madison makes footwear knowledge simple, stylish, and easy to follow.