Repair cracked plastic sunglasses frame using plastic welding, epoxy, or a reinforced glue patch.
I’ve fixed dozens of frames in my repair shop and at home. This guide on how to repair cracked plastic sunglasses frame shows clear, tested steps. I’ll walk you from diagnosis to a neat, lasting fix. Read on for tools, step-by-step methods, and tips I learned the hard way.

Why plastic frames crack and what that means for repair
Plastic sunglasses frame cracks happen from stress, drops, heat, or long-term material fatigue. Thin hinge areas and temples take the most force. Knowing the cause helps pick the best fix. For example, a clean stress crack needs a different approach than a shattered corner. Assess the crack size, location, and frame type before you start. This saves time and prevents wasted repairs.

Tools and materials you’ll need to repair cracked plastic sunglasses frame
Gather these items. They are cheap and easy to find.
- Super glue (cyanoacrylate) for small, tight cracks
- Two-part epoxy for structural bonds
- Plastic welding kit or soldering iron for tough thermoplastics
- Sandpaper (400, 800, 1200 grit) for prep and finish
- Acetone or isopropyl alcohol for cleaning
- Clamps, rubber bands, or masking tape to hold parts steady
- Thin filler rod or plastic patch material for gaps
- Small files and a hobby knife for shaping
- Protective gloves and eye protection
I usually keep a small kit at home. It saved a favorite pair of sunglasses more than once.

Quick assessment: decide whether to repair or replace
Ask these simple questions:
- Is the crack on the hinge, frame front, or temple?
- Does the crack go all the way through the frame?
- Is the frame warped or missing chunks?
- Do the lenses come loose or crack risk spreading?
If the crack is small and the frame is intact, you can often repair it. If the frame is shattered or the lens fit is compromised, replacement is safer. When in doubt, test a simple glue fix first. If it fails, switch to a stronger method.
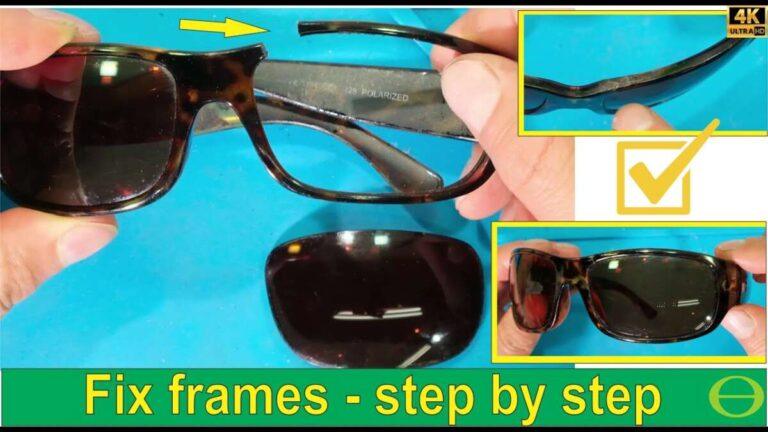
Step-by-step methods to repair cracked plastic sunglasses frame
Choose a method by crack type. Below are clear steps for each common approach.
Method 1: Super glue for hairline cracks
- Clean the area with isopropyl alcohol.
- Dry fully.
- Apply a tiny drop of super glue along the crack.
- Press the parts together. Hold with tape or a clamp for 5 to 10 minutes.
- Let cure 24 hours for full strength.
This is fast and neat. It works best for small, clean cracks.
Method 2: Two-part epoxy for structural strength
- Roughen the surfaces lightly with 400 grit sandpaper.
- Clean with alcohol and let dry.
- Mix epoxy per instructions.
- Apply epoxy into the crack and along the inner seam.
- Clamp and let cure for the recommended time.
- Sand and polish the excess epoxy to match the frame.
Epoxy adds strong, gap-filling support for thicker cracks.
Method 3: Plastic welding for thermoplastics
– Confirm the frame is a weldable plastic (acetate and many injected plastics weld; polycarbonate can be trickier).
- Heat the welding tool or soldering iron to a low setting.
- Melt a thin plastic rod into the crack while fusing frame edges.
- Smooth the weld with a metal pick and sand once cool.
Practice on scrap plastic first. Plastic welding gives a near-original strength when done right.
Method 4: Reinforcing with a splint or patch
- Cut a thin strip of plastic or metal (like thin brass) to fit the inside curve.
- Glue the splint inside the temple or bridge with epoxy.
- Sand and cover with matching paint or heat-shrink tubing if visible.
This method is great if the crack is near the hinge or in a load-bearing spot. The splint spreads stress away from the crack.
After any repair, recheck lens alignment and hinge function. A misaligned frame can stress the repair and cause a new crack.

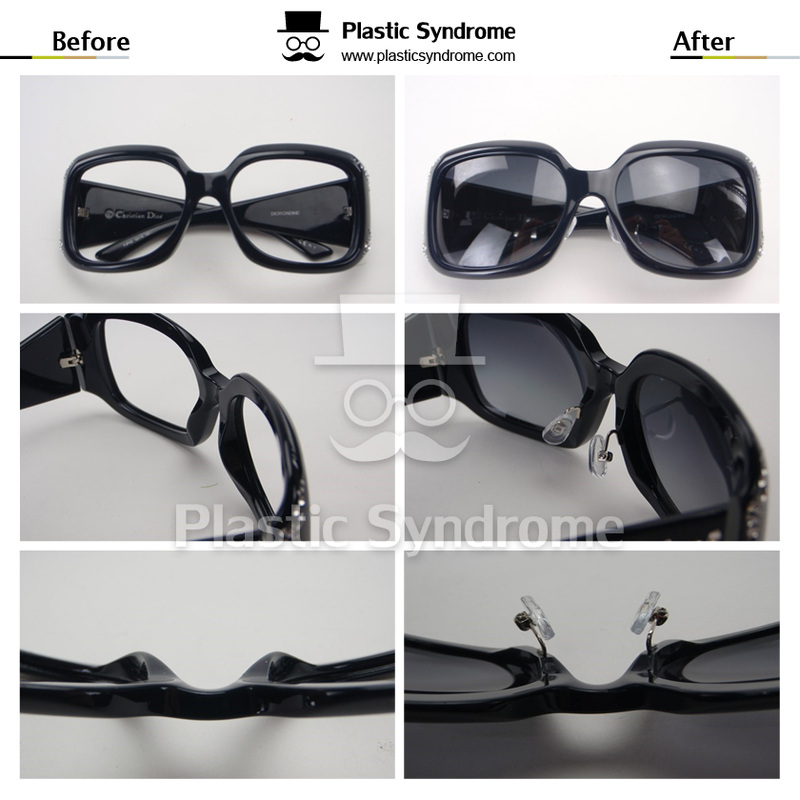
Finishing, sanding, and cosmetic repair
Make the repair look good and last longer.
- Sand rough edges with 800 then 1200 grit.
- Use a small file for tight spots.
- Match color with plastic-safe paint or polish.
- Apply a thin coat of clear nail polish or UV-curing resin for shine.
- Re-tighten screws or replace bent hinges.
I often keep a tiny paint pen to hide small seams. A tidy finish makes sunglasses wearable and harder to break again.

Safety, limitations, and what to avoid
Safety first.
- Work in a ventilated area when using glue, epoxy, or heat.
- Use eye protection and gloves.
- Don’t overheat thin plastics; they can warp.
- Avoid using too much glue; it can bond lenses or cloud clear areas.
Not all frames can be restored to like-new. Designer frames with embedded logos, electrical parts, or special lenses may be best handled by the maker or a pro.

Preventing future cracks and care tips
Good habits protect frames.
- Store sunglasses in a hard case.
- Avoid leaving them in hot cars or direct sun for long.
- Tighten screws periodically.
- Clean gently with a soft cloth and mild soap.
- Alternate pairs to reduce daily stress.
I once saved a pair by swapping to a lighter hinge screw. Small care habits add years to frames.
Time and cost estimates for common fixes
Typical time and cost:
- Super glue fix: 10–30 minutes, under $5.
- Epoxy repair: 30–90 minutes plus 24-hour cure, $5–15.
- Plastic welding: 15–60 minutes, tool cost higher but per-repair cost low.
- Reinforcement splint: 30–90 minutes, $5–20 depending on materials.
If you value the frame or they are expensive, a professional repair can be worth the cost.
Personal tips and mistakes to avoid
From my repair work:
- Always clean first. Glue fails on dirty plastic.
- Use small amounts of adhesive. Less is stronger and neater.
- Clamp gently. Too much pressure squeezes out filler.
- Test alignments before glue sets. Fixing misalignment later is hard.
- Practice plastic welding on scrap plastic. It’s easy to overdo heat.
These small steps cut failed repairs and wasted time.
Frequently Asked Questions of how to repair cracked plastic sunglasses frame
Can I fix a cracked plastic sunglasses frame with super glue?
Yes. Super glue works for hairline cracks and quick fixes. It sets fast but may not fill large gaps or withstand heavy stress.
How long does an epoxy repair last on sunglasses?
A proper epoxy repair can last years with normal use. Curing fully and reinforcing the area improves durability.
Is plastic welding safe for all plastic frames?
No. Some plastics warp or release fumes when heated. Check the frame material and practice on scrap first.
Will a repair change how my sunglasses look?
Some repairs are nearly invisible. Others need sanding and paint. Cosmetic results depend on the method and skill used.
When should I choose replacement over repair?
Replace when the frame is shattered, lenses loosen, or alignment is permanently affected. If the cost or effort is high, replacement is the best choice.
Can I repair the hinge area myself?
Yes, small hinge cracks can be repaired with epoxy or a splint. Reinforcing inside the temple usually restores strength.
How soon can I wear sunglasses after repair?
Super glue sets quickly, but wait 24 hours for full bond. Epoxy needs the full cure time stated on the product label.
Conclusion
Repairing cracked plastic sunglasses frame is doable at home with simple tools and the right method. Start with a clear assessment, pick the right repair—super glue, epoxy, welding, or a splint—and finish with careful sanding and alignment. Try small fixes first and step up to stronger methods if needed. If you value the pair, give them a thoughtful repair instead of tossing them. Try one method on a low-cost pair first, then share your success or questions below.

Rubel Miah is the Senior Editor at MyStyleGrid.com, where he brings a sharp editorial eye and an unshakable love for fashion to everything he does. A true style addict, Rubel lives and breathes trends, from streetwear to high fashion, and has a knack for turning inspiration into impactful stories. With years of experience in fashion journalism and digital media, he curates content that empowers readers to express themselves through style. When he’s not editing features or forecasting the next big thing, you’ll find him hunting down vintage pieces or capturing street style moments around the city.