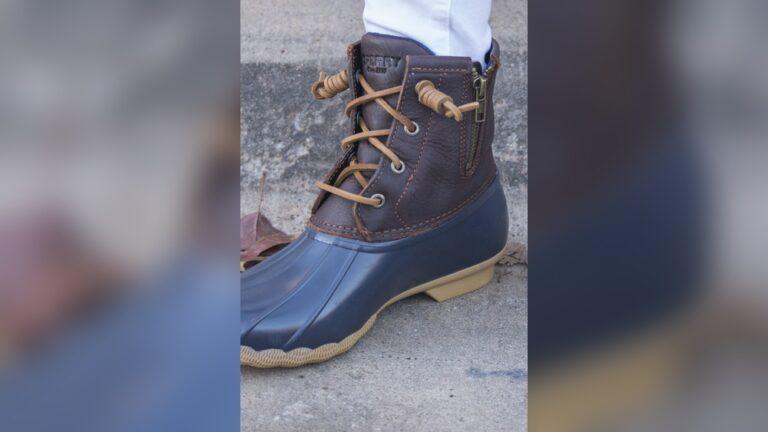
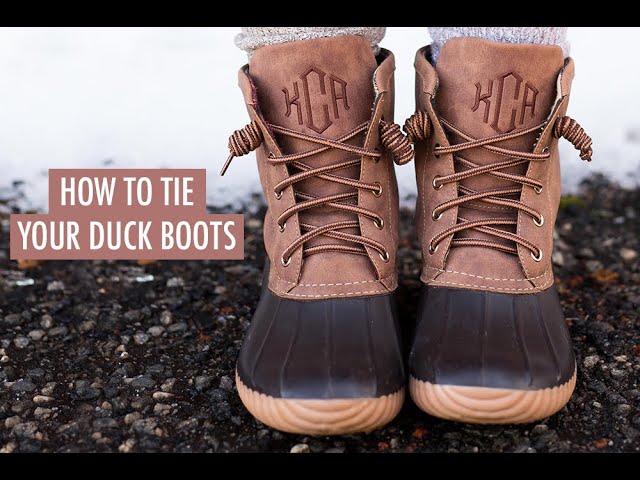
If you’ve ever struggled with your duck boots feeling loose or untied at the worst moments, you’re not alone. Getting your laces tied just right isn’t only about looks—it’s about comfort, support, and keeping your feet dry no matter where your day takes you.
In this guide, you’ll discover easy, step-by-step ways to tie your duck boots securely using knots that stay put and look sharp. Whether you want a quick fix or a sturdy knot for long-lasting wear, you’ll learn exactly how to make your boots work for you.
Ready to say goodbye to loose laces and hello to all-day comfort? Let’s get started.

Credit: www.youtube.com
Choosing The Right Laces
Choosing the right laces for your duck boots is key to comfort and performance. The laces must fit well and last through tough conditions. Picking the correct material and length helps you lace your boots properly. Style also plays a role in how your boots look and feel.
Material And Length
Duck boots need laces made from strong materials. Leather laces give a classic look but may wear out faster in wet conditions. Synthetic laces, like nylon or polyester, resist water and last longer. Choose laces that are the right length for your boots. Too short, and they won’t tie properly. Too long, and they look messy and may get caught on things.
Durability And Style
Durability matters for all-day wear and rough weather. Thick, round laces hold up better than thin, flat ones. Look for laces with reinforced tips to avoid fraying. Color and style affect your boot’s appearance. Dark laces hide dirt well. Bright or patterned laces add a bit of personality. Match your laces to your boots for a clean, sharp look.
Preparing Your Duck Boots
Before tying your duck boots, proper preparation ensures a secure fit.
Taking time to prepare the boots helps avoid discomfort and wear.
Check the laces and hardware for any issues before starting.
Loosening The Laces
Start by loosening the laces gently from top to bottom.
Loosen enough to slide your foot in without force.
Do not pull or tug harshly to protect the laces.
Evenly loosen both sides to maintain lace balance.
Checking Eyelets And Hooks
Inspect the eyelets for any damage or bending.
Make sure hooks are firmly attached and not loose.
Replace or repair any broken parts before tying your boots.
Clean around eyelets and hooks to remove dirt and debris.
Basic Lacing Techniques
Tying duck boots properly is essential for comfort and durability. Basic lacing techniques ensure your boots fit well and stay secure during wear. These simple methods work well for most duck boots. Learn these easy styles to keep your boots snug and ready for any weather.
Standard Crisscross
The standard crisscross is the most common lacing method. Start by threading the lace through the bottom eyelets from outside to inside. Pull the laces tight so the boot fits snugly.
Cross the laces over each other and thread them through the next set of eyelets. Repeat this crisscross pattern up to the top. This technique evenly distributes pressure across the foot for a comfortable fit.
Finish by tying a simple bow knot or double knot to secure the laces. This method is quick and effective for everyday use.
Lacing With Hooks
Many duck boots have metal hooks above the eyelets. These hooks help tighten the boot around the ankle. To lace with hooks, start by using the eyelets as usual at the bottom.
Once you reach the hooks, wrap the lace around each hook instead of threading through an eyelet. Pull the lace tight after each hook. This holds the ankle firmly for better support.
After the last hook, tie your laces with a bow or knot. This lacing style is excellent for rugged outdoor activities. It keeps your boots secure and comfortable all day long.
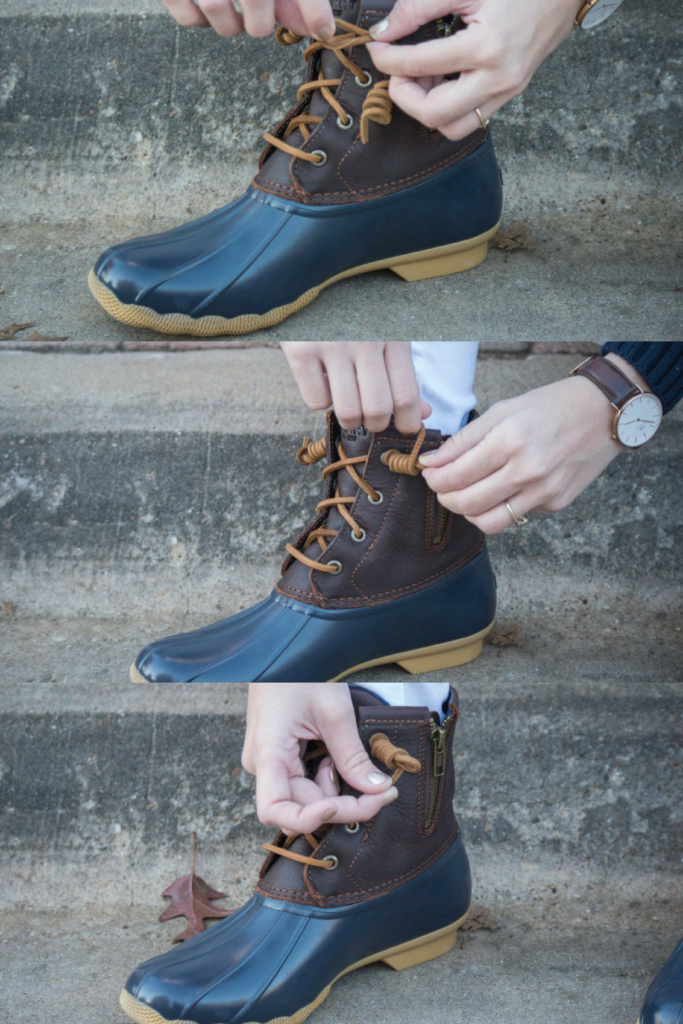
Eastland Knot For Duck Boots
The Eastland knot is a simple and reliable way to tie duck boots. It keeps your boots secure and comfortable. This knot works well with the thick laces of duck boots. Follow these steps to tie it perfectly every time.
Creating The Loop
Start by making a small loop with one lace. The loop should be about an inch from the boot’s eyelet. Hold the loop steady with your fingers. This loop is the base for your knot.
Wrapping The Lace
Take the other lace end and wrap it around the base of the loop. Keep the wraps close to each other and tight. Wrap until you reach near the loop’s end. This wrapping adds strength to the knot.
Securing The Knot
Push the lace tip through the small opening left at the loop’s end. Pull the tip gently to tighten the knot. Make sure the knot feels snug but not too tight. This step locks the knot in place.
Seaman’s Knot For A Secure Fit
The Seaman’s Knot offers a strong, secure fit for duck boots. It holds tight through wet and rugged conditions. This knot uses two loops intertwined for extra grip. It prevents your laces from loosening during long walks. Learning this knot helps keep your boots snug and comfortable. Follow the steps below to tie it easily and correctly.
Starting The Knot
Begin by crossing the left lace over the right. Wrap it around and pull through to form a simple knot. Make sure to pull it tight. This base knot keeps the laces stable. A firm start is key to a secure finish.
Forming Bunny Ears
Create a loop with each lace, shaped like bunny ears. Hold one loop in each hand. These loops will form the main structure of the knot. Keep the loops even in size for balance.
Weaving And Tightening
Cross the right loop over the left loop. Bring the bottom loop forward and tuck it through the hole between loops. Pull both loops outward to tighten the knot. Adjust as needed to ensure a snug fit. This weaving locks the laces firmly in place.
Credit: www.thethriftypineapple.com
Tips To Prevent Lace Slippage
Lace slippage can make your duck boots loose and uncomfortable. Keeping your laces tight helps you walk safely and confidently. Use these simple tips to stop laces from slipping and keep your boots snug all day.
Double Knotting
Double knotting makes your laces harder to come undone. After tying the first knot, tie another one on top. This extra knot holds tight during movement and rough use. It is easy and quick, but very effective at preventing slippage.
Using Lace Locks
Lace locks secure your laces without needing to tie extra knots. They are small devices that clamp down on the lace. Slide the lace lock near the top of your boot and press it closed. This stops the laces from loosening, even on slippery or wet days.
Hiding The Laces
Hiding the laces on your duck boots gives a clean and sleek look. It also prevents the laces from catching on branches or debris. This simple style keeps your boots looking neat and tidy. Two easy methods help you hide the laces effectively. Both are quick and add a polished finish to your boots.
Inside-out Eyelet Technique
Start by threading your laces through the eyelets from the inside. This means the lace tips come out closer to the tongue. The laces lie flat against the boot’s sides. Pull the laces tight, but not too tight to avoid discomfort. This method hides most of the lace under the boot’s leather sides. It keeps the laces less visible and secure.
This technique works well on boots with wide eyelets. It also reduces lace wear from friction. The laces stay protected from dirt and water. You can finish tying with a simple knot or bow on the tongue.
Tying Behind The Tongue
Thread the laces normally through the eyelets. Instead of tying on top, pull the lace ends behind the tongue. Cross the laces behind the tongue and tie a knot or bow there. This hides the knot and loops under the tongue flap. The laces stay out of sight and stay secure.
This method works best with boots that have a tall or thick tongue. It keeps laces from loosening during walks. Plus, it looks neat without bulky loops on top. You can adjust tightness easily without showing the laces.
Avoiding Discomfort And Lace Bite
Wearing duck boots comfortably depends a lot on how you tie the laces. Discomfort and lace bite often happen when the laces are too tight or unevenly pulled. Proper lacing helps avoid pressure points on the top of your foot. It also prevents the laces from digging into your skin during long walks. Simple adjustments to the lacing method can make a big difference in comfort.
Lacing Sequence Adjustments
Start lacing from the bottom eyelets, pulling the lace evenly on both sides. Skip one or two eyelets near the top to reduce pressure on sensitive areas. Use a straight or criss-cross pattern that feels best on your foot. Avoid crossing laces too tightly over the instep, as this causes lace bite. Adjust the lacing to allow some space for foot movement. This helps reduce friction and discomfort during wear.
Proper Tension Tips
Keep the laces snug but not tight. Tight laces restrict blood flow and cause pain. Loosen the laces slightly around the ankle for better comfort. Pull the laces firmly near the bottom for support, but ease tension near the top. Tie the knot securely without over-tightening. Consider double knotting to keep laces from loosening. Check your comfort after walking for a few minutes and adjust if needed.
Maintaining Your Duck Boot Laces
Maintaining your duck boot laces is key for keeping your boots reliable and looking good. Well-kept laces hold your boots firmly and last longer. Neglecting them can cause breaks or looseness, making your boots uncomfortable or unsafe. Simple care steps keep your laces clean and strong. Knowing when to replace laces helps avoid unexpected wear during outdoor activities.
Cleaning And Care
Remove dirt and mud from laces regularly. Use a soft brush or cloth to wipe off debris. Hand wash laces with mild soap and warm water. Rinse thoroughly to remove all soap. Let laces air dry completely before re-lacing boots. Avoid using harsh detergents or bleach. These can weaken lace fibers and cause damage. Store boots in a dry, cool place to prevent lace mildew or rot.
When To Replace Laces
Check laces for signs of fraying or cuts. Thin or worn spots reduce lace strength. If laces snap or fail to hold knots, it is time to replace them. Also replace laces that have lost elasticity or stiffness. Use laces that match the original size and style for best fit. Carry spare laces during long trips or hikes for quick changes. Fresh laces improve boot fit and keep feet secure.
Credit: www.youtube.com
Frequently Asked Questions
How To Tie Duck Boot Laces With Hooks?
Start by threading laces through the bottom eyelets. Loop each lace around the corresponding hook. Cross the laces over and continue lacing upward. Secure with a knot or bow at the top hooks. Tighten evenly for a snug fit.
How To Lace Up Ll Bean Duck Boots?
To lace up LL Bean duck boots, start with the Eastland knot. Create a loop, wrap the lace around it, tuck the tip through, and tighten securely. Alternatively, use the Seaman’s knot by making two loops, crossing them, weaving, and pulling tight for a firm hold.
How To Tie Boots So The Laces Don’t Show?
Thread laces inside the eyelets, not outside. Tie the knot behind or under the tongue to hide laces completely. Adjust tightness for comfort.
What Is The 2 1 3 Method Of Lacing?
The 2 1 3 method of lacing involves threading the lace through two eyelets, then one, and finally three. This creates a secure, balanced fit ideal for boots. It enhances comfort and prevents lace slippage during wear.
Conclusion
Tying duck boots is simple with the right steps. Using knots like the Eastland or Seaman’s keeps laces secure. Practice a few times for better speed and confidence. Well-tied boots stay comfortable and last longer. Enjoy your outdoor adventures with sturdy, well-laced duck boots.
Keep these tips handy for quick and easy tying every time.

Madison Clark is a footwear expert and the voice behind MyStyleGrid.com. She specializes in honest shoe reviews, style tips, and practical guides to help readers find the perfect pair for any occasion. With years of experience in blogging and content creation, Madison makes footwear knowledge simple, stylish, and easy to follow.