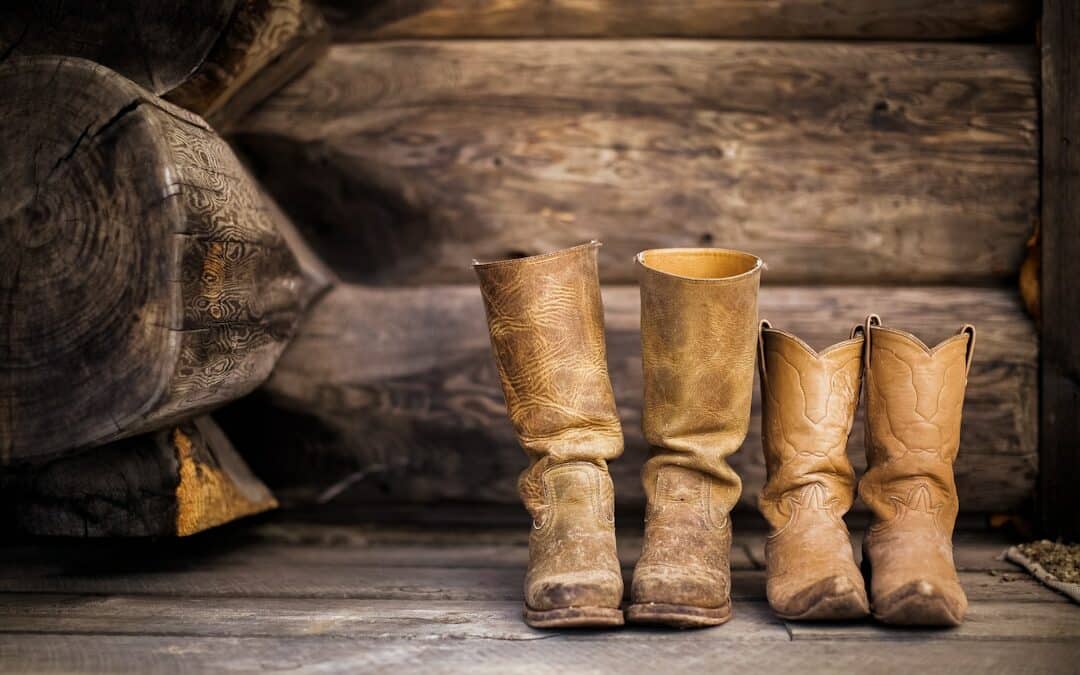
Re-glueing or resoling your cowboy boots will tighten loose soles and bring them back to life.
I’ve worked on and tested dozens of boots over the years. I know how to fix loose soles on cowboy boots, when to DIY, and when to trust a cobbler. This guide walks you through clear checks, the right tools, step-by-step repairs, costs, and prevention tips. Read on and you’ll feel confident about fixing your boots or choosing the best pro repair.

Why cowboy boot soles come loose
Soles separate for simple reasons. Age, wear, heat, moisture, and poor glue can break the bond between the sole and the welt or upper. Heavy use on rough surfaces speeds this up. Cheap manufacturing or thin soles can also fail sooner.
Common causes
- Natural breakdown of adhesives from heat, water, and time.
- Repeated flexing and pressure at the toe and heel.
- Nails or stitching that have worked loose.
- Improper storage or long wet exposure.
- Poor original construction or cheap materials.
What to expect
- Small separations at the toe or heel at first.
- Larger flaps that let dirt and water in if not fixed.
- A loose sole can damage the welt and insole if ignored.

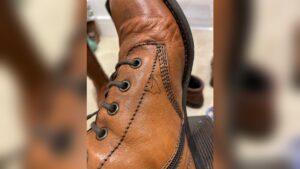
How to assess if your boots need repair
Start with a simple check. Run your hand around the sole edge. Feel for gaps or soft spots. Look at stitching and nailed areas for rust or looseness.
Quick tests
- Wiggle test: Grip the heel and toe and gently twist. Any movement is a problem.
- Peel test: Use a fingernail to try lifting the edge. If it lifts easily, the glue has failed.
- Sound test: Tap the sole; a hollow sound near the edge often means separation.
Severity guide
- Small edge lift under 1/4 inch: Good candidate for home re-glue.
- Larger gaps, missing stitching, or delamination: Better for a cobbler.
- Worn down sole layers or cracked midsole: Consider resoling.

Tools and materials you’ll need
Having the right materials makes the repair last. Here’s a practical list for a re-glue repair and when to tackle a simple re-sole.
Basic tools
- Contact cement or shoe glue rated for leather and rubber.
- Shoe repair clamps or heavy books and bands.
- Clean rags and rubbing alcohol for prep.
- Sandpaper (80–120 grit) to roughen contact surfaces.
- Utility knife or sole scraper to remove old adhesive.
- Needle and waxed thread or small tacks for temporary hold.
- Leather conditioner and waterproofing spray for finish.
Optional pro tools
- Shoe stretcher, cobbler hammer, and stitching awl if you plan to re-stitch.
- Shoe press or stronger clamps for even pressure.
- Soling material if you plan to replace the entire sole.
Step-by-step: how to fix loose soles on cowboy boots
This section covers two main approaches. Re-glueing is for small lifts. Resoling is for major damage. Follow safety rules. Work in a ventilated area. Wear gloves if needed.
A. Re-glueing small lifts
- Clean and dry
- Remove dirt, old glue flakes, and moisture. Wipe the area with rubbing alcohol. Let it dry completely.
- Roughen surfaces
- Lightly sand both the sole edge and the boot welt or midsole. This helps glue bond.
- Apply adhesive
– Spread contact cement or shoe glue on both surfaces thinly and evenly. Follow the glue’s directions for open time. - Clamp and cure
- Press the surfaces together firmly. Use clamps or tie-downs for even pressure. Wipe excess glue quickly. Let it cure for the recommended time.
- Trim and finish
- Remove any hardened glue that shows. Condition the leather and apply a protective sole edge coat.
B. Resoling or partial resole
- Inspect and decide
- If the sole is worn, delaminated across a large area, or stitching fails, replacement may be needed.
- Remove old sole
- Carefully cut away the old sole with a utility knife or sole scraper. Clean the surface.
- Prepare new sole material
- Cut the new sole to shape or buy pre-cut replacement soles. Roughen both contact surfaces.
- Attach with adhesive and fasteners
- Use strong adhesive. For best results, use nails or tacks and stitching where appropriate. Clamp and let cure.
- Trim, bevel, and finish
- Shape the sole edge. Add heel caps and edge dressing. Condition uppers.
When to call a cobbler
- You lack tools or experience.
- The welt is damaged or stitching has failed.
- You want a professional resole for long boots or expensive leather.
- You want a warranty or guaranteed work.
Personal tip from the field
I once re-glued a favorite pair twice before I realized the midsole was cracking. I stopped after the second cheap fix and opted for a proper resole. That repair added years to the boots. If you see repeated lifts, resoling is usually the smarter long-term choice.
Cost, time, and realistic expectations
What it will take
- Time: A re-glue can take a few hours plus curing time. A professional resole can take several days.
- Cost: DIY glue is cheap. Professional re-soling ranges from moderate to high, depending on materials and labor.
Price guide
- Home re-glue supplies: $10–$30.
- Simple resoles at a cobbler: $40–$120.
- Full leather resoles or premium work: $120–$250+.
Limitations
- DIY fixes are great for small lifts. They can fail if underlying structure is bad.
- Cheap adhesives or shortcuts reduce longevity.
- A professional cobbler has tools and experience for lasting work.

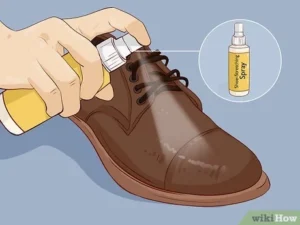
Maintenance and prevention tips
Taking care of your boots stops seams and soles from coming loose. Small steps pay off.
Daily care
- Keep boots dry when possible. Wipe them after exposure to water or mud.
- Condition leather once a month or as needed.
- Use a shoe tree to keep shape and reduce stress.
Usage tips
- Rotate between boots to let adhesives rest.
- Avoid harsh surfaces that grind soles.
- Use heel and toe taps to protect wear areas.
Seasonal checks
- Inspect seams, stitching, and sole edges every few months.
- Re-glue small lifts early to prevent larger damage.

Frequently Asked Questions of how to fix loose soles on cowboy boots
How long will a DIY re-glue last?
A properly executed re-glue can last months to years. Longevity depends on adhesive quality, preparation, and how much you wear the boots.
Can I use household glue to fix my boots?
Household glues usually lack flexibility and water resistance. Use a contact cement or dedicated shoe glue rated for leather and rubber.
Is resoling a cowboy boot expensive?
Resoling varies by material and labor. Expect modest costs for rubber soles and higher costs for leather or custom work.
Will resoling change the fit of my boots?
A properly done resole should not change fit. Minor changes in sole thickness can feel different. Talk with your cobbler if fit is a concern.
Can I prevent loose soles altogether?
You can reduce risk by caring for boots, avoiding constant wet exposure, and using sole protectors or taps on high-wear areas.
Should I attempt stitching as part of the repair?
If you have stitching tools and skill, you can re-stitch the welt. For most people, a cobbler’s stitching is best for durability.
Conclusion
You can fix loose soles on cowboy boots with the right checks, tools, and steps. Small lifts are perfect for a careful DIY re-glue. Major damage usually needs a professional resole. Keep boots dry, inspect them often, and act early to avoid bigger repairs. Try a simple repair this weekend, or talk to a trusted cobbler for long-term work. Share your experience or questions below and subscribe for more practical boot care tips.

Rubel Miah is the Senior Editor at MyStyleGrid.com, where he brings a sharp editorial eye and an unshakable love for fashion to everything he does. A true style addict, Rubel lives and breathes trends, from streetwear to high fashion, and has a knack for turning inspiration into impactful stories. With years of experience in fashion journalism and digital media, he curates content that empowers readers to express themselves through style. When he’s not editing features or forecasting the next big thing, you’ll find him hunting down vintage pieces or capturing street style moments around the city.