Clean, re-glue, fill, and repaint the peeled areas with flexible leather paint to restore boots.
I’ve repaired dozens of synthetic boots and know how to fix peeling faux leather boots without spending a fortune. This guide walks you through why faux leather peels, how to assess the damage, the exact tools and products to use, step-by-step repairs for small flaking and large peeling, and how to keep your boots looking new. Read on for clear, tested methods and tips from real repair work so you can save your favorite pair fast.
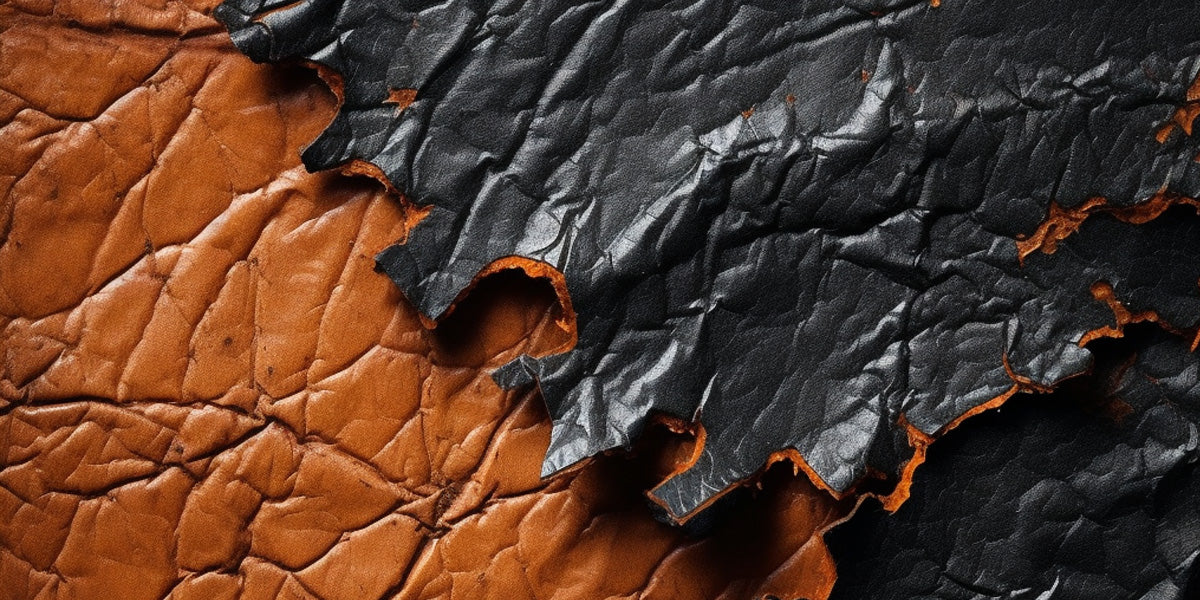
Why faux leather peels: causes and quick definitions
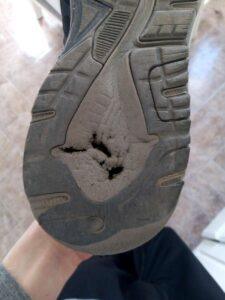
Faux leather (also called PU leather, vinyl, leatherette, or synthetic leather) peels when the top finish separates from the backing. Common causes are wear, sun and heat damage, poor manufacturing, repeated creasing, and exposure to oils or solvents. Moisture and salt from feet can also weaken the finish over time.
Key terms in plain language:
- PU leather: a cloth or foam base covered by a polyurethane layer. That top layer is what peels.
- Vinyl: a thicker plastic layer that can crack or delaminate.
- Adhesive failure: the bond between layers breaks.
Understanding these basics helps you choose the right repair method for how to fix peeling faux leather boots.
How to assess your boots before repair
Start by checking the scale and location of the damage. Small flakes and surface popping are easier. Large patches where the top layer has separated need more work. Ask:
- Does the backing material (fabric or foam) still feel sturdy?
- Is the peeling only on the toe, heel, or around seams?
- Are there cracks in the base material or only loss of finish?
If the backing is disintegrating, repairs may be temporary. If it’s solid, you can often fully restore the look. I learned early on to always test a small area first. That saved a pair of boots I loved.

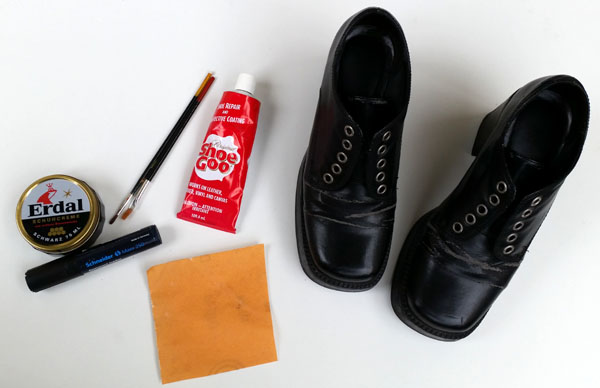
Tools and materials you’ll need
Gather these items so you can work cleanly and fast:
- Soft cloths and cotton swabs
- Mild soap and water or a gentle leather cleaner
- Isopropyl alcohol (70%) for degreasing small spots
- Flexible contact adhesive or leather-specific glue
- Fine sandpaper or 400–600 grit sanding pad
- Leather filler or vinyl repair compound
- Flexible leather paint or dye matched to your boot color
- Small brushes and a foam sponge
- Painter’s tape and disposable gloves
- Optional: heat gun or hair dryer on low
Choosing flexible products matters. The goal is to match stretch and movement so the repair moves with the boot.

Step-by-step repairs for peeling faux leather boots
Below are two main repair tracks. Pick the one that matches your damage: minor flaking or large-area peeling.
Minor flaking (small chips and surface loss)
- Clean: Wipe the area with mild soap and water. Dry fully.
- Degrease: Use a cotton swab and isopropyl alcohol on the flaking spot. Let dry.
- Sand lightly: Use fine sandpaper to remove loose edges and feather the paint. Work gently.
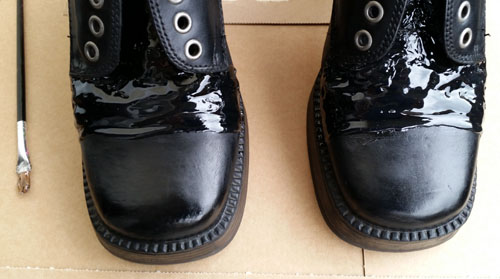
- Apply flexible glue: Put a thin coat of contact adhesive under the lifted edges. Press down smoothly. Use tape to hold until cured.
- Fill and smooth: If there are small pits, use a tiny amount of leather filler. Smooth with a damp finger or tool. Let cure.
- Paint: Apply thin coats of flexible leather paint. Let each coat dry. Blend outward to hide edges.
This method fixed light peeling on my ankle boots twice. Patience with thin paint layers gives the best finish.
Large-area peeling (big flakes or whole panels)
- Remove loose material: Trim ragged edges with scissors. Clean the area.
- Inspect backing: If the backing is solid, proceed. If soft or crumbly, you may need a patch.
- Apply adhesive: Spread flexible adhesive on the backing and underside of the remaining top layer as needed. Press into place. Use clamps or tape while curing.
- Use a patch if needed: For missing chunks, cut a thin patch of similar material or fabric. Glue the patch under the damaged area for support.
- Fill seams: Use a vinyl repair compound to rebuild the surface. Work in thin layers. Sand lightly between layers.
- Color and seal: Use flexible leather paint to match color. Seal with a flexible, clear sealer if desired.
Large repairs take more time. I once repaired a boot outer panel by patching and painting; it held for two seasons with light wear.
Tips for painting and color matching
- Test colors on a hidden area first.
- Apply many thin coats rather than one thick coat. Thin layers stay flexible.
- Use a hair dryer on low to speed drying between coats, but avoid high heat.
- Matte or satin finishes look more natural on faux leather than high gloss.

Preventing future peeling and care tips
Preventive care keeps fixes lasting and stops new peeling.
- Clean regularly with mild soap and water.
- Avoid harsh solvents and bleach. These eat finishes.
- Condition occasionally with a product made for synthetics. Natural leather conditioners may not work on PU.
- Store boots away from direct sun and heat. Heat dries and cracks the top layer.
- Rotate footwear. Daily wear accelerates peeling.
- Treat scuffs early with flexible paint before they spread.
My best tip: treat new short scuffs immediately. That small habit prevented larger repairs on two pairs.
When to repair versus when to replace
Repair when:
- The backing is solid and the damage is cosmetic.
- You love the fit and the cost of repair is lower than replacement.
- You want to extend a pair for occasional wear.
Replace when:
- The backing or foam is crumbling.
- Structural seams or soles are failing too.
- Repair cost approaches or exceeds a new pair.
Be honest about longevity. Repairs can extend life by months or years, but may not fully recreate factory finish for heavy daily use.
Quick PAA-style questions (short answers)
Can I fix peeling faux leather boots at home?
Yes. Small to medium peeling can be repaired at home with the right glue, filler, and flexible paint. Follow steps carefully and test products first.
Will leather conditioner stop faux leather from peeling?
No. Traditional leather conditioners are made for real leather and often won’t bond with faux finishes. Use products labeled for synthetic leather.
Does heat cause faux leather to peel faster?
Yes. Repeated exposure to high heat or direct sunlight weakens the topcoat and speeds peeling. Keep boots shaded and dry.

Frequently Asked Questions of how to fix peeling faux leather boots
What glue is best to fix peeling faux leather boots?
Use a flexible contact adhesive or a glue made for leather and vinyl. These adhesives keep the bond flexible so the repair moves with the boot.
Can I use acrylic paint on faux leather boots?
Acrylic paint can crack on faux leather because it’s not always flexible. Use flexible leather paint or textile paint designed to stretch.
How long will a DIY repair last?
A good repair can last months to years depending on wear and care. Heavy daily use shortens lifespan compared with occasional wear.
Is it safe to use heat to speed up repairs?
Low heat from a hair dryer is okay to speed drying between thin coats. Avoid high heat or a heat gun close to the surface as it can further damage the finish.
Can I restore a heavily peeled boot to look new?
You can improve appearance a lot, but heavy peeling may show texture or slight color differences. Repairs can be very good but sometimes not identical to factory finish.
Conclusion
You can save many favorite pairs with practical repairs. Clean and assess the damage, pick the right glue and filler, and use flexible paint for the final touch. Take quick action on small scuffs and store boots properly to prevent future peeling. Try a small test repair first and then tackle larger sections with patience.
Give it a try today: choose one pair, gather the tools from the list, and follow the step-by-step guide to see how to fix peeling faux leather boots for yourself. Leave a comment with your results or questions and share what worked for you.

Rubel Miah is the Senior Editor at MyStyleGrid.com, where he brings a sharp editorial eye and an unshakable love for fashion to everything he does. A true style addict, Rubel lives and breathes trends, from streetwear to high fashion, and has a knack for turning inspiration into impactful stories. With years of experience in fashion journalism and digital media, he curates content that empowers readers to express themselves through style. When he’s not editing features or forecasting the next big thing, you’ll find him hunting down vintage pieces or capturing street style moments around the city.