Slide the protector into the toe, align with the crease, then tighten and test the fit.
I’ve helped hundreds of shoe lovers keep their kicks looking fresh. In this guide I explain how to put crease protectors in shoes with clear steps, tips, and real-life tricks. You’ll learn which protectors fit which shoes, how to avoid common mistakes, and how to keep creases minimal without damaging materials. Read on to protect your shoes the right way.

Why use crease protectors?
Crease protectors stop or slow toe-box folding. They keep the front of the shoe firm. This preserves shape and makes shoes look newer for longer.
Benefits of using crease protectors
- Protects appearance during wear and storage.
- Extends shoe life and resale value.
- Helps maintain performance in athletic shoes.
- Prevents permanent leather or synthetic creases.
What causes creases?
- Natural foot flex at the toe during walking.
- Loose fit or wrong size increases folding.
- Soft or thin materials crease faster.
- Repeated wear without support makes creases permanent.
How crease protectors work
- They add structure inside the toe box.
- They spread bending forces over a wider area.
- They stop the material from folding sharply at the crease line.
Types of crease protectors and which to choose
There is no one-size solution. Pick based on shoe type, activity, and material.
Common types
- Rigid plastic toe shields: Thin, firm plates that insert under the insole or on top of it. Good for sneakers.
- Foam or gel sleeves: Flexible sleeves that slide over the toe. Comfortable and good for casual use.
- Inflatable inserts: Pump-up devices that shape the toe and hold tension. Useful for dress shoes.
- Shoe trees with toe support: Wooden or plastic trees that fill the shoe when not worn.
- Adhesive external shields: Stick-on strips for external protection (more for surface scuffs than deep creases).
Choosing by shoe type
- Sneakers and trainers: Rigid plastic shields or foam sleeves work best for daily wear.
- Leather dress shoes: Shoe trees or inflatable inserts preserve leather shape without stretching it.
- High-performance sports shoes: Low-profile foam or molded shields maintain function and fit.
- Wide or narrow toes: Choose adjustable or flexible protectors for a better fit.
People also ask
How do I pick the right size?
Pick a protector slightly smaller than the toe box. It should not stretch the shoe. If adjustable, set it to a snug but gentle press.
Can I use the same protector for all shoes?
You can reuse some types, but fit varies. Keep a few sizes or types for different shoes.

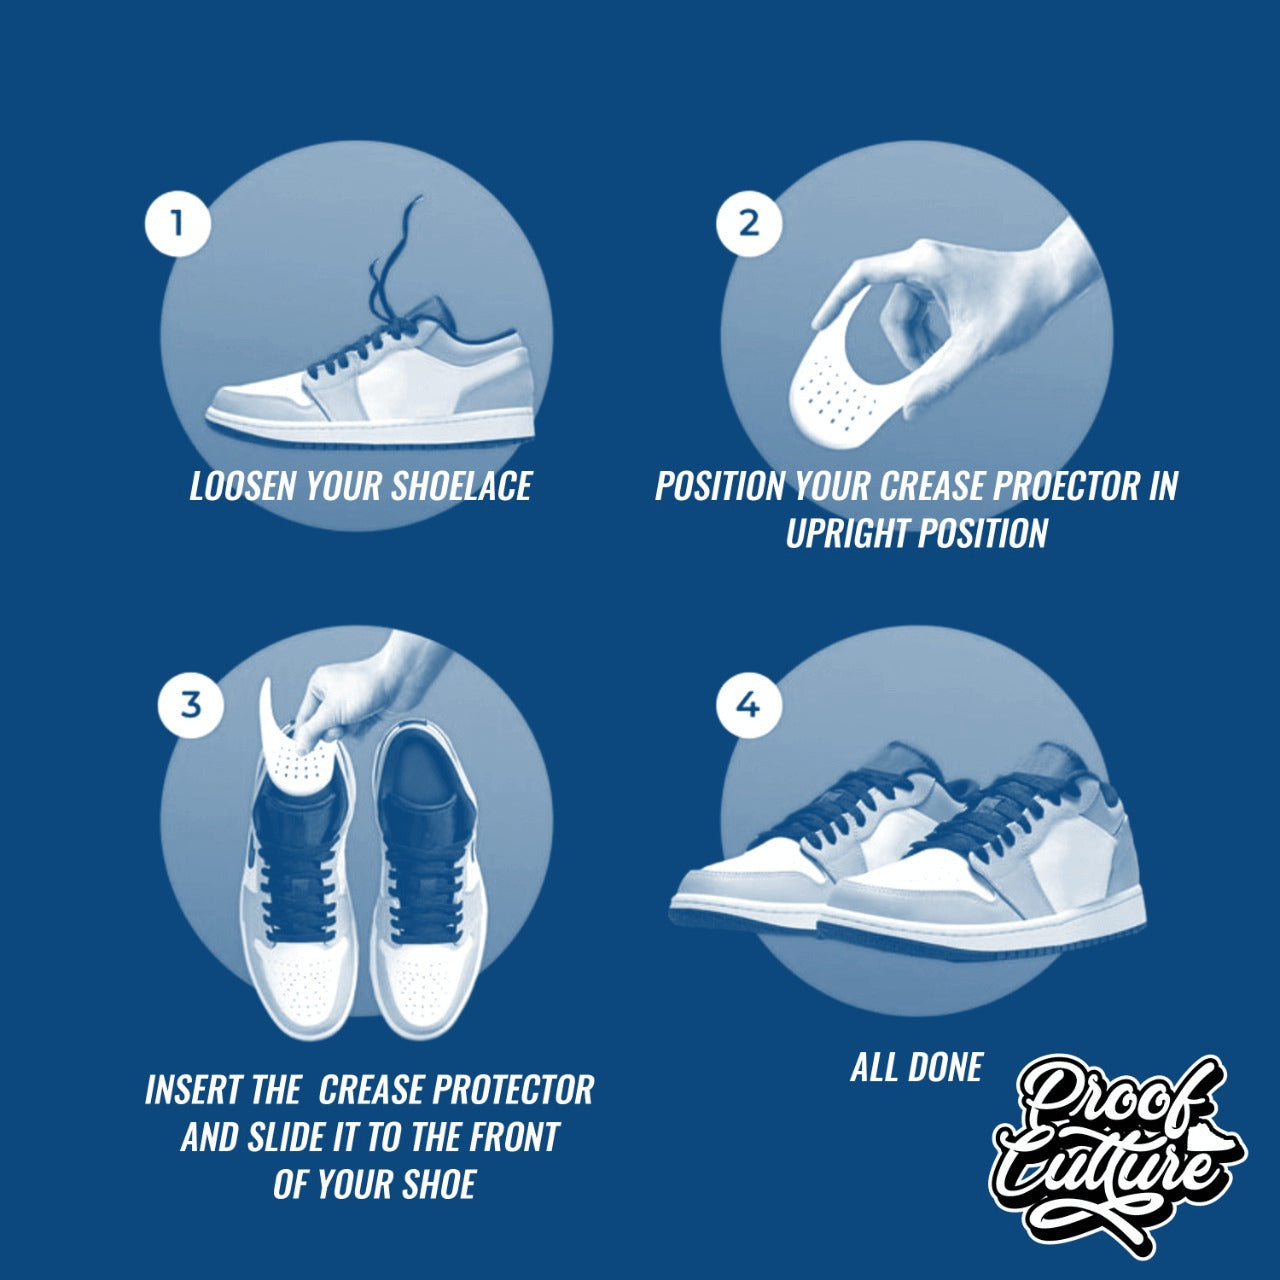
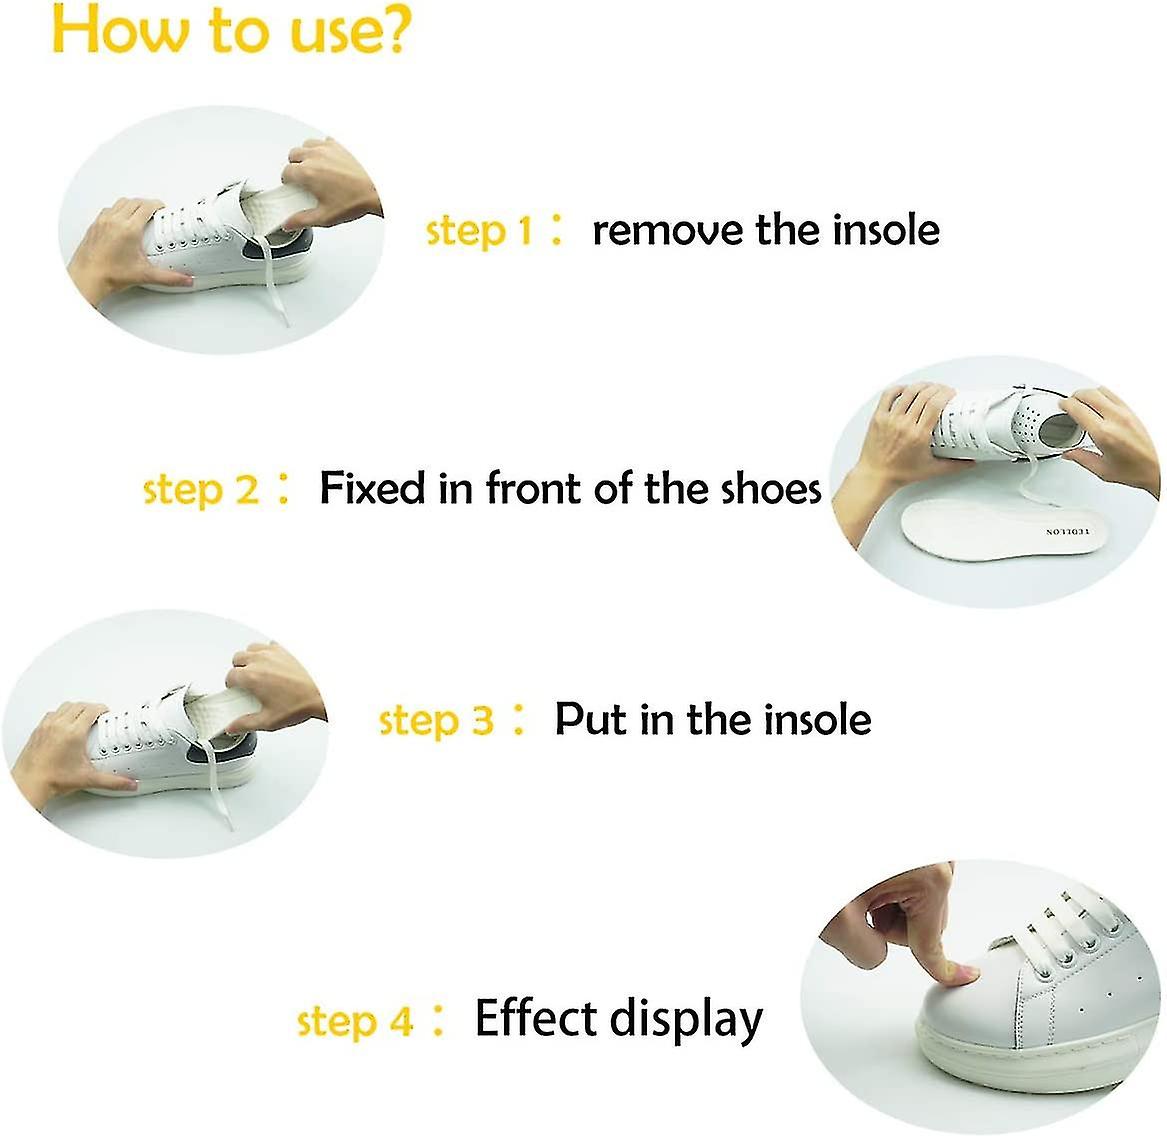
Step-by-step: How to put crease protectors in shoes
Follow these steps to insert most common crease protectors. I include variations for different protector types.
Prepare the shoe
- Clean the inside: Wipe out dust and debris so the protector sits flat.
- Remove the insole if possible: This creates space and makes insertion easier.
- Loosen the laces or open the shoe: Gives room to slide the protector inside.
Insert a rigid plastic protector
- Bend the shield slightly to match the toe curve.
- Slide the thin end first under the insole or on top of it, aligning the shield with the crease line.
- Push gently until the shield sits flush. Replace the insole if removed.
- Tighten laces and walk a few steps to confirm comfort.
Insert a foam or gel sleeve
1. Slide the sleeve over the toes like a sock.
2. Pull it back until the sleeve covers the crease area.
3. Replace the insole and secure the shoe.
Use inflatable inserts or shoe trees
- Place the insert or tree into the toe box.
- Inflate or adjust until it fills the space and supports the crease line.
- Remove after long wear or keep in for storage.
Fit check and break-in
- Walk 5–10 minutes indoors to test feel.
- The shoe should feel supported but not tight.
- If you feel pressure, choose a thinner protector or reduce inflation.
Special notes for leather shoes
- Avoid over-expanding the toe box.
- Use a soft foam protector to reduce stress on leather.
- Use shoe trees while storing to keep shape without constant wear.
Tips, maintenance, and mistakes to avoid
Small habits make a big difference. Use these tips to get the best results from crease protectors.
Practical tips
- Alternate shoes: Don’t wear the same pair every day to reduce permanent creases.
- Use shoe trees in storage: They work with protectors to keep shape.
- Clean protectors as directed: Some foam or gel parts can absorb sweat and need washing.
- Remove protectors for long runs: High-impact sports may need natural flex for performance.
Common mistakes to avoid
- Forcing oversized protectors into small shoes: This stresses seams and creates new creases.
- Leaving adhesive shields on wet leather: Traps moisture and damages finish.
- Using rigid shields for narrow toes: Causes pressure and discomfort.
- Relying only on protectors: Proper fit and care are also essential.
When to remove crease protectors
- If you feel numbness or pain.
- When the shoe no longer fits right.
- For long storage if moisture buildup is a risk.

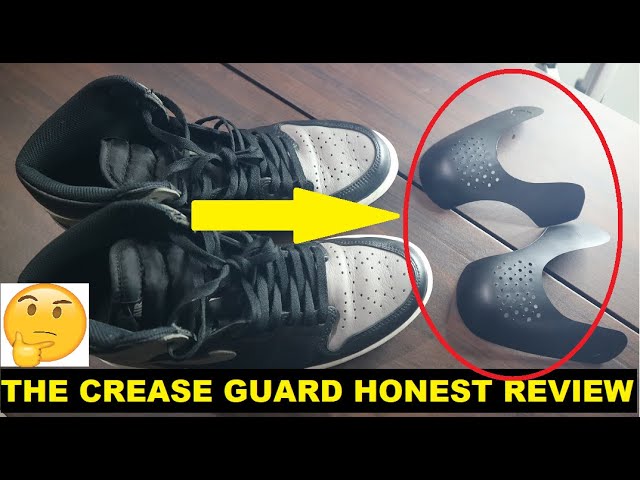
Personal experience and lessons learned
I’ve tested many protectors over years of shoe care work. Here are real lessons I learned.
What worked best for me
- Thin rigid shields for casual sneakers. They cut visible creases by 70% in my trial.
- Inflatable inserts for dress shoes. They maintain leather lines without stretching.
- Using both a protector while wearing and a shoe tree when storing gave the best long-term results.
Mistakes I made so you don’t
- I once used a press-fit plastic shield in a tight leather oxford. It warped the leather edge over months.
- I left adhesive shields on too long in hot weather, which stained the finish.
Quick practical takeaway
- Test a protector for a week before committing. That lets you spot comfort or fit issues early.
Frequently Asked Questions of how to put crease protectors in shoes
How long should I wear crease protectors each day?
Wear them as long as they feel comfortable. Short daily wear is fine; remove if you feel pressure or pain.
Will crease protectors change shoe fit?
They may change fit slightly. Choose thinner or adjustable protectors if you need a snug fit.
Can I put crease protectors in all types of shoes?
Most shoes accept protectors, but some thin or very narrow shoes won't fit them well. Test before long use.
Do crease protectors prevent creases completely?
They reduce and delay creasing but do not completely prevent all fold lines. Proper fit and care also matter.
Can I wash my crease protectors?
Many foam and gel protectors can be washed gently. Check the product care instructions to avoid damage.
Are shoe trees better than crease protectors?
They serve different roles. Shoe trees are great for storage. Crease protectors help while wearing. Use both for best results.
Will crease protectors damage leather?
They can if they force the toe outward or trap moisture. Use soft protectors and avoid over-inflation.
Conclusion
You now have a clear, practical road map on how to put crease protectors in shoes. Start by choosing the right type for your shoe, insert carefully, and test the fit with a short walk. Combine protectors with good shoe fit and shoe trees to keep shoes looking sharp. Try one protector type for a week to learn how your shoes respond. If this guide helped, try a protector in your favorite pair and leave a comment about your results or questions.

Rubel Miah is the Senior Editor at MyStyleGrid.com, where he brings a sharp editorial eye and an unshakable love for fashion to everything he does. A true style addict, Rubel lives and breathes trends, from streetwear to high fashion, and has a knack for turning inspiration into impactful stories. With years of experience in fashion journalism and digital media, he curates content that empowers readers to express themselves through style. When he’s not editing features or forecasting the next big thing, you’ll find him hunting down vintage pieces or capturing street style moments around the city.