If you’re working on your car’s CV boot and find yourself without the right tool to tighten the clamp, don’t worry—you’re not alone. Tightening a CV boot clamp without a specialized tool might sound tricky, but with a few simple tricks and everyday items, you can get the job done quickly and securely.
In this guide, you’ll learn easy, step-by-step methods to tighten your CV boot clamp without any special equipment. Keep reading, and you’ll save time, avoid costly trips to the mechanic, and protect your car’s crucial parts—all with tools you already have at home.

Credit: www.peachparts.com
Cv Boot Clamp Basics
Understanding the basics of CV boot clamps is essential for proper maintenance. These clamps keep the CV boot secure, protecting the joint from dirt and moisture. Knowing their purpose and types helps in handling them correctly, especially without tools.
Purpose Of Cv Boot Clamps
CV boot clamps hold the boot tightly around the CV joint. This prevents grease from leaking out. They also stop dirt and water from entering the joint. A secure clamp ensures the joint lasts longer and works smoothly. Without a good clamp, the boot can slip or tear easily.
Types Of Clamps
Several clamp types fit different CV boots. The most common are ear clamps and band clamps. Ear clamps have small tabs or “ears” that you squeeze to tighten. Band clamps use a screw or bolt to adjust the size. Some clamps are reusable, while others are one-time use. Choosing the right type depends on your CV boot and repair needs.

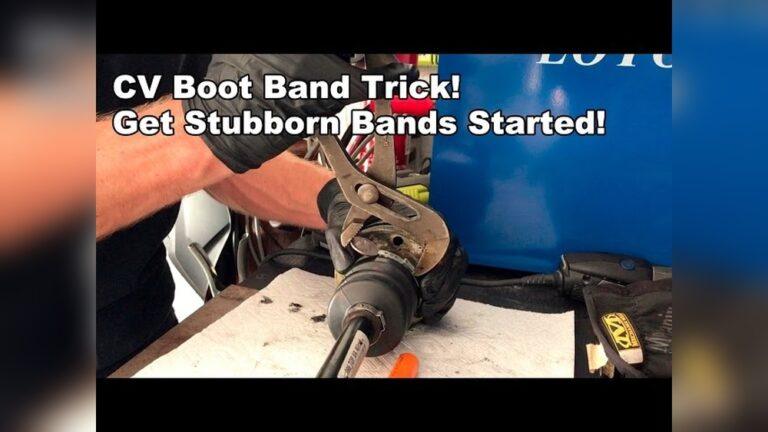
Credit: www.youtube.com
Signs Of Loose Cv Boot Clamp
A loose CV boot clamp can lead to serious car issues. It allows dirt and moisture to enter the CV joint. This causes the joint to wear out faster. Early signs of a loose clamp help prevent costly repairs. Knowing what to look for saves time and money.
Visual Inspection Tips
Start by checking the CV boot closely. Look for cracks or tears on the boot surface. A loose clamp may cause the boot to shift or bulge. Check if grease is leaking near the clamp area. Grease stains or dirt buildup around the boot is a warning sign. Also, inspect the metal clamp for any gaps or looseness. A properly fitted clamp should sit snugly without gaps.
Common Symptoms
Listen for clicking sounds while turning the wheels. This noise often signals a damaged CV joint due to a loose boot clamp. Notice any vibration or shaking during driving. This may mean the joint is worn out. A loose clamp can also cause grease to splash inside the wheel well. Watch for unusual grease spots on the ground. These symptoms point to immediate attention needed for the CV boot clamp.
Prep Steps Before Tightening
Preparing the CV boot clamp before tightening is crucial. Proper prep ensures the clamp fits securely and prevents damage. Follow simple steps to get the area ready. This saves time and effort during the tightening process.
Cleaning The Area
Start by cleaning the CV boot and clamp area. Dirt and grease can stop the clamp from fitting well. Use a clean cloth to wipe off dust and grime. Removing all debris helps the clamp hold tightly. A clean surface also prevents wear and tear.
Positioning The Clamp Properly
Place the clamp around the CV boot carefully. Make sure it sits evenly without twisting. The clamp should cover the boot’s edge fully. Proper positioning avoids leaks and slipping. Align the clamp so the tightening tab is easy to reach.
Diy Methods To Tighten Without Tools
Sometimes, tightening a CV boot clamp without proper tools is necessary. Using simple DIY methods can help secure the clamp well enough to protect the CV joint. These easy techniques use common items or your hands to tighten the clamp effectively.
Understanding these methods saves time and money. It also helps keep your vehicle safe from dirt and moisture damage. Here are some practical ways to tighten a CV boot clamp without special tools.
Using Pliers Or Screwdriver Alternatives
Pliers or a flathead screwdriver can work as clamp-tightening tools. Grip the clamp’s tab firmly with pliers. Squeeze gently to bend the metal and tighten the clamp.
If pliers are unavailable, a sturdy flathead screwdriver helps. Use it to push and press the clamp tab into place. Make small adjustments until the clamp fits tightly.
Bending Clamp Tabs By Hand
Clamp tabs are often thin and flexible metal. You can bend these tabs carefully using your fingers. Press the tab against the boot and fold it over the clamp’s edge.
Apply steady pressure for a firm hold. This manual method works best on softer metal clamps. Take care not to hurt your fingers while bending the tabs.
Tapping Clamp To Secure
Light tapping can help lock the clamp in place. Use the back of a screwdriver or a small hammer to tap the clamp gently. Tap near the clamp’s tab to secure it firmly.
Do not hit too hard to avoid damaging the clamp. Tapping helps tighten the clamp and prevents it from loosening during driving.
Creative Household Items As Tools
Finding the right tool to tighten a CV boot clamp can be tricky without a proper clamp tool. Creative household items can help you tighten the clamp securely. These everyday objects offer the grip and leverage needed to fasten the clamp tightly. Using such items can save time and avoid extra costs.
Using Nail Clippers Or Tile Nippers
Nail clippers or tile nippers have sharp, strong jaws perfect for gripping the clamp tabs. Place the clamp’s end between the clipper blades. Squeeze firmly to bend the clamp’s locking tab over. This action holds the clamp tight around the CV boot. Nail clippers are small, easy to control, and often available in most homes. Tile nippers offer more force for thicker clamps. Both tools provide a simple way to secure the clamp without special equipment.
Employing Vise Grips Or Prying Tools
Vise grips or prying tools give excellent leverage for tightening CV boot clamps. Adjust the vise grips to hold the clamp’s end securely. Then, squeeze the handles to bend and lock the clamp. Prying tools like flathead screwdrivers can help bend tabs if no locking pliers are available. Use the flat edge to push the clamp’s tab down tightly. These tools help apply controlled pressure for a secure fit. They work well for stubborn or larger clamps needing extra force.
Safety Tips During Diy Fixes
Safety is key when tightening a CV boot clamp without a tool. Small mistakes can cause injury or damage. Taking proper precautions helps you finish the job safely and effectively. Follow these tips to protect yourself and your parts during the process.
Avoiding Clamp Damage
Handle the clamp gently to avoid bending or breaking it. Use steady pressure rather than force. Avoid sharp or sudden movements that can weaken the metal. Check the clamp for cracks or rust before tightening. A damaged clamp may fail and cause leaks. Work slowly and carefully to keep the clamp in good shape.
Protecting Your Hands
Wear gloves to shield your hands from sharp edges on the clamp and boot. Gloves also improve your grip and reduce slipping. Keep your hands away from pinch points when tightening the clamp. Use cloth or a piece of rubber to protect skin when applying pressure. Stop immediately if you feel pain or discomfort. Safety must come first in every step.
When To Seek Professional Help
Knowing when to seek professional help is important for your vehicle’s safety. Tightening a CV boot clamp without the right tools can sometimes lead to problems. Recognizing the signs that the clamp needs replacement or understanding the risks of improper tightening can save you from costly repairs. Below are key points to help you decide when to get expert assistance.
Signs Clamp Needs Replacement
Look for cracks or tears in the CV boot. Grease leaking from the joint means the clamp may fail. A loose or missing clamp can cause dirt and water to enter the joint. If you notice unusual noises while driving, it might indicate clamp issues. Visible rust or corrosion on the clamp also signals replacement is needed.
Risks Of Improper Tightening
Too loose clamps allow dirt and moisture inside the CV joint. This leads to faster wear and damage to the joint. Over-tightening can cut the boot or damage the clamp. Damaged boots cause grease leaks, reducing lubrication and causing joint failure. Improper tightening may cause your vehicle to break down unexpectedly.
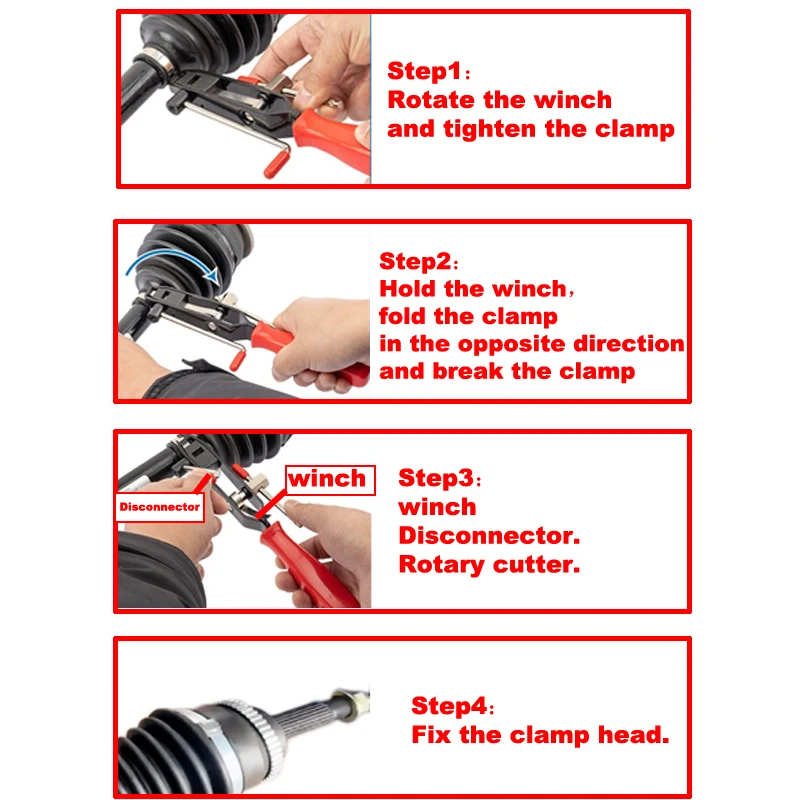
Credit: www.aliexpress.com
Frequently Asked Questions
How To Get Cv Boot Clamps Tight?
Use pliers to bend the clamp tabs tightly around the CV boot. Tap gently with a hammer to secure the fit. Avoid overtightening to prevent damage.
How To Tighten Crimp Clamps?
Place the clamp around the hose or boot. Hand-tighten it snugly. Use a wrench or pliers to crimp or tighten the clamp securely. Avoid overtightening to prevent damage.
How To Tighten Metal Band Clamps?
Place the metal band clamp around the hose or object. Use a screwdriver or wrench to turn the adjustment screw. Tighten until secure but avoid overtightening. Ensure the clamp fits snugly without damaging the material.
How To Fit Cv Boot Clamps?
Slide the CV boot onto the axle, position the clamp around the boot’s grooves, then crimp the clamp ear tightly using pliers or a crimping tool. Check for a secure, leak-proof fit before finishing.
Conclusion
Tightening a CV boot clamp without a tool is doable with patience. Use simple household items like pliers or screwdrivers carefully. Avoid overtightening to prevent damage to the boot or axle. Check the clamp’s fit by gently pulling on it after tightening.
Regular inspection helps catch issues early and keeps your vehicle running smoothly. Practicing these steps ensures a secure, lasting repair even without special tools. Stay safe and take your time for the best results.

Madison Clark is a footwear expert and the voice behind MyStyleGrid.com. She specializes in honest shoe reviews, style tips, and practical guides to help readers find the perfect pair for any occasion. With years of experience in blogging and content creation, Madison makes footwear knowledge simple, stylish, and easy to follow.