Check materials, stack height, rebound, and in-store feel to find the right cushioning.
I’ve spent years testing shoes for comfort and performance. I will walk you through how to compare sneaker cushioning before purchase with clear steps, real-world tips, and easy checklists. This guide covers materials, metrics, in-store tests, review checks, and practical buy/no-buy cues so you can pick shoes that match your body, goals, and budget.
Why cushioning matters for comfort and performance
Cushioning affects comfort, impact, and stability.
Good cushioning can lower pain and fatigue.
Bad cushioning can cause slips, aches, or injury.
Knowing how to compare sneaker cushioning before purchase helps you find shoes that suit your weight, gait, and activity.
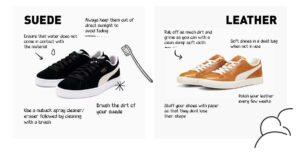
Common cushioning types and what they feel like
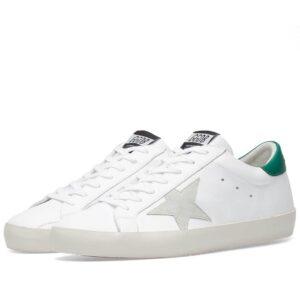
Foam
- Soft, light, and common in daily trainers. Feels plush but may compress over time.
Air or gas units
- Noticeable bounce and light weight. Good shock absorption for runners and walkers.
Gel and silicone inserts
- Targeted cushioning. They absorb impact in key zones like the heel.
Layered or composite systems
- Combine foams and air for balance. They try to mix softness with rebound.
Energy-return foams and plates
- Firmer feel and more spring. Often used for racing shoes and tempo runs.
Understanding these basics is a key part of how to compare sneaker cushioning before purchase.

Metrics and specs to read on the label
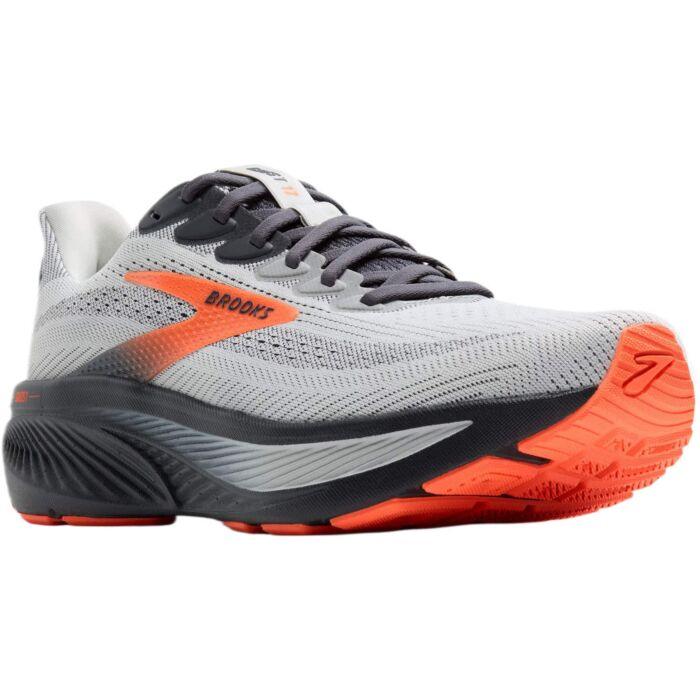
Stack height
- The total midsole thickness. Higher stack means more material between your foot and the ground.
Drop
- The height difference from heel to toe. It changes how your foot lands and feels the cushioning.
Density and firmness
- Denser foams feel firmer. Look for durometer or descriptors like soft, medium, firm.
Rebound or energy return
- How quickly the foam springs back. High rebound feels bouncier.
Durability estimates
- Manufacturer claims help but look at user reviews for real wear rates.
These specs let you compare cushioning in a clear, side-by-side way before you buy.
Simple in-store tests to compare cushioning
Bring the socks and insoles you use. Try this quick sequence.
- Walk five minutes at a brisk pace to feel real use.
- Jog in place and do single-leg hops to check stability and rebound.
- Do a heel strike and then a forefoot roll to sense transition and drop.
- Stand on one leg for five seconds to test balance.
- Press the midsole with your thumb to get a raw sense of foam density.
Take notes or photos. Testing like this is essential when you want to know how to compare sneaker cushioning before purchase.

Using reviews, labs, and data to compare cushioning
Read many reviews. Look for weight of tester and miles run.
Find lab data when available: impact tests, pressure maps, and longevity tests are very useful.
Compare user reports about how cushioning changed after 50–200 miles.
Trust patterns over single opinions. Real testing data and many consistent reviews beat one glowing or one angry review. This helps you compare cushioning across brands and models.
Match cushioning to activity and foot type
Casual walking
- Choose plush foam and moderate stack for comfort and ease.
Long-distance running
- Look for a balance of cushioning and rebound. Durability matters.
Speed work and racing
- Favor high-rebound foams and lower weight.
Cross training and gym
- Look for firm cushioning with stable platforms.
Flat feet vs high arches
- Flat feet often need firmer support and stable cushioning. High arches may prefer softer, more shock-absorbing cushioning.
Knowing the match helps you compare sneaker cushioning before purchase so your shoes fit your routine.

Practical checklist to use at the store or online
- Compare label specs
- Check stack height, drop, and material claims.
- Test in person when you can
- Use the in-store tests above.
- Consider weight and gait
- Heavy runners need denser, more durable foam.
- Read multiple reviews
- Focus on long-term reports and tester weight.
- Check return and trial policies
- A good return window removes risk.
- Inspect construction
- Look for wiggle room, glued seams, and midsole creasing.
- Think about insoles and orthotics
- Try your own insole to see the true feel.
This checklist is your short map on how to compare sneaker cushioning before purchase.
My experience: mistakes, wins, and tips
I once bought a plush trainer for long runs. It felt great at first. After 50 miles the foam crushed and my calves tightened. I learned to prefer foams with high rebound for mileage.
A win: switching to a shoe with a slightly firmer midsole cut my knee soreness in half during tempo runs.
Tips I use now
- Always test with your normal socks.
- Note how cushioning feels after 5–10 minutes.
- Record tester weight in notes when reading reviews.
These real lessons made me better at how to compare sneaker cushioning before purchase.
Buying online: how to simulate tests remotely
Check return policies and try-on windows first.
Use videos and close-up photos to judge midsole thickness and materials.
Filter reviews by users with similar weight and mileage.
Ask sellers about demo programs or alignment with local stores for trials. These steps help you compare cushioning when you can’t test in person.
Common limits and when to see a pro
Cushioning isn’t everything. Fit, width, and arch support matter.
If you have chronic pain, see a podiatrist before choosing shoes.
A gait analysis at a specialty store can help match cushioning to how you move. Be honest about pain or prior injuries when comparing cushioning.
Frequently Asked Questions of how to compare sneaker cushioning before purchase
How do I know if cushioning is too soft?
If your foot feels unstable or you sink too far into the shoe, the cushioning is likely too soft. Soft cushioning can also wear fast and change your stride.
Can I test cushioning with my own insoles?
Yes. Bring your insoles into the store or order a shoe with a good return policy and test them at home. Your insole shows how the shoe works with your real support.
Does higher stack height always mean better cushioning?
No. Higher stack means more material but not always better shock absorption or stability. Material type and density matter more than height alone.
How much does body weight affect cushioning choice?
Body weight greatly affects cushioning. Heavier people compress foam faster, so they often need firmer, denser cushioning for durability and support.
Should runners choose bouncy shoes for long runs?
Not always. Bouncy shoes can save energy but may change your foot strike. For long runs, balance bounce with comfort and durability. Try both on training days to decide.
Conclusion
Comparing sneaker cushioning before purchase is a mix of specs, in-person testing, user data, and personal needs. Use the checklist, try shoes with your gear, read varied reviews, and trust your body. Start small: test shoes on a short run and return if they don’t feel right. Take action now—use the in-store tests or the checklist above and make one confident purchase this month. Leave a comment with your shoe questions or share a find so others can learn from your test.

Rubel Miah is the Senior Editor at MyStyleGrid.com, where he brings a sharp editorial eye and an unshakable love for fashion to everything he does. A true style addict, Rubel lives and breathes trends, from streetwear to high fashion, and has a knack for turning inspiration into impactful stories. With years of experience in fashion journalism and digital media, he curates content that empowers readers to express themselves through style. When he’s not editing features or forecasting the next big thing, you’ll find him hunting down vintage pieces or capturing street style moments around the city.