Use talcum powder, dry and condition leather, tighten insoles, or re-glue/resolve as needed.
I’ve repaired dozens of boots and fixed squeaky soles on leather boots for friends and clients. I know how irritating a squeak can be and which simple fixes work fast. This guide walks you through why the noise happens and how to fix squeaky soles on leather boots step by step. Read on for clear diagnosis, tools, DIY fixes, and when to call a pro.

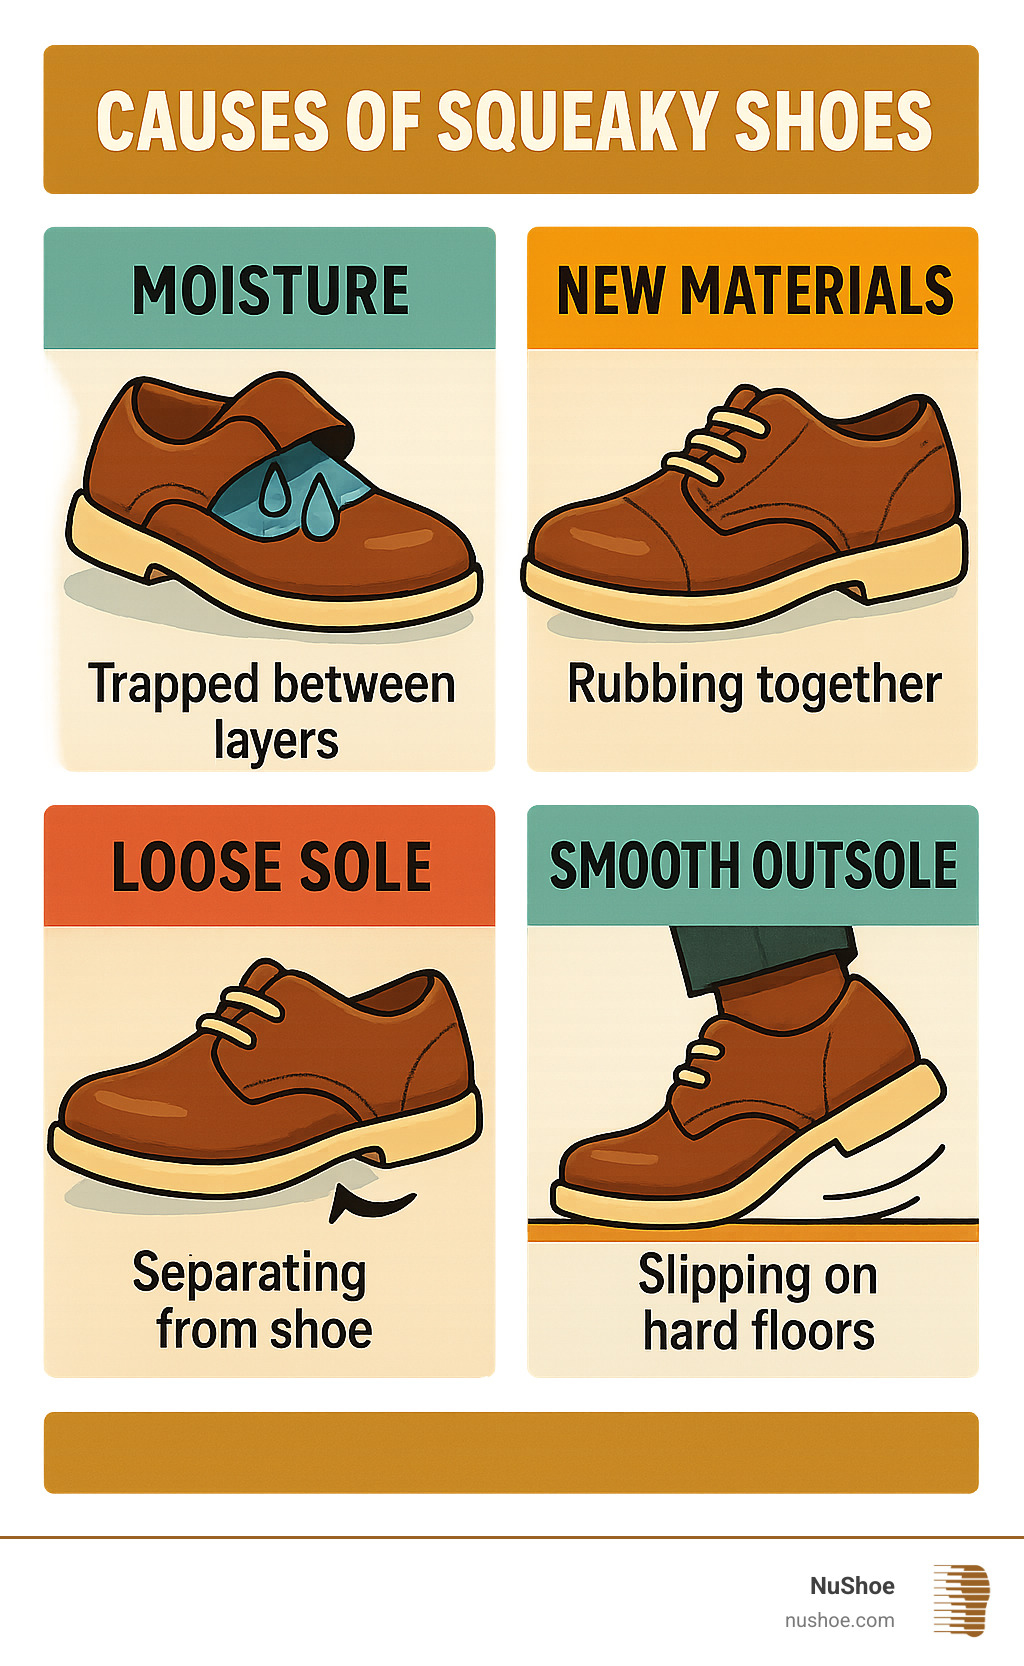
Why leather boots squeak: common causes
Leather boots can squeak for a few clear reasons. Moisture trapped between layers makes a sucking or rubbing noise. Loose insoles or heels can shift and rub while you walk. Worn or separated glue lines create friction. New leather or new soles often squeak until they break in.
Knowing the cause helps pick the right fix. If you want to learn how to fix squeaky soles on leather boots, start by diagnosing the source. A quick inspection points you to the best repair path.
Quick diagnosis checklist for squeaky soles on leather boots
Use this short checklist to locate the noise fast.
- Wear the boots and listen while you walk on different surfaces. Listen for heel vs. ball-of-foot noise.
- Press the outsole and midsole to find any separation or hollow spots.
- Remove the insole and walk in the boots briefly to see if the sound changes.
- Check for wet spots inside and a loose heel counter or shank.
- Smell for moisture or old glue; that can reveal trapped dampness.
This checklist saves time and steers you to the correct solution for how to fix squeaky soles on leather boots.
Materials and tools you'll need
Gather supplies before you begin a repair. Common, low-cost items work well.
- Talcum powder, cornstarch, or baby powder for dry lubrication.
- Graphite powder for tight leather seams.
- Leather conditioner, mink oil, or saddle soap for leather care.
- Shoe glue (contact cement) and clamps for re-gluing soles.
- Sandpaper (120–220 grit) or a coarse file to roughen surfaces.
- Replacement insoles or heel taps if parts are worn.
- Clean rags, a small brush, and a hairdryer for drying and application.
Having these on hand makes it easier to fix squeaky soles on leather boots safely and quickly.
Step-by-step fixes for squeaky soles on leather boots
Try fixes from simplest to more involved. Test after each step.
- Dry out moisture
- Why: Moisture between leather layers often causes squeaks.
- How: Remove insoles and dry boots at room temperature. Use a fan or newspaper. Avoid direct heat from radiators or open flames.
- Test: Walk after drying. If the squeak stops, you’re done.
- Lubricate seams and insole gaps with powder
- Why: Fine powder reduces friction inside the shoe.
- How: Take out the insole if possible. Sprinkle talcum powder or cornstarch into the gap between insole and sole. Work powder in by pressing and flexing the sole. Replace insole and test.
- Tip: Graphite powder helps leather-on-leather squeaks.
- Tighten or replace insoles and heel pads
- Why: Loose or thin insoles let parts rub and make noise.
- How: Add a thin, firm replacement insole or adhesive heel pads. Use double-sided shoe tape to stop slippage.
- Test: Walk and listen. A stable insole often removes the squeak.
- Condition and treat leather surfaces
- Why: Dry or stiff leather can rub loudly.
- How: Clean the leather with saddle soap or a mild cleaner. Apply leather conditioner or mink oil sparingly. Let it absorb and dry. Don’t over-oil soles if they are meant to be non-slip.
- Note: Conditioning helps both comfort and noise reduction.
- Roughen and re-glue separated layers
- Why: Separated glue lines rub and trap air.
- How: Clean the area. Use sandpaper to roughen both surfaces lightly. Apply contact cement per instructions. Clamp the sole firmly and allow full cure time.
- Warning: Use proper ventilation and follow glue safety directions.
- Replace heel taps or full soles
- Why: Severely worn heels or soles need part replacement.
- How: Heel taps are inexpensive and easy to install. Full resoling is best for older boots with good uppers.
- When: Choose a cobbler if resoling or stitching is needed.
- When all else fails: professional repair
- Why: Structural issues, internal shanks, or stitched soles need pro tools.
- How: Take boots to a reputable cobbler. Describe the problem and tests you ran.
- Expect: A skilled cobbler can diagnose and fix complex squeaks.
Following these steps will cover most scenarios of how to fix squeaky soles on leather boots. Start with soft fixes and move to repair or resoling only if needed.

Preventive care to stop squeaks returning
Routine care keeps boots quiet and long-lived.
- Keep boots dry after use. Dry with a fan and remove insoles overnight.
- Condition leather every few months to keep it supple and less noisy.
- Replace insoles before they are fully compressed.
- Add heel taps on new boots to prevent early wear.
- Store boots in a breathable bag or box to limit moisture buildup.
Simple maintenance reduces the chance you’ll need to learn how to fix squeaky soles on leather boots again.
When to choose a cobbler or professional
Choose a pro if the issue is structural or the boots are high value.
- If the sole is stitched or the shank is failing, a cobbler can repair it correctly.
- If you’ve re-glued once and the joint keeps failing, pro materials and machines will help.
- Expect costs to vary by job: small fixes are cheap; full resoling costs more.
- Ask for a clear estimate and a warranty on the work.
A professional repair can extend life and restore comfort when DIY steps don’t fix squeaks. It’s often worth the investment for quality leather boots.

My experience and lessons learned fixing squeaky soles on leather boots
I’ve fixed squeaks on work boots, dress boots, and vintage leather pairs. The most common cause I saw was trapped moisture or a loose insole. Early on, I over-oiled soles and made slip problems. I learned to treat leather sparingly and to always try powder under the insole first. When re-gluing, clamping and full cure time mattered most. These small lessons saved time and kept boots looking good.
If you try repairs, start simple. Test after each step. That approach saved me from unnecessary resoling work more than once.
Frequently Asked Questions of how to fix squeaky soles on leather boots
Why do my leather boots squeak when I walk?
Squeaks usually come from moisture, loose insoles, or separated glue lines. Simple drying and replacing the insole often stops the noise.
Can I use baby powder to fix squeaky soles on leather boots?
Yes. Baby powder or talcum powder reduces friction between the insole and sole. Sprinkle a little under the removable insole and test the boots.
Will leather conditioner stop the squeak?
Conditioner can help if stiff or dry leather is rubbing. Use it sparingly and test, as over-oiling can change traction or appearance.
How long does it take for a re-glued sole to stop squeaking?
Glue cures vary, but most contact cements take 24 hours to set and longer to reach full strength. Follow product instructions for best results.
When should I replace the sole instead of repairing it?
Replace the sole if it’s badly worn, cracked, or the stitch is damaged. If multiple layers are failing, resoling is the durable option.
Conclusion
You can fix most noises with a logical approach. Start by diagnosing moisture, loose insoles, or separation. Try powder, tightening, conditioning, and re-gluing in that order. If the problem persists, a cobbler offers lasting repair. Take action now: check your boots, try the simple steps, and say goodbye to squeaks. Share your results or ask a question in the comments to get tailored tips.

Rubel Miah is the Senior Editor at MyStyleGrid.com, where he brings a sharp editorial eye and an unshakable love for fashion to everything he does. A true style addict, Rubel lives and breathes trends, from streetwear to high fashion, and has a knack for turning inspiration into impactful stories. With years of experience in fashion journalism and digital media, he curates content that empowers readers to express themselves through style. When he’s not editing features or forecasting the next big thing, you’ll find him hunting down vintage pieces or capturing street style moments around the city.