You can fix a broken sandal strap with strong stitching, a replacement rivet, or flexible shoe adhesive.
A broken strap does not always mean your favorite sandals belong in the trash. The right repair depends on where the strap failed, what material it uses, and how much stress the repair must handle. This guide explains how to fix broken strap on sandals with simple tools, clear steps, and practical tips that help the repair last.
Check the Damage Before You Start
Before learning how to fix broken strap on sandals, inspect the break closely. A strap may tear near the buckle, pull out of the sole, split along its length, or lose a small metal connector. Each problem needs a different repair.
Clean the sandal first. Remove dirt, dust, and old glue with a dry cloth. If the strap is wet, oily, or dirty, glue and stitches may not bond well.
Look for these common types of damage:
• Strap pulled out of the sole: The strap end has slipped from its slot or torn away from the footbed.
• Strap split near a buckle: The material has cracked where it bends or carries tension.
• Broken stitching: The strap is still whole, but the thread has snapped.
• Broken rivet or pin: A metal fastener no longer holds the strap in place.
• Torn leather or fabric: The strap itself has a deep tear or missing section.
• Cracked rubber or plastic: The strap has become stiff and breaks when bent.
If the sole is badly worn, the footbed is separating, or several straps are damaged, repair may not be safe. A small fix can restore comfort, but it cannot turn a worn-out sole into a stable one.
Tools and Materials You May Need
The best way to fix broken strap on sandals is to match the repair material to the strap. Leather needs a different approach from rubber or woven fabric.
Gather the following items as needed:
• Strong polyester or nylon thread
• A sharp leather needle or heavy sewing needle
• Small pliers
• Flexible shoe adhesive or contact cement
• Fine sandpaper
• Rubbing alcohol and a clean cloth
• Replacement rivets, Chicago screws, or snap fasteners
• An awl or small hole punch
• A small piece of matching leather, rubber, or canvas
• Scissors or a craft knife
• Clamps, clothespins, or masking tape
• A small hammer and firm work surface
Choose flexible shoe glue, not ordinary school glue or brittle super glue. Sandals bend with every step, so a hard adhesive can crack and release. Super glue may work for a tiny plastic crack, but it often becomes stiff and can damage leather.
For a strong repair, use a combination of stitching and adhesive. Glue holds the surfaces in place, while stitches spread the pulling force across a wider area.

How to Fix a Broken Sandal Strap With Sewing
Sewing is often the most dependable method for a torn leather or fabric sandal strap. It works well when the strap still has enough material on both sides of the tear.
Step 1: Trim and clean the damaged area
Cut away loose threads and ragged fibers. Do not remove more material than needed. Wipe the area with a small amount of rubbing alcohol, then let it dry completely.
If the strap is leather, lightly roughen the underside with fine sandpaper. This gives adhesive a better surface to grip.
Step 2: Overlap the strap ends
Place the two ends together with an overlap of about one-half inch. A larger overlap gives more strength, but it may feel bulky against your foot.
If the strap is too short to overlap, add a small leather or fabric patch beneath it. The patch should extend beyond the tear on both sides.
Step 3: Add flexible adhesive
Apply a thin layer of shoe adhesive between the overlapping pieces. Press them together and wipe away extra glue.
Follow the product directions for drying time. Some adhesives need a few minutes to become tacky before you press the pieces together.
Step 4: Sew across the repair
Use a strong polyester or nylon thread. Stitch through both layers in a box pattern, then add an X through the center. This pattern spreads force better than one straight row.
Make small, even stitches. If the material is thick, use an awl to make pilot holes first. Pull the thread firmly, but do not pull so hard that it cuts into the strap.
Step 5: Seal the thread
Tie the thread on the underside of the strap. Add a small amount of flexible adhesive over the knot. Allow the repair to cure before wearing the sandal.
This sewing method is one of the best answers to how to fix broken strap on sandals because it uses both bonding and mechanical support.
How to Fix a Strap That Pulled Out of the Sole
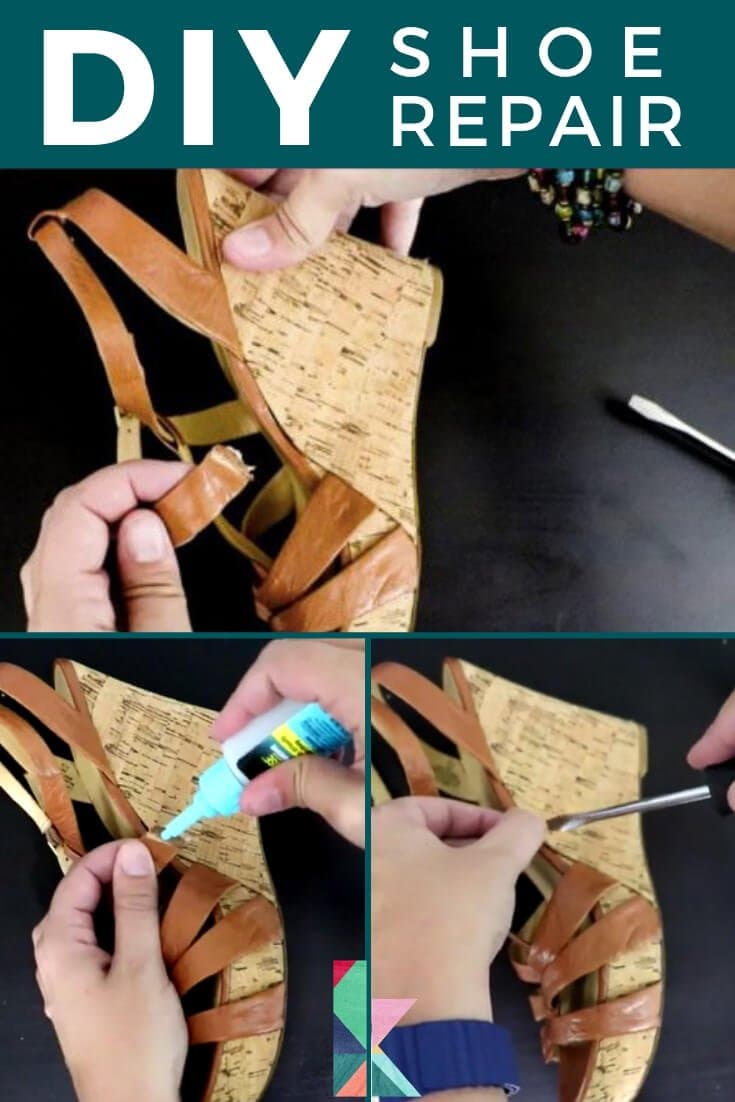
A strap that pulls out of the sole needs more than surface glue. The strap must be anchored inside the sole or secured with a broad patch.
First, remove loose glue and dirt from the strap end and the slot. If the strap end is frayed, trim it into a clean shape. Do not make it too short.
Apply flexible shoe adhesive to the strap end and the inside of the slot. Push the strap back into place with pliers or a blunt tool. Avoid sharp tools that may cut the sole.
For added strength, use one of these options:
• Insert a small leather patch across the strap end inside the sole.
• Stitch through the strap and patch before applying adhesive.
• Use a replacement sole plug designed for sandal repairs.
• Add a small rivet if the sole is thick enough to support it.
Press the sole together with clamps or heavy books. Place wax paper between the sandal and the clamp so the glue does not stick to the tool.
Let the adhesive cure for the full time listed on the label. Many repair failures happen because the sandal is worn after only a few minutes. A repair can feel firm on the table but fail under body weight.
How to Fix a Broken Buckle, Rivet, or Connector
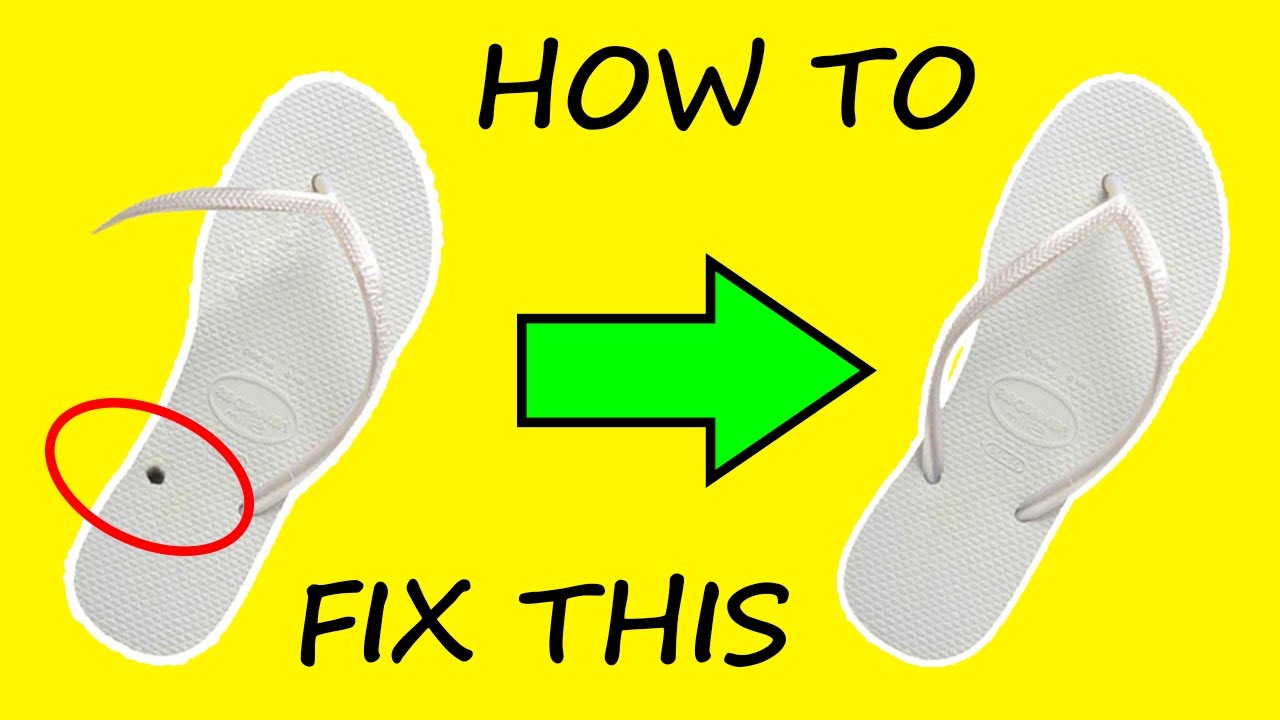
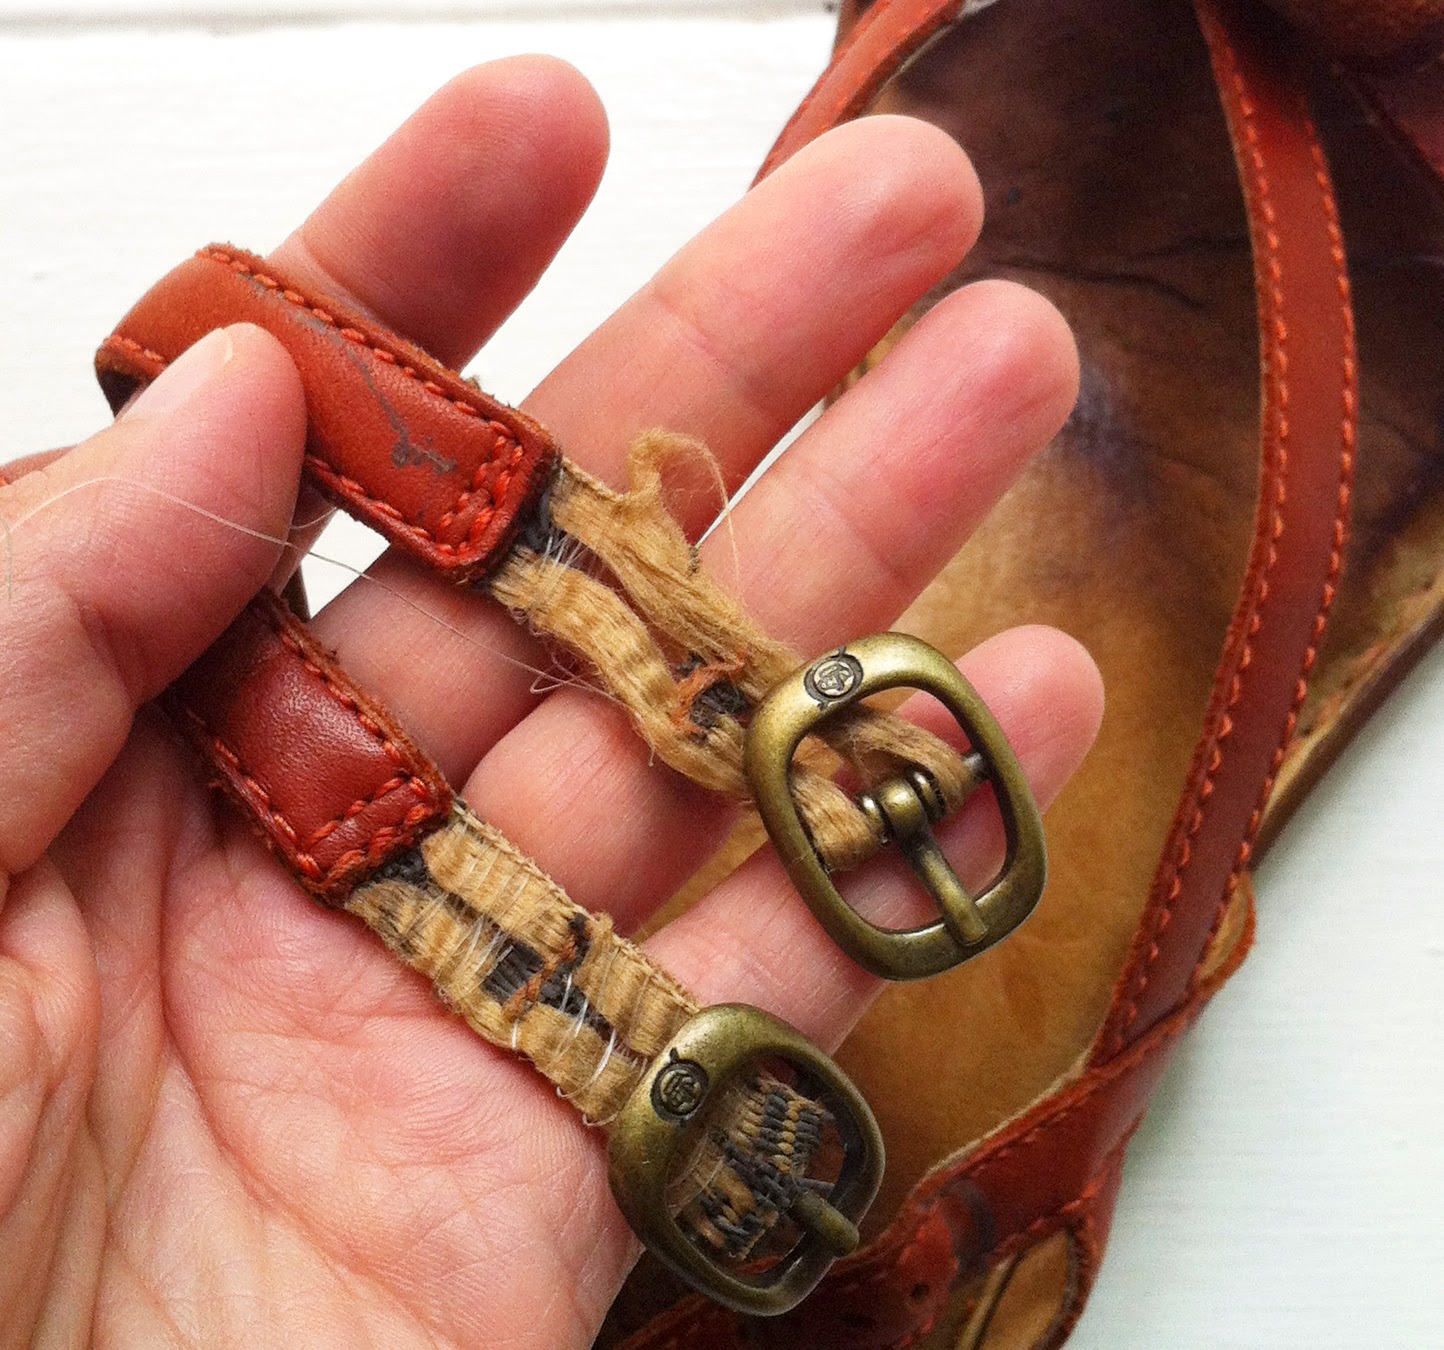
A broken buckle or rivet is a common reason people search for how to fix broken strap on sandals. The repair is usually simple if the strap itself remains strong.
Start by removing the old fastener with pliers. Check the holes for stretching or tearing. If the holes are damaged, move the new fastener slightly and make a fresh hole.
You can use:
• A replacement buckle for an adjustable strap
• A Chicago screw for a removable connection
• A two-part rivet for a permanent connection
• A small leather loop to replace a missing connector
To install a rivet, place the strap layers together and push the rivet through aligned holes. Set the rivet on a firm surface and tap it gently with a small hammer. Several light taps are safer than one hard blow.
Chicago screws are useful because they can be removed later. Add a small drop of thread-locking compound if the screw keeps loosening. Do not use permanent glue on the screw until you are sure the strap sits correctly.
Test the buckle several times before walking. The fastener should lie flat and should not press against your skin.

How to Repair Rubber, Plastic, and Woven Straps
Rubber and plastic straps can be harder to repair than leather. They stretch, flex, and resist many common glues.
For a rubber strap, clean both sides and roughen them lightly with sandpaper. Use an adhesive labeled for rubber, footwear, or flexible materials. Hold the ends together with tape or a clamp while the adhesive cures.
For a plastic strap, identify the plastic type if possible. Some plastics bond well, while others remain difficult to glue. A small replacement strap or a mechanical fastener may work better than adhesive alone.
For a woven or nylon strap, overlap the ends and sew them with heavy thread. You can also melt the edge very lightly with heat to stop fraying, but use great care. Keep flames and heat away from skin, glue, and other materials.
Avoid these common mistakes:
• Using hot glue on a high-stress strap
• Applying thick glue that creates a hard lump
• Sewing through rubber without support
• Heating unknown plastic, which may release harmful fumes
• Wearing the sandal before the repair fully cures
When the material is brittle, chalky, or cracked in several places, replacement is usually safer than repair. This is an important limitation when deciding how to fix broken strap on sandals.

How to Make the Repair Stronger and More Comfortable
A successful repair should hold the strap and feel good against your foot. Strength alone is not enough if the repaired area rubs, pinches, or creates a pressure point.
Keep the repair flat. Trim excess thread and smooth any sharp edge from a rivet. Cover a rough patch with a thin layer of leather, fabric, or moleskin.
Check the alignment before the adhesive sets. The strap should sit at the same angle as the original. A crooked strap can change how your foot moves and may cause blisters.
Use this simple strength test:
-
Pull the strap firmly by hand.
-
Bend it in the same direction it bends while walking.
-
Press down on the footbed as if taking a step.
-
Check for lifting, cracking, loose threads, or movement.
-
Wear the sandal indoors for five to ten minutes.
If the repair passes these tests, take a short outdoor walk. Avoid long walks, running, hiking, or wet conditions during the first day.
In my repair tests, the most common mistake is rushing the cure time. The second is using glue without adding stitches, a patch, or a fastener where the strap carries heavy tension.
When You Should Replace the Sandals
Not every broken strap should be repaired at home. Replacement is the safer choice when the sandal cannot support your foot evenly.
Consider replacing the sandals if:
• The sole is thin, cracked, or separating
• The strap has several weak spots
• The footbed is badly compressed
• The repair would sit directly under a pressure point
• The strap material has become hard and brittle
• The sandal slips even before the damage
• You cannot create a secure anchor
A professional shoe repair shop may be able to replace the strap, rebuild the anchor, or install a new buckle. This option makes sense for leather sandals, handmade footwear, or a pair with sentimental value.
A repaired sandal is not automatically as strong as a new one. Be honest about the repair’s limits, especially if you plan to use the sandals on stairs, wet ground, or uneven trails.

How to Prevent Another Broken Strap
Once you know how to fix broken strap on sandals, prevention becomes easier. Most strap failures come from repeated bending, moisture, poor fit, or worn materials.
Use these care habits:
• Keep sandals dry after wearing them in rain.
• Store them away from direct heat and sunlight.
• Clean salt, sand, and sweat from the straps.
• Do not pull hard on buckles or heel straps.
• Rotate between two or more pairs.
• Check stitching and rivets before a long walk.
• Condition leather with a product made for footwear.
• Replace stretched or weak fasteners early.
Fit also matters. A sandal that is too tight places extra force on the strap. A loose sandal makes your foot slide, which causes repeated pulling at the attachment point.
Think of the strap like a small bridge. Dirt, stress, and poor support weaken it little by little. Regular checks help you repair a small problem before it becomes a complete break.
Frequently Asked Questions About How to Fix Broken Strap on Sandals
Can I fix a broken sandal strap with super glue?
Super glue may hold a small, low-stress crack for a short time, but it becomes stiff when dry. Flexible shoe adhesive, reinforced stitching, or a rivet is usually a better choice for a strap that bends while you walk.
What is the strongest way to fix broken strap on sandals?
The strongest home repair often combines flexible adhesive with strong stitching or a mechanical fastener. A leather patch under the damaged area can spread stress and make the repair more durable.
How long should shoe glue cure before I wear sandals?
Follow the adhesive label, because cure times vary by product and material. Many shoe adhesives need at least 12 to 24 hours for a full cure, even when the surface feels dry sooner.
Can a cobbler replace a broken sandal strap?
Yes, a cobbler can often replace a strap, buckle, rivet, or damaged anchor. Professional repair is especially useful when the sandal has a thick sole, premium leather, or a complicated fastening system.
Is it safe to walk in sandals after repairing the strap?
Test the repair indoors first and take a short walk before using the sandals for a long trip. Stop wearing them if the strap lifts, rubs your skin, or shifts your foot out of a stable position.
How do I fix a sandal strap that keeps coming loose?
Clean the connection, remove old adhesive, and secure the strap with a suitable fastener or reinforced stitching. Glue alone may not work if the strap carries heavy tension or the sole material is worn.
Conclusion
Learning how to fix broken strap on sandals can save money and keep a comfortable pair in use. Clean the damage, choose materials that match the strap, and reinforce high-stress areas with stitching, patches, rivets, or flexible shoe adhesive.
Let every repair cure fully, test it indoors, and replace the sandals when the sole or strap is too weak to support you safely. Try these steps on a damaged pair, and share your repair results or questions in the comments.

Rubel Miah is the Senior Editor at MyStyleGrid.com, where he brings a sharp editorial eye and an unshakable love for fashion to everything he does. A true style addict, Rubel lives and breathes trends, from streetwear to high fashion, and has a knack for turning inspiration into impactful stories. With years of experience in fashion journalism and digital media, he curates content that empowers readers to express themselves through style. When he’s not editing features or forecasting the next big thing, you’ll find him hunting down vintage pieces or capturing street style moments around the city.