Clean, repair with leather filler, condition, and seal to restore cracked leather on sneakers.
I’ve spent years fixing shoes and testing repair products, so I’ll walk you through exactly how to fix cracked leather on sneakers. This guide gives clear steps, tools, and realistic expectations so you can repair small cracks, revive dried leather, and know when to seek professional help. Read on to save a favorite pair and keep new ones from cracking in the future.
Why leather cracks on sneakers and what it means for repair
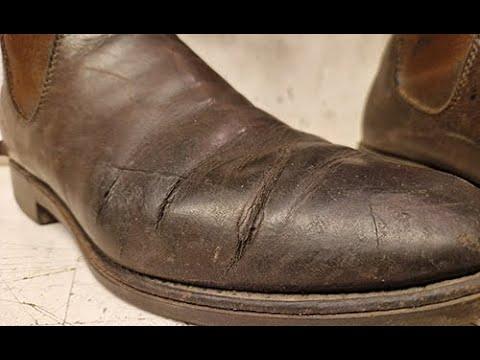
Leather cracks when it loses oils and flexibility. Sneakers often face moisture changes, sun, salt, and rough wear. That causes small lines at first and deeper splits later.
Understanding the cause helps you choose the right fix. Surface cracks can often be cleaned, conditioned, and filled. Deep cracks or missing leather may need patching or professional repair.
Common causes:
- Age and dryness from lack of conditioning.
- Heat, sunlight, and quick drying after getting wet.
- Cheap or synthetic leather that wears faster.
- Repeated bending point stress in flex zones.
What to expect:
- Small cracks can disappear visually with filler and dye.
- Deep splits may never be invisible but can be stabilized and protected.

Tools and materials you’ll need
Use the right materials. Cheap tools make quick fixes worse. Here’s what I recommend.
Essential items:
- Soft cloths and microfiber towels.
- Mild leather cleaner or saddle soap.
- Isopropyl alcohol (70%) for degreasing.
- Leather conditioner or neatsfoot oil.
- Leather filler or flexible leather repair compound.
- Fine sandpaper (400–600 grit) or leather sanding pad.
- Small spatula or plastic spreader.
- Leather dye or recoloring balm that matches your sneaker.
- Clear leather finisher or flexible acrylic sealer.
- Cotton swabs and painter’s tape.
- Optional: small heat gun or hair dryer on low.
Safety tip:
- Work in a ventilated area. Wear gloves if you’re sensitive to chemicals.
Step-by-step: how to fix cracked leather on sneakers
This method covers surface and mild-to-moderate cracks. Read the whole section before you start.
- Clean the leather
- Brush off dust. Wipe with a damp cloth.
- Use a mild leather cleaner. Rinse residue with a damp cloth.
- Let dry fully at room temperature.
- Degrease and prep
- Dab a cotton swab in isopropyl alcohol.
- Gently wipe the cracked area to remove oils and old conditioners.
- Allow alcohol to evaporate fully.
- Light sanding and texture
- Lightly sand around the crack with 400–600 grit sandpaper.
- Smooth only the high edges. Don’t remove more leather than needed.
- Wipe away dust.
- Apply leather filler
- Use a flexible leather filler. Apply thin layers with a small spatula.
- Push filler into the crack, then smooth it level with the surface.
- Let each layer dry fully. Repeat until the crack is flush.
- Sand and blend
- Once cured, sand the filler smooth with fine sandpaper.
- Feather the filler into surrounding leather for a natural finish.
- Recolor if needed
- Apply leather dye or recoloring balm in thin coats.
- Let each coat dry. Build color slowly until it blends.
- Condition and seal
- Apply a leather conditioner to restore oils.
- After conditioning soaks in, finish with a flexible leather sealer.
- Let cure per product instructions.
- Final polish and protect
- Buff lightly with a soft cloth.
- Consider a waterproofing spray for added protection.
Practical tips from experience:
- I use two thin coats of filler, not one thick one. It cures better and stays flexible.
- Test dye on an inconspicuous area first.
- Wait at least 24 hours before heavy wear.

Advanced fixes and when to choose them
For deep splits, missing grain, or heavy structural damage, use advanced tactics or pros.
Options:
- Leather patching
- Stitching and reinforcement under the leather
- Replacing panels if the sneaker has removable or sewn panels
- Professional cobbler work with heat-bonding and color-matching
When to see a pro:
- The leather is torn through or has large missing pieces.
- The sneaker has high value or sentimental worth.
- You want a near-original color match and finish.
Limitations:
- Repairs can stabilize and improve appearance, but may not be invisible.
- Synthetic leather may not accept traditional leather fillers or dyes well.
Preventing cracks and maintaining leather sneakers
Prevention is cheaper than repair. Keep leather supple and protected.
Daily to monthly care:
- Clean dirt and salt off after use.
- Condition leather every 1–3 months depending on wear.
- Avoid prolonged direct sunlight and heat.
- Use shoe trees to keep shape and prevent deep creases.
- Rotate shoes. Don’t wear the same pair every day.
Long-term tips:
- Apply a flexible leather sealant seasonally.
- Avoid harsh detergents and machine washing.
- Reapply waterproofing before rainy seasons.

Troubleshooting common repair issues
Quick Q&A on problems you might hit while repairing.
Why is the filler cracking again?
- The filler may be too rigid or the leather wasn’t clean. Use a flexible filler and ensure full prep.
Color mismatch after dyeing?
- Build thin coats and blend edges. Use a leather color balm for minor tone adjustments.
Stiff area after repair?
- Apply leather conditioner and flex the area gently. Stiffness often reduces after a week.
Will the repair hold on synthetic leather?
- Many leather products won’t bond to synthetics. Use a product labeled for faux leather or consult a pro.
PAA-style questions:
What’s the fastest way to fix small leather cracks?
- Clean, apply flexible filler, sand, recolor, and condition. It can be done in a few hours with drying time.
Can conditioning alone fix cracked leather?
- Conditioning helps fresh cracks and prevents new ones, but it won’t refill deep splits. Use filler for visible gaps.
How long does a repaired area last?
- With good prep and seal, repairs can last months to years depending on wear.

My experience: real repairs and lessons learned
I’ve repaired dozens of sneakers, from daily beaters to collectible pairs. Here are honest lessons.
What worked best:
- Thin layers. Multiple thin layers beat one thick layer every time.
- Proper prep. Cleaner and alcohol made a huge difference in adhesion.
- Matching color slowly. Rushing the dye led to uneven patches.
Common mistakes I made early on:
- Skipping conditioning until after repair, which made edges flake.
- Using general-purpose glues that cracked with flex.
- Not testing filler flexibility on a scrap first.
Practical trick I use:
- Tape a thin strip of plastic under a deep crack before filling. It gives support and prevents filler loss inside gaps.

Materials to avoid and product notes
Avoid products that can cause more harm.
Do not use:
- Household glues that dry rigid and crack with movement.
- Harsh solvents that strip leather oils repeatedly.
- Opaque paints that form a non-flexible skin.
Choose products labeled:
- Flexible leather filler
- Leather-safe dyes and conditioners
- Water-based sealers for breathability
Product safety:
- Follow manufacturer dry times.
- Work in ventilation. Test on scraps when possible.

Frequently Asked Questions of how to fix cracked leather on sneakers
How long does it take to fix small cracks on leather sneakers?
A basic repair can take a few hours of work plus drying time. Expect 24 hours before normal wear.
Can I use shoe glue to fix cracked leather?
Glue alone is not ideal for cracks that need filling. Use flexible leather filler and glue only for edges or patches.
Will leather conditioner remove cracks?
Conditioner softens and hides fine lines but won’t fill deep cracks. Use filler for visible gaps.
Is it better to dye or paint repairs?
Dye penetrates and looks natural on real leather. Paint can be used but may crack if it’s not flexible.
How do I match color on older leather?
Build thin coats of dye and blend edges. Use a color balm for minor tone tweaks and test first.
Can I repair synthetic leather the same way?
Some steps are similar, but many fillers and dyes for real leather won’t bond to synthetics. Use products for faux leather.
When should I take sneakers to a cobbler?
If the leather is torn, missing, or the sneakers are valuable, a cobbler can deliver stronger, longer-lasting repairs.
Conclusion
You can save many pairs by learning how to fix cracked leather on sneakers. Clean well, use flexible filler, match color slowly, and always finish with conditioner and sealer. Start with small fixes and build confidence. Try one repair this weekend, share your results, and subscribe or comment if you want product recommendations or a step-by-step photo guide.

Rubel Miah is the Senior Editor at MyStyleGrid.com, where he brings a sharp editorial eye and an unshakable love for fashion to everything he does. A true style addict, Rubel lives and breathes trends, from streetwear to high fashion, and has a knack for turning inspiration into impactful stories. With years of experience in fashion journalism and digital media, he curates content that empowers readers to express themselves through style. When he’s not editing features or forecasting the next big thing, you’ll find him hunting down vintage pieces or capturing street style moments around the city.