Repair small cracks in rubber rain boots with cleaning, adhesive, and flexible patching or replace if severe.
I have repaired dozens of wet-weather boots and taught others the right fixes. This guide shows how to fix cracked rubber rain boots step by step. I will explain when repairs work, what materials to use, and tips that save time and money. Read on to learn practical, tested methods to restore waterproof boots and extend their life.

Why rubber rain boots crack
Rubber rain boots crack for many reasons. Age, UV exposure, repeated flexing, and chemical contact all weaken rubber. Cold weather makes rubber brittle. Poor storage speeds the process. Understanding why helps you choose the right repair.
Rubber is a flexible polymer. Over time the polymer chains break down. This causes small surface fissures that grow into larger cracks. Some boots use natural rubber. Others use synthetic blends. Each type reacts differently to adhesives and patches. Knowing your boot material guides repair choices.

Quick assessment: can you repair or should you replace?
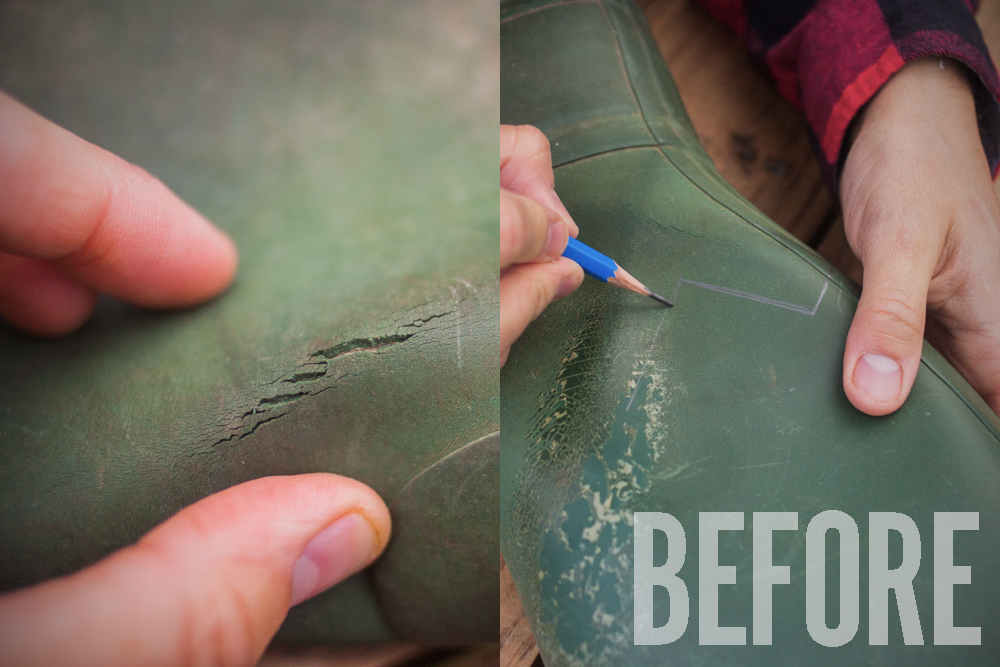
Start by checking crack size and location. Small hairline cracks on the surface are usually repairable. Large deep cracks through the sole or at seams often need replacement. If the boot is more than 8–10 years old, replacement may be wiser.
Test waterproofing by placing the boot in a tub of water for a few minutes. Mark where water seeps in. If multiple leaks appear, repairs can be time-consuming and may not last. If the crack is on a high-flex area like the toe bend, choose flexible repair compounds.

Materials and tools you'll need
Gather items before you begin. Using the right materials improves success when you try to fix cracked rubber rain boots.
- Rubber cleaner or mild soap and warm water for cleaning the surface.
- Rubbing alcohol to remove residues and oils.
- Fine-grit sandpaper for light abrasion.
- Rubber cement or flexible contact adhesive for bonding.
- Rubber repair glue formulated for neoprene or rubber.
- Flexible patch material such as rubber sheets or neoprene patches.
- Clamps or strong tape to hold patches in place while curing.
- Scarfs, gloves, and a well-ventilated space for safety.
I prefer products labeled for rubber or neoprene. They bond better and remain flexible. Using household glues can cause rigid joins that crack again.
Step-by-step: how to fix cracked rubber rain boots
Follow these steps to repair small to medium cracks. Read all steps before starting. Work in a ventilated area and wear gloves.
-
Clean the boots thoroughly.
- Rinse mud and dirt. Use mild soap and warm water.
- Wipe the cracked area with rubbing alcohol to remove oils.
- Let boots dry fully, ideally overnight.
-
Prepare the crack for adhesion.
- Lightly sand around the crack with fine-grit sandpaper.
- Remove dust with a soft brush or cloth.
-
Choose your repair method based on crack size.
- For hairline surface cracks: apply rubber cement or a rubber conditioner and work it into the crack.
- For deeper cracks: use rubber repair glue. Apply glue inside the crack and press edges together.
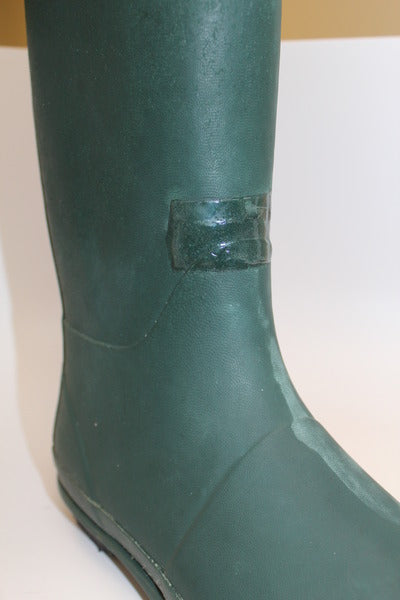
- For long or high-stress cracks: use a patch plus adhesive. Cut a patch larger than the damaged area.
-
Apply adhesive and patch.
- Follow product instructions for primer or wait times.
- Spread adhesive on both the boot and patch surfaces if required.
- Press patch firmly. Use a roller or a flat tool to remove air bubbles.
-
Secure and cure.
- Use clamps or wrap strong tape to hold the patch in place.
- Allow full cure time as recommended; shorter cures weaken the bond.
- After curing, flex the boot gently to test the repair.
-
Seal and finish.
- Apply a thin coat of waterproof sealant if needed.
- Condition the rubber with a rubber conditioner to restore flexibility.
These steps outline how to fix cracked rubber rain boots with durable results. Small cracks often come back if the rubber is old, so monitor repairs.
Alternative repair methods
If the main method isn't an option, try these alternatives.
- Shoe repair professional
- A cobbler can use heat, solvents, and specialist adhesives for tough cases.
- Liquid rubber coatings
- These can coat the entire boot for extra protection and hide multiple small cracks.
- DIY patch kits
- Home kits include adhesive and patches for quick field repairs.
- Sewing and reinforcing
- For fabric-reinforced boots, stitching plus a glued patch can add strength.
Each alternative has pros and cons. Professional repair costs more but often lasts longer. Liquid coatings add weight and change boot feel.

Prevention and care tips to avoid future cracks
Prevention is simple and effective. Small habits extend boot life and reduce how often you need to fix cracked rubber rain boots.
- Store boots away from direct sunlight and heat.
- Rinse and dry boots after use to remove salt and chemicals.
- Apply rubber conditioner periodically to keep material supple.
- Avoid folding or creasing boots when storing.
- Rotate footwear to reduce constant stress on one pair.
I once kept a pair of boots in a warm garage and watched them crack in a season. Moving them to a cool closet and applying conditioner stopped further cracking.
When to call a professional or replace
Call a professional when repairs are complex or when the boot has structural damage. Deep sole cracks, torn boot collars, or failed past repairs often need expert work. Replacement is best if repair costs approach or exceed new-boot price.
Consider the boot’s age, sentimental value, and cost. If you need reliable waterproofing for work or safety, replace rather than repair. If the boots are favorite or costly, professional repair can save them.

Personal experience and lessons learned
I repaired my first cracked rain boots with kitchen glue and learned the hard way. The repair held for a month but failed in cold weather. After testing industry adhesives, I now use products labeled for rubber and allow full cure times. My best repairs used a rubber patch plus flexible adhesive.
Lessons learned
- Do not rush curing times.
- Clean surfaces well before bonding.
- Match patch flexibility to boot material.
These small steps make a big difference when you fix cracked rubber rain boots.

Common questions people ask about repairing boots
What causes boots to fail after repair?
- Repairs fail if you skip cleaning or use rigid adhesives. Always prepare the surface and choose flexible glue.
Can all rubber boots be repaired?
- Most can be repaired, but very old or heavily degraded boots may not hold a lasting fix. Assess material condition before repair.
How long will a repair last?
- A proper repair can last months to years depending on use, environment, and materials. Heavy daily use shortens lifespan.
Is it safe to use repaired boots in deep water?
- If the repair fully seals and bonds, they can be safe. Test boots in shallow water before trusting them in deep conditions.
Can I use household glue to fix boots?
- Household glues are usually too rigid. Use adhesives made for rubber or neoprene for flexible, waterproof bonds.
Frequently Asked Questions of how to fix cracked rubber rain boots
How do I know if a crack is repairable?
Small surface cracks and shallow splits are usually repairable. If the rubber crumbles or the crack goes through multiple layers, replacement may be best.
What adhesive is best for rubber rain boots?
Choose an adhesive specifically formulated for rubber or neoprene. These remain flexible and waterproof after curing.
How long should I let the adhesive cure?
Follow the product instructions. Most rubber adhesives need 12 to 24 hours to cure fully, though some fast formulas cure faster.
Can I use a patch on the inside of the boot?
Yes, internal patches can reinforce repairs and keep seams waterproof. They work well when combined with external patches.
Will repairs change boot flexibility?
A proper flexible adhesive and matching patch will keep flexibility. Rigid glues or thick patches can make the area stiff and prone to new cracks.
Conclusion
Fixing cracked rubber rain boots is often practical and cost-effective when you follow the right steps. Clean the area, choose a flexible adhesive, use a proper patch, and allow full curing for the best outcome. Preventive care will reduce future damage and save money.
Try one repair on a low-stress area first. If it works, you can confidently fix other cracks. Share your repair story or ask questions below to get tailored tips and product suggestions.

Rubel Miah is the Senior Editor at MyStyleGrid.com, where he brings a sharp editorial eye and an unshakable love for fashion to everything he does. A true style addict, Rubel lives and breathes trends, from streetwear to high fashion, and has a knack for turning inspiration into impactful stories. With years of experience in fashion journalism and digital media, he curates content that empowers readers to express themselves through style. When he’s not editing features or forecasting the next big thing, you’ll find him hunting down vintage pieces or capturing street style moments around the city.