Use a strong flexible adhesive, clean the area, clamp while curing, and consider a cobbler for large gaps.
I have fixed dozens of cracked soles across boots, sneakers, and work shoes. In this guide I explain how to fix a cracked sole of a shoe from tiny hairline splits to full separations. You will learn which tools and glues work, step-by-step repair methods for different sole materials, tips to prevent repeat damage, and when a professional is the smarter choice. Read on to save shoes, money, and time with reliable, tested techniques I use in real repairs.
Why shoe soles crack: common causes and signs
Soles crack for a few clear reasons. Long wear breaks down rubber and foam. Heat and sun dry materials and make them brittle. Oils and chemicals can eat away compounds. Poor storage, cold snaps, and heavy flexing speed damage. Old glue lines fail and let water in, which worsens the split.
Look for these signs:
- Small hairline splits near flex points.
- Pieces lifting or flapping at the toe or heel.
- White powdery surface on old rubber (sign of dry rot).
- Soft midsole that compresses unevenly.
- Water seepage or odd smells inside the shoe.
Understanding why soles fail helps you decide how to fix a cracked sole of a shoe. Match the repair to the cause for a longer result.

Can cracked soles be repaired or must you replace the shoe?
Not every crack needs tossing. Many cracks are repairable. Superficial splits and partial separations can be glued or patched. Full tread loss, crushed midsoles, or structural damage often need a cobbler or replacement. Repair is best when:
- The upper is in good shape.
- The crack is limited to the outsole or a thin midsole area.
- You act early before the crack widens or water ruins the insole.
If you want a durable fix, learning how to fix a cracked sole of a shoe properly matters. Some fixes last months. Others can last years if done well and matched to the sole material.
Materials and tools you’ll need
Choose tools based on the sole type. Gather these basics:
- Isopropyl alcohol or mild detergent for cleaning.
- Soft brush or toothbrush for debris.
- Sandpaper (80–220 grit) to roughen surfaces.
- Rubbing alcohol wipes.
- Strong flexible shoe glue (urethane, neoprene, or shoe repair cement).
- Contact cement or two-part epoxy for heavy repairs.
- Clamps, rubber bands, heavy books, or elastic straps.
- Shoe repair patches or thin rubber sheets.
- Utility knife and scissors.
- Disposable gloves and safety glasses.
- Solvent for old glue removal (if needed).
Having right materials upfront helps you fix a cracked sole of a shoe with fewer mistakes. I keep a small kit at home for quick fixes.

Step-by-step repairs for different sole types
Assess the shoe first. Is the crack in the outsole, midsole, or at the welt? Use the right method below based on where the crack is.
Hairline cracks in rubber outsole
- Clean the sole with soap and water. Dry fully.
- Wipe with alcohol to remove oils.
- Lightly sand the crack edges.
- Apply flexible shoe glue into the crack.
- Press the crack together and hold with clamps or bands for the cure time.
- Remove excess glue and let cure completely.
Partial separation or lifting
- Clean and sand both surfaces.
- Apply contact cement or urethane glue to both parts.
- Wait as per product instructions for tackiness.
- Press firmly and clamp for the recommended time.
- Trim any excess glue.
Large gaps or missing outsole pieces
- Remove loose debris and roughen edges.
- Use a backing patch or thin rubber to fill voids.
- Glue patch into place, then clamp.
- For heavy wear areas, consider cobbler re-soling.
Midsole cracks (foam or EVA)
- Clean and dry well.
- Use a flexible urethane adhesive designed for soft foam.
- Clamp gently; too much pressure can squeeze out adhesive.
- For deep splits, insert a thin fabric backing before gluing.
Welt separation on dress shoes
- Clean the welt and sole joint.
- Use a strong contact cement or cobbler-grade adhesive.
- Clamp or stitch if possible. For stitched welts, a cobbler should stitch and glue.
These methods show how to fix a cracked sole of a shoe for most common cases. Match glue type and clamping pressure to the material for the best bond.

How to glue a cracked sole: a close-up procedure
A reliable glue job needs patience. Follow these precise steps.
Preparation
- Work in a ventilated space.
- Remove laces and insoles if needed.
- Clean the cracked area with soap and water. Dry.
- Wipe surfaces with isopropyl alcohol to remove oils.
- Sand lightly to add tooth to the material.
Applying the adhesive
- Read the glue directions. Use urethane for flexible bonds and contact cement for quick tack.
- Apply evenly into the crack. Avoid overfilling.
- Press surfaces together, ensuring alignment.
- Wipe excess immediately with a cloth and solvent if safe.
Clamping and curing
- Use clamps, heavy books, or rubber bands. Keep steady pressure.
- Follow cure time on the glue label. Longer cure gives stronger bond.
- Avoid stress or water exposure during curing.
Finishing touches
- Trim dried glue with a sharp blade.
- Use fine sandpaper to smooth the area.
- For extra durability, apply a thin rubber patch or sole protector.
Doing this right explains how to fix a cracked sole of a shoe so it lasts. I always let glue cure 24 hours when possible. Quick use often causes re-failure.

Using sole patches and replacement kits
Sole patches and kits are good for quick fixes and reinforcement. Consider these options:
- Precut rubber patches for worn heels and toes.
- Peel-and-stick sole protectors to cover weak areas.
- Full sole replacement kits that include adhesive and a new rubber outsole.
- Rubber cement and fabric backing for flexible repairs.
How to apply a patch
- Clean and sand the area.
- Apply glue to both surfaces if the patch is not self-adhesive.
- Position the patch and press firmly.
- Clamp until the adhesive cures.
Kits are handy when you need a low-cost repair. For true sole replacement, quality kits plus careful prep can extend shoe life for months or years. This helps when learning how to fix a cracked sole of a shoe on a budget.
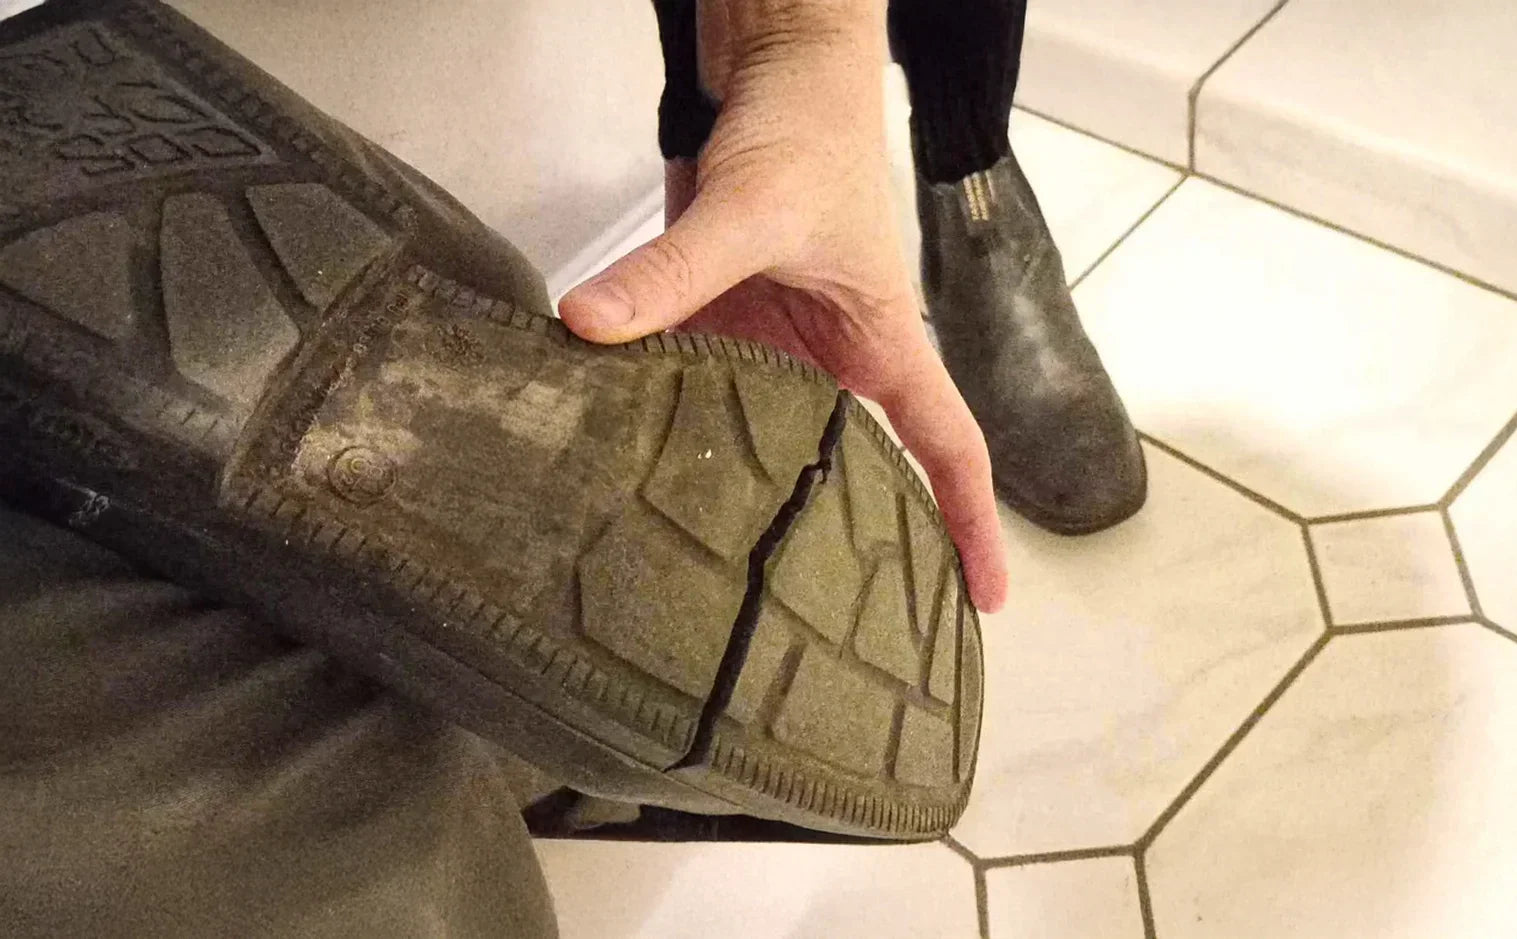
When to see a cobbler or replace the shoe
Some problems need pros. Visit a cobbler if:
- The crack runs through structural midsole or shank.
- The upper is separating from the sole along the welt.
- The sole is badly worn across the entire shoe.
- You need matched professional re-soling to restore balance.
Replace the shoe when:
- The cost of repair approaches or exceeds the shoe’s value.
- The midsole or cushioning has failed.
- Multiple repairs have already been made and keep failing.
A cobbler can replace soles professionally and use stitching or industrial adhesives that DIY kits lack. Knowing when to stop self-repair and pay for expertise is part of how to fix a cracked sole of a shoe wisely.

Preventing future sole cracks: maintenance tips
Good care prevents many cracks. Try these habits:
- Rotate shoes; don’t wear the same pair daily.
- Clean and dry shoes after wet use.
- Store away from direct sunlight and heat.
- Use sole protectors or rubber taps on high-wear areas.
- Re-glue small lifts before they become cracks.
- Condition leather and treat foam with recommended products.
Preventive care is the easiest way to reduce how often you need to fix a cracked sole of a shoe. Small steps save money and keep shoes functional longer.
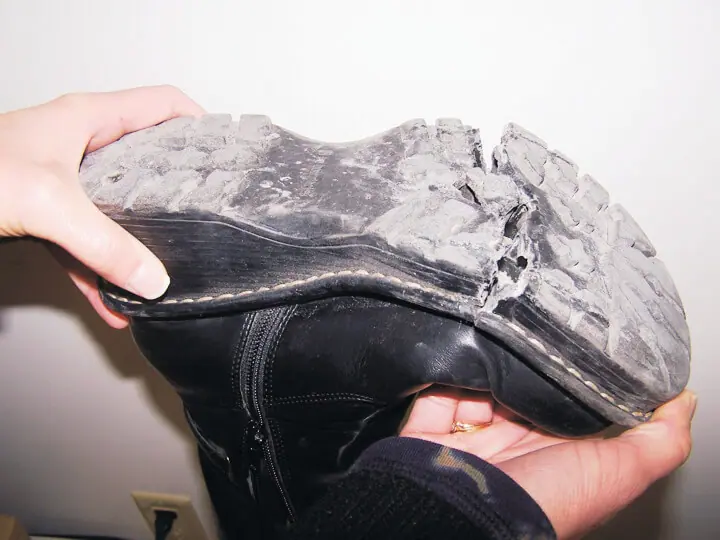
Personal experience and practical tips from my repairs
I’ve repaired running shoes, hiking boots, and work boots. A late-night fix on a favorite boot taught me this: prepare surfaces well. I once used a cheap glue and had the sole re-open within a week. After switching to urethane adhesive and proper clamping, the same repair lasted two seasons.
Lessons I learned
- Always clean with alcohol. Oils kill bonds.
- Sanding is not optional. It helps glue stick.
- Don’t over-clamp—some soles need room to sit naturally.
- Use a backing patch for big gaps to support the bond.
If you are fixing a cracked sole of a shoe for the first time, practice on an old pair. You will get better at matching pressure and glue amount. These small experiments save good shoes from botched repairs.
Common mistakes to avoid
Avoid these errors that cause re-failure:
- Using superglue on flexible soles. It bonds but becomes brittle.
- Skipping cleaning or sanding.
- Rushing the cure time and walking too soon.
- Using wrong adhesive for the material.
- Clamping unevenly and causing misalignment.
Knowing what not to do is as valuable as knowing how to fix a cracked sole of a shoe. Good habits lead to durable repairs.
Frequently Asked Questions of how to fix a cracked sole of a shoe
Can I fix a cracked sole at home?
Yes. Most small cracks and partial separations can be fixed with proper glue, cleaning, and clamping. Bigger structural failures may need a cobbler.
What glue is best for shoe soles?
Use a flexible urethane adhesive or contact cement made for shoes. Avoid rigid glues like standard superglue on flexible soles.
How long should I clamp a repaired sole?
Follow the adhesive instructions. Aim for at least 12–24 hours of steady pressure for most urethane glues to reach strong bond strength.
Will a DIY repair affect shoe comfort?
If done correctly, repairs should not change fit much. For large midsole fixes, cushioning may feel different. Test indoors first.
When should I replace the shoe instead of repairing?
Replace when multiple parts are failing, cushioning and fit are lost, or repair costs near the shoe’s value. Structural midsole collapse usually means replacement.
Conclusion
You can save many pairs by learning how to fix a cracked sole of a shoe. Clean surfaces, pick the right adhesive, sand, and clamp patiently for the best results. For major structural damage, a cobbler provides lasting repairs. Try small repairs on older shoes first, use the right materials, and adopt simple care habits to prevent future cracks. If this guide helped, try a repair today, share your results in the comments, or subscribe for more practical shoe care tips.

Rubel Miah is the Senior Editor at MyStyleGrid.com, where he brings a sharp editorial eye and an unshakable love for fashion to everything he does. A true style addict, Rubel lives and breathes trends, from streetwear to high fashion, and has a knack for turning inspiration into impactful stories. With years of experience in fashion journalism and digital media, he curates content that empowers readers to express themselves through style. When he’s not editing features or forecasting the next big thing, you’ll find him hunting down vintage pieces or capturing street style moments around the city.