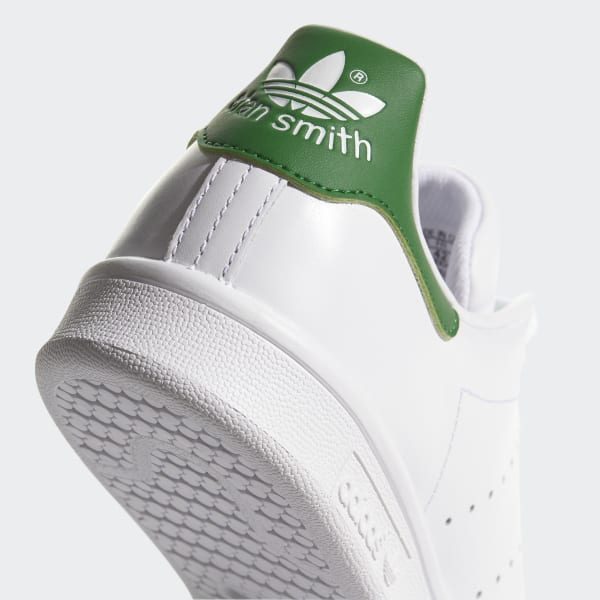
Do you love your white sneakers? I know I do. There is nothing quite like a fresh pair of Adidas Stan Smiths. They look clean. They look sharp. They go with everything. You can wear them with jeans. You can wear them with a dress. They are a true classic.
But there is a problem. White shoes do not stay white for long.
You walk outside. You step in mud. Someone steps on your foot. Suddenly, your crisp white shoes look gray and sad. I have been there. It is frustrating. You want them to look new again. But you are scared. You do not want to ruin them.
I have good news for you. You can fix them.
In this guide, I will show you how to clean Adidas Stan Smith white sneakers safely. I have cleaned hundreds of pairs. I have made mistakes so you do not have to. I am going to teach you the right way. We will use safe tools. We will use simple steps. Your shoes will look bright again.
Let’s get started.
My Personal Stan Smith Story
I need to tell you a quick story. Years ago, I bought my first pair of Stan Smiths. I loved them. I wore them to a music festival. It was a bad idea. It rained. The field turned to mud. My beautiful white shoes turned brown.
I panicked. I went home and threw them in the washing machine. I added a cup of bleach. I thought, “Bleach makes things white, right?”
I was wrong.
When I took them out, the leather was cracked. The soles had turned a weird yellow color. The shape was ruined. I had to throw them away. I was heartbroken. That day, I promised to learn the real way to clean shoes. I spent years testing methods. I learned about leather. I learned about soap. Now, I am sharing that knowledge with you.
Know Your Shoes: Leather vs. Synthetic
Before we clean, we must look at the shoe. Not all Stan Smiths are the same.
In the past, Adidas made them from real animal leather. Today, many pairs are made of Primegreen. This is a high-performance recycled material. It looks like leather. It feels like leather. But it is synthetic.
Why Does This Matter?
Real leather has pores. It absorbs water. If you get it too wet, it can dry out. It can crack.
Synthetic Primegreen is different. It is more durable. It has a plastic coating. This makes it easier to clean. However, you still need to be gentle. If you scrub too hard, you can scratch the coating. Once the coating is scratched, dirt gets stuck inside.
Check your box. Or check the tag inside the shoe. If it says “Sustainable” or “Primegreen,” you have the new type. If it is a vintage pair, it might be real leather.
Don’t worry. The method I will teach you is safe for both. We will use a “low moisture” method. This means we use very little water. This protects the glue and the material.

Credit: www.adidas.com
The “Do Not” List: 4 Mistakes to Avoid
We want to clean safely. So, we must avoid dangerous things. Here are four things you must never do.
1. Do Not Use Bleach
Bleach is too strong. It burns the material. It causes a chemical reaction with the rubber. This turns your white soles yellow. Once they turn yellow from bleach, you cannot fix it. Avoid bleach.
2. Do Not Use the Washing Machine
It is tempting. It seems easy. But the machine is violent. The shoes bang around. This breaks the structure. The heel can collapse. The glue can loosen. The heat from the wash can warp the shoe. Hand washing is the only safe way.
3. Do Not Use Direct Heat
Do not put wet shoes near a radiator. Do not use a hair dryer. Do not leave them in hot sun. Heat dries out leather. It makes the rubber brittle. It can make the soles peel off. Always air dry in a cool place.
4. Do Not Use Hard Brushes
Do not use a floor scrub brush. Do not use a wire brush. These are too hard. They will scratch the white paint off the leather. They will leave marks. We need soft tools.
Gathering Your Supplies
You do not need expensive kits. You probably have what you need at home. Here is your shopping list.
The Tools
- Soft Bristle Brush: A premium shoe brush is good. A soft toothbrush is also perfect.
- Microfiber Cloths: These are soft. They pick up dirt well. Paper towels can leave lint.
- Magic Eraser: This is a white foam sponge. It is great for rubber soles.
- Two Bowls: One for soapy water. One for clean water.
The Solutions
- Mild Dish Soap: Clear soap is best. Colored soap can dye the stitching.
- Baking Soda: This is a natural whitener. It acts as a gentle abrasive.
- Warm Water: Not hot. Just warm.
Optional: If you want to buy a cleaner, look for “foaming sneaker cleaner.” But soap and water work just as well for most dirt.
Phase 1: Preparation
We are almost ready to scrub. But first, we must prep. Good prep makes the job easier.
Step 1: Remove the Laces
You cannot clean the tongue with laces on. Dirt hides under the laces. Plus, the laces need their own bath. Take them off. Put them aside. We will clean them later.
Step 2: Insert Shoe Trees
Do you have shoe trees? These are plastic or wood inserts. They keep the shoe shape. If you do not have them, that is okay. You can stuff the shoe with a dry washcloth. Or use a balled-up plastic bag.
Why do this?
It gives you a hard surface. When you scrub, the shoe won’t collapse. It pushes the wrinkles out. This helps you clean inside the creases.
Step 3: Dry Brushing
Do not put water on a muddy shoe. The water will turn the mud into liquid. This pushes dirt deeper into the leather.
Take your soft brush. Make sure it is dry. Gently brush the whole shoe. Knock off the loose dust. Knock off the dried mud. Brush the soles too. Get the big chunks off first.
Now, your shoes are prepped. The laces are off. The loose dirt is gone. We are ready for the wet work.
Credit: www.adidas.com
Now comes the fun part. We are going to make those shoes sparkle. We will clean the upper part first. Then we will tackle the soles. Finally, we will fix the laces.
Phase 2: Cleaning the Upper
The upper is the white part of the shoe. It is the face of the sneaker. We need to be gentle here.
1. Mix Your Solution
Take a small bowl. Fill it with warm water. Add a few drops of mild dish soap. You do not need a lot of bubbles. Just a little soap is enough.
Expert Tip: If your shoes are very gray, add a teaspoon of baking soda. Mix it in. This helps lift the dirt. This is a great way to clean white leather sneakers baking soda style.
2. The Brush Method
Dip your soft brush into the water. Shake it off. We want it damp, not soaking wet.
Start at the toe box. This is usually the dirtiest part. Move the brush in small circles. Do not press hard. Let the bristles do the work. The soap will create a light foam. This foam lifts the dirt.
Work your way back. Clean the sides. Clean the heel. Be careful around the green (or colored) heel tab. Sometimes the color can bleed. Test a small spot first.
3. Cleaning the Tongue
The tongue is often made of soft synthetic leather or foam. It grabs dirt from your socks. Scrub it gently. Hold it steady with your hand. Scrub in circles.
4. Wipe as You Go
This is very important. Do not let the dirty foam dry on the shoe.
After you scrub one section, wipe it. Use your microfiber cloth. Wipe away the suds. Look at the cloth. Is it dirty? Good. That means the dirt is leaving the shoe.
5. Check the Creases
Look at the toe. Do you see wrinkles? Dirt loves to hide there.
Press your finger inside the shoe to push the wrinkle out. Or rely on your shoe tree. Use the corner of your brush. Gently scrub the line of the crease.
6. The Final Wipe
Once the whole upper is scrubbed, take a clean cloth. Dampen it with fresh water. No soap this time. Wipe the whole shoe down. This removes any soap residue. Soap residue can attract more dirt later. So, make sure it is all gone.
Phase 3: Restoring the Soles
The sole is the rubber bottom. It is tough. You can use a bit more force here. But we still want to be safe.
1. The Stiff Brush
If you have a stiffer brush, use it here. If not, your toothbrush is fine. Dip it in the soapy water. Scrub the side of the sole. Scrub the toe bumper.
The rubber has a texture. Dirt gets stuck in the tiny holes. Scrub back and forth. Scrub up and down.
2. Using the Magic Eraser
Do you have scuff marks? Black lines on the rubber? This is where the Magic Eraser shines.
Wet the eraser. Squeeze it out. Rub the scuff mark gently. The eraser acts like very fine sandpaper. It buffs away the top layer of dirt.
Warning: Only use the Magic Eraser on the rubber sole. Do not use it on the leather upper. It can ruin the leather finish. It is great to remove scuffs from rubber soles, but keep it off the paint!
3. The Textured Grip
Look at the bottom of the shoe. There is a pattern. Use your brush to dig out rocks or gum. If gum is stuck, use ice. Put ice on the gum to freeze it. Then scrape it off with a dull knife.
Phase 4: Deep Cleaning Laces and Insoles
Your shoes are clean. But your laces are dirty. Dirty laces make clean shoes look bad.
How to Clean Laces
You can put laces in the washing machine. Put them in a mesh bag first. But I prefer hand washing. It is faster.
- Fill a bowl: Use warm water.
- Add soap: Dish soap is fine.
- Soak: Put the laces in. Let them soak for 15 minutes. This loosens the grime.
- Scrub: Take the laces out. Rub them together in your hands. Like you are washing your hands.
- Rinse: Rinse under cold water until soap is gone.
- Dry: Hang them up to air dry.
What About Insoles?
The insole is the part inside. It can smell bad.
- Take them out if you can.
- Sprinkle baking soda on them. Let it sit overnight. This kills smells.
- In the morning, shake off the powder.
- Scrub with a damp cloth and soap. Do not soak them. Foam takes a long time to dry.
Dealing with Tough Stains
Sometimes soap is not enough. You might have grass stains. You might have oil. Let’s look at specific problems.
Grass Stains
Did you walk through a park? Grass leaves green streaks.
The Fix: White vinegar. Mix vinegar and water (50/50). Dip a cloth in it. Rub the stain gently. The acid breaks down the plant color.
Oil or Grease
Did you drop food on your shoe?
The Fix: Cornstarch or baby powder. Cover the oil spot with powder. Let it sit for an hour. The powder sucks up the oil. Brush it off. Then clean with soap.
Ink Marks
Did a pen mark your shoe?
The Fix: Rubbing alcohol. Put a tiny drop on a cotton swab. Dab the ink. Do not rub hard. Just dab. The ink should transfer to the cotton. Be careful. Alcohol can dry out leather. Use a leather conditioner after.
Yellowing Soles
This is the hardest problem. Soles turn yellow due to oxidation. Oxygen reacts with the rubber.
The Fix: You can buy “Sole Sauce” online. Or use hydrogen peroxide.
- Buy 40 volume cream developer (from a hair supply store).
- Paint it on the yellow rubber.
- Wrap the shoe in clear plastic wrap.
- Set it in the sun for an hour. The UV light activates the cream.
- Rinse it off.
This helps restore yellowed sneaker soles. But be careful. Do not get the cream on the leather.

Credit: www.ebay.com