Clean, sand, and use a flexible contact or neoprene adhesive to reattach and seal the footbed.
I repair and restore sandals for a living and have fixed hundreds of peeling footbeds. This guide shows exactly how to fix peeling sandal footbed material. You will learn clear steps, safe glue choices, material-specific fixes, and prevention tips. Read on to restore comfort and extend the life of your favorite sandals.

Understand why sandal footbeds peel
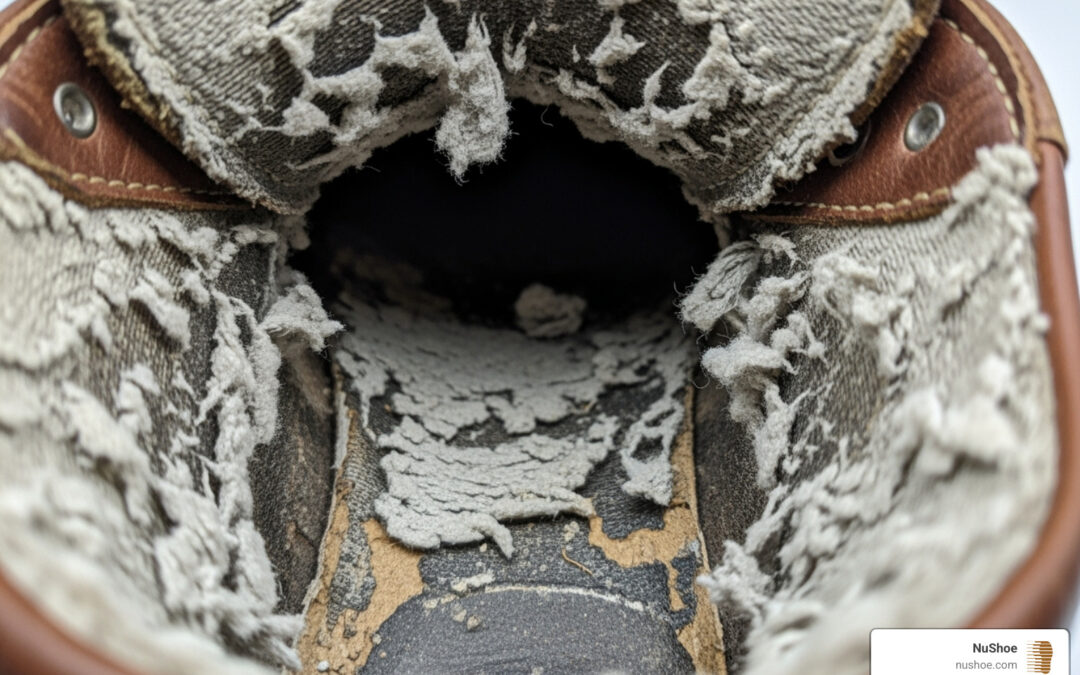
Peeling starts when glue, coating, or top layers separate from the base. Heat, sweat, repeated bending, and low-quality glue speed this up. Old adhesives dry and lose flexibility. Dirt and oils block good bonding.
Common causes:
- Poor factory glue or thin top layers.
- Wear from friction and sweat.
- Exposure to sun and heat that dries adhesives.
- Water saturation in foam or cork bases.
Knowing the cause helps pick the right fix. If you fix the symptom but not the cause, the peel will come back. This is the core idea behind how to fix peeling sandal footbed material. Keep the base clean and pick a flexible adhesive for long-term hold.

Tools and materials you will need
Choose the right tools and glue for the job. The wrong adhesive makes the problem worse.
Essentials:
- Contact cement or neoprene cement for flexible bonds.
- Flexible fabric or leather glue for suede or leather footbeds.
- Polyurethane adhesive for foam repairs.
- Isopropyl alcohol or denatured alcohol for cleaning.
- Sandpaper 120–220 grit and a small sanding block.
- Soft cloths, cotton swabs, and toothpicks.
- Weights, clamps, or rubber bands to hold parts while curing.
- Cork filler or leather dye for cosmetic touch-ups.
- Clear flexible sealer or shoe protectant spray.
Selecting the right glue matters. For most synthetic footbeds, use neoprene or contact cement. For leather, use leather glue. For cork or foam, use specialty fillers and flexible adhesives. These choices form the backbone of how to fix peeling sandal footbed material.
Step-by-step repairs for common footbed types
Follow simple steps. Work slowly. Test on a small area first.
General prep steps:
- Clean the footbed with alcohol and a cloth to remove oil and dirt.
- Let it dry fully for at least 15 minutes.
- Lightly sand both surfaces to roughen them for better adhesion.
- Remove dust with a dry cloth.
Synthetic and EVA foam footbeds
Synthetic and EVA foam are common and need a flexible glue.
Steps:
- Clean with isopropyl alcohol. Let dry.
- Sand lightly where peeling begins.
- Apply a thin, even coat of contact or neoprene cement to both surfaces.
- Wait the glue tack time per instructions (usually a few minutes).
- Press firmly and clamp or weigh down for the recommended cure time.
- Trim loose bits and tuck edges with a toothpick.
Tips:
- Use small clamps with soft pads to avoid marking the foam.
- Avoid excess glue; it can soak into foam and stay tacky.
This is a reliable method when you need to know how to fix peeling sandal footbed material on foam types.

Leather and suede footbeds
Leather needs adhesives that stay flexible and won't darken the leather.
Steps:
- Clean with a damp cloth and mild soap for stains, then flush with water and dry.
- Use leather prep or rubbing alcohol for the glue zone.
- Lightly scuff with 220-grit sandpaper.
- Apply leather-specific adhesive or flexible contact cement.
- Clamp gently and let cure. For suede, press with a cloth to avoid marking.
- Use leather dye or polish to blend repairs if needed.
Tips:
- Test glue on a hidden area first to check color change.
- For worn suede, consider a thin suede patch glued and blended.
Knowing how to fix peeling sandal footbed material for leather is mostly about choosing the right adhesive and avoiding over-saturation.

Cork footbeds
Cork footbeds can crumble if not handled gently. Use cork filler and a flexible glue.
Steps:
- Remove loose crumbles with a soft brush.
- Clean with alcohol and dry.
- Use a flexible cork adhesive or polyurethane glue on the bond zone.
- For missing chunks, apply cork filler in layers, let dry, then sand smooth.
- Seal the cork with a flexible sealer to reduce future water damage.
Tips:
- Avoid soaking cork; too much moisture causes expansion and new peeling.
- Use thin layers for filler to avoid cracking.
This approach explains how to fix peeling sandal footbed material when the base is cork.

Drying, curing, and finishing advice
Curing is as important as bonding. Rushing leads to weak repairs.
Key rules:
- Follow manufacturer cure times on glue labels exactly.
- Use steady pressure for the full cure period. Short bursts do not work.
- Avoid heat guns unless the glue recommends heat curing; too much heat can warp foam.
- After cure, sand any excess glue and finish with dye or sealer if needed.
Finish steps:
- Apply a thin flexible sealer or protectant spray.
- Let the sandals sit unused for 24 hours before wearing.
- Test a small step indoors before a full walk.
Good cure practices finish the lesson on how to fix peeling sandal footbed material right.

Preventive care to stop peeling from returning
Prevention is cheap and easy. It extends repair life.
Daily habits:
- Keep sandals clean and dry after use.
- Rotate footwear to let adhesives rest.
- Avoid storing in hot cars or direct sun.
- Use a protectant spray for leather, suede, or cork.
- Replace worn sandals before multiple layers start to delaminate.
Seasonal care:
- Reapply sealer yearly if you wear sandals heavily.
- Inspect footbeds for bumps, soft spots, or small lifts and fix early.
These steps help prevent the need to redo how to fix peeling sandal footbed material months later.

When to replace or seek professional repair
Some damage needs a pro or new sandals. Know your limits.
Signs you should replace or go pro:
- The core foam or cork is mushy or deeply cracked.
- Multiple delamination points across the footbed.
- Structural sole damage or detached straps.
- When repairs cost more than a good replacement.
Professional cobblers can re-sole or replace footbeds and match materials. If you are unsure, ask a local repair shop for an estimate. This helps you decide whether to DIY how to fix peeling sandal footbed material or get expert help.
Troubleshooting common problems
If the first repair fails, try these checks.
Problem: Glue stays tacky
- Cause: Glue soaked into foam or humidity prevented curing.
- Fix: Clean excess, let dry fully in a warm, dry room, reapply recommended glue.
Problem: Edge lifts return after a week
- Cause: Dust or oils prevented good bonding, or pressure wasn’t maintained.
- Fix: Re-clean, sand, and use clamps or weights for the full cure period.
Problem: Color change after glue
- Cause: Wrong adhesive for leather or suede.
- Fix: Use a leather-safe glue next time and test first on an unseen spot.
Problem: Repair stiffens the footbed
- Cause: Non-flexible adhesive used.
- Fix: Remove excess hardened glue where possible and redo with a flexible adhesive.
These tips refine your approach to how to fix peeling sandal footbed material and save time.
Frequently Asked Questions of how to fix peeling sandal footbed material
What glue works best for synthetic footbeds?
Use neoprene or contact cement. These adhesives stay flexible and bond well to plastic-like materials.
Can I use super glue on a peeling footbed?
Super glue is too rigid for most footbeds. It may bond short-term but will crack and fail with walking flex.
How long should I wait before wearing sandals after repair?
Wait at least 24 hours or the full cure time on the glue label. Rushing use risks delamination.
Will cleaning the footbed remove peeling?
Cleaning alone won’t fix peeling but is essential prep. You must clean, sand, and glue to re-bond surfaces.
Is it cheaper to repair or replace sandals?
Minor peeling repairs are cheap. Severe damage or worn-out soles often justify replacement costs.
Can I do a full footbed replacement at home?
Yes, with the right materials and tools you can replace a footbed, but it takes more skill and time than simple glue repairs.
Conclusion
Fixing peeling sandal footbed material is simple when you use the right prep, the right adhesive, and allow full cure time. Clean the area, sand lightly, pick a flexible glue for the material, clamp while curing, and seal the finish. Small fixes save money and keep sandals comfy.
Take action today: inspect a peeling pair, pick the correct adhesive from this guide, and try a small repair. If you need help, share a photo or ask a cobbler for a quick estimate. Leave a comment with your repair result or questions — I’ll help troubleshoot.

Rubel Miah is the Senior Editor at MyStyleGrid.com, where he brings a sharp editorial eye and an unshakable love for fashion to everything he does. A true style addict, Rubel lives and breathes trends, from streetwear to high fashion, and has a knack for turning inspiration into impactful stories. With years of experience in fashion journalism and digital media, he curates content that empowers readers to express themselves through style. When he’s not editing features or forecasting the next big thing, you’ll find him hunting down vintage pieces or capturing street style moments around the city.