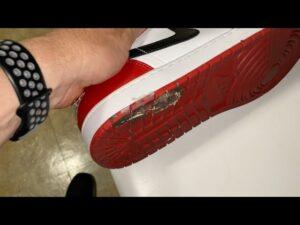
Repair a torn boot toe cap by cleaning, filling, gluing, and sealing for a near-original finish.
I’ve spent years fixing boots for friends, tradespeople, and my own worn pairs. This guide explains how to repair damaged boot toe cap step by step, with clear methods for leather, rubber, and capped safety toes. Read on to learn the tools, materials, and techniques that work reliably, plus tips I learned the hard way so you avoid common mistakes.

Why boot toe caps get damaged
Toe caps take the first impact and wear. Scuffs, cuts, separation, and holes happen from repeated knocks, rough surfaces, and moisture. Knowing the cause helps you pick the right repair method.
Most damage shows up as:
- Scuffs and abrasions on leather or synthetic overlays.
- Separation of the toe cap from the sole or upper.
- Punctures or holes from sharp objects.
- Deformed or cracked rubber or plastic toe protectors.
When you know why your toe cap failed, you can decide if a repair will last or if replacement is safer. I once repaired a leather toe cap that kept peeling because I skipped proper cleaning; lesson learned.

Types of toe caps and how that affects repair
Not all toe caps are the same. The repair method depends on the material and construction.
- Leather overlay cap: Common on dress and casual boots, made from the boot’s upper leather shaped over the toe.
- Rubber or molded synthetic cap: Found on work boots and casual shoes for extra protection.
- Steel, composite, or aluminum safety cap: A hard insert under the toe box. Damage usually affects the upper or the cap’s surrounding material rather than the cap itself.
Choose a repair plan that matches the cap type. For example, fixing a leather overlay uses leather filler and polish, while rubber caps need flexible adhesives and patch materials.

Tools and materials you’ll need
Use the right tools to make repairs last. Gather these before you start.
- Soft cloths and brushes for cleaning.
- Mild leather cleaner or rubbing alcohol for synthetic materials.
- Sandpaper: 220–400 grit for scuffing surfaces.
- Flexible contact cement or urethane adhesive.
- Leather filler, rubber cement, or flexible epoxy depending on material.
- Small spatula or palette knife to apply filler.
- Edge dressing, leather dye, or shoe polish to finish color.
- Clamps, rubber bands, or heavy weights to keep parts pressed while glue cures.
- Optional: toe cap patch, replacement overlay, and sewing awl for heavy repairs.
I keep a small repair kit in my shed. It saves time when a favorite pair needs a quick fix.
Step-by-step: how to repair damaged boot toe cap — leather overlay
This method fixes holes, deep scuffs, and separated leather toes.
- Clean and dry the area.
- Remove dirt and oils. Use a mild leather cleaner or a damp cloth and let the leather dry fully.
- Remove loose material and scuff the surface.
- Gently sand the area to create tooth for glue and filler.
- Reattach separated areas.
- Apply flexible contact cement under the loose edge. Press firmly and clamp for the recommended time.
- Fill holes and deep gouges.
- Use a leather filler in thin layers. Smooth with a spatula. Let each layer dry before applying the next.
- Sand and blend.
- Once dry, lightly sand to level the patch with surrounding leather.
- Dye and finish.
- Apply color-matching leather dye or polish. Top with a protective leather conditioner or edge dressing.
I once repaired a boot with a deep tear using thin layered filler and slow drying. The layered approach prevented cracking later.

Step-by-step: how to repair damaged boot toe cap — rubber or molded toes
Rubber caps need flexibility and a different approach.
- Clean thoroughly.
- Use warm soapy water for dirt, then rubbing alcohol to remove oils.
- Roughen the surface.
- Lightly sand both the patch area and any patch material.
- Use a flexible adhesive.
- Apply a rubber cement or a urethane adhesive. For holes, place a patch behind the hole first, then glue.
- Fill gaps if needed.
- Use a flexible filler designed for rubber. Apply thin layers and cure fully.
- Smooth and protect.
- Sand lightly and apply waterproof sealant if the boot will see wet use.
When I patched a rubber toe that had a pinhole, I used a small internal patch plus adhesive. That combination holds well under heavy flex.

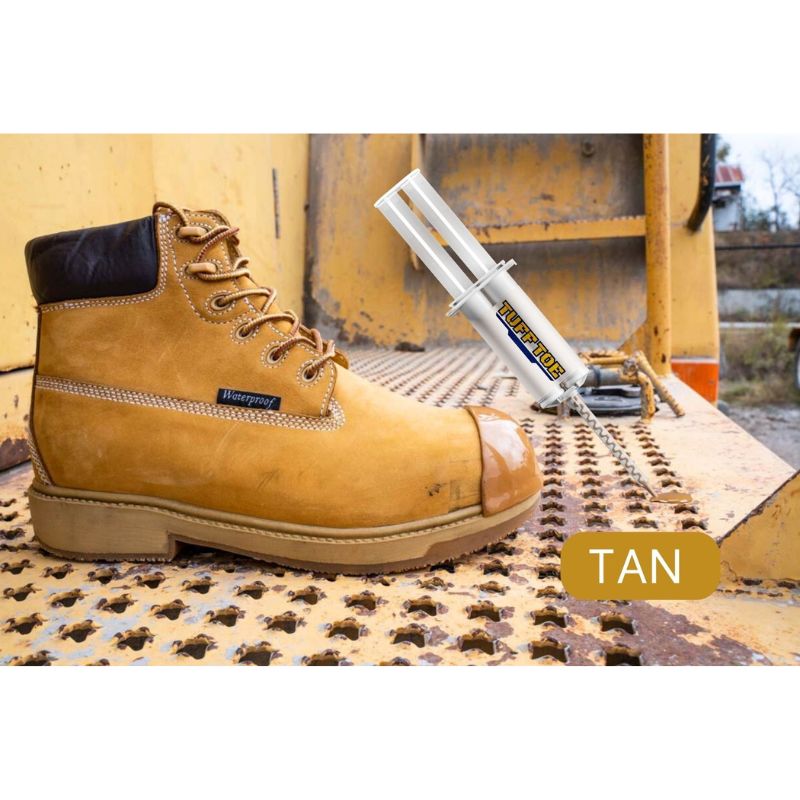
Repairing boots with steel or composite toe inserts
Damage often affects the outer material rather than the insert itself. Here’s how to handle it.
- Inspect the insert first.
- If the steel or composite cap is bent or cracked, replace the boot. Repairing a compromised safety cap is unsafe.
- Fix the upper material.
- Use leather or rubber repair techniques to restore the outer covering around the insert.
- Re-seat or replace liners.
- If the lining is damaged, replace or patch it to maintain comfort and protection.
I always advise tradespeople: don’t risk a compromised safety toe. If the insert is damaged, replacement is the only safe option.

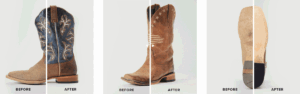
When to repair vs replace
Decide based on safety, cost, and durability.
-
Repair if:
- Damage is limited to surface scuffs, small holes, or a separated overlay.
- The safety insert is intact and the structure is solid.
- You want a low-cost solution for cosmetic or minor functional fixes.
-
Replace if:
- The steel or composite toe is cracked or bent.
- The sole is failing along with the toe cap.
- Repair costs approach replacement price.
I replaced boots once after underestimating a hidden insert crack. That taught me to inspect inside the toe box before investing time in repairs.

Maintenance and prevention tips
Prevent damage to extend boot life. Simple habits pay off.
- Keep boots clean and dry.
- Dirt and salt speed breakdown of materials.
- Condition leather regularly.
- A conditioned toe cap resists cracks and scuffs.
- Use toe guards or protective overlays for work boots.
- These add a sacrificial layer to take hits.
- Rotate footwear.
- Regular rest reduces continuous wear on a single pair.
I’ve seen boots last years longer with basic care. A few minutes each month prevents big repairs.

Common mistakes and troubleshooting
Avoid these pitfalls to make repairs last.
- Skipping cleaning before gluing.
- Oil and dirt stop adhesives from bonding.
- Using rigid glue on a flexible toe.
- The repaired area will crack under flex.
- Rushing curing times.
- Pressure and patience matter. Allow full cure.
- Ignoring underlying damage.
- Surface fixes won’t help if the toe insert is compromised.
If a repair keeps failing, reassess the material and adhesive. Try a different filler or a professional cobbler if in doubt.
Personal experience and lessons learned
I’ve repaired dozens of boots over the years. Here are three real lessons I learned the hard way.
- Clean first, always. Once I skipped alcohol clean-up and the glue popped off in a week.
- Layer filler thinly. Thick filler shrinks and cracks; thin layers bond better.
- Know when to stop. A cracked safety toe means replacement, not repair.
These small rules keep repairs effective and boots dependable.
Frequently Asked Questions of how to repair damaged boot toe cap
What adhesive is best for repairing a leather toe cap?
Use a flexible contact cement or a urethane-based adhesive. They bond well and remain flexible for daily flex.
Can I repair a hole in a rubber toe cap myself?
Yes. Clean, patch from the inside, and use flexible rubber cement or urethane. Let each layer cure fully for durability.
How long does a toe cap repair take to cure?
Cure time varies by product but expect at least 24 hours for full strength. Some adhesives need up to 48 hours for best results.
Is it safe to repair a damaged steel toe?
If the steel toe itself is cracked or bent, do not repair—replace the boot. Repairs should only touch the outer material.
Will dyed leather look different after repair?
Some color variation can happen. Use matching leather dye and work in thin layers to blend for a near-original look.
Conclusion
You can extend boot life by learning how to repair damaged boot toe cap properly. Clean the area, pick the right filler and adhesive, and take your time to layer and cure. For safety toes, inspect the insert first and replace if compromised. Try a basic repair on small damage, and seek professional help for complex or safety-critical issues. Share your repair success or questions below, subscribe for more shoe-care tips, or leave a comment with your boot type and problem to get tailored advice.

Rubel Miah is the Senior Editor at MyStyleGrid.com, where he brings a sharp editorial eye and an unshakable love for fashion to everything he does. A true style addict, Rubel lives and breathes trends, from streetwear to high fashion, and has a knack for turning inspiration into impactful stories. With years of experience in fashion journalism and digital media, he curates content that empowers readers to express themselves through style. When he’s not editing features or forecasting the next big thing, you’ll find him hunting down vintage pieces or capturing street style moments around the city.