Are your snowboard boots feeling loose or uncomfortable on the slopes? Getting the perfect fit can make all the difference between an amazing ride and a frustrating day.
You want your boots snug enough to give you control but not so tight that they cause pain. Learning how to tighten your snowboard boots properly is key to improving your performance and keeping your feet happy. In this guide, you’ll discover simple, effective steps to adjust your boots just right—so you can focus on shredding the mountain with confidence.
Keep reading to find out how to get that perfect fit every time!
Choosing The Right Fit
Choosing the right fit is the first step to tightening your snowboard boots comfortably. A good fit ensures better control and less foot pain on the slopes. It is important to pick boots that match your foot size and shape well. This helps in tightening them properly without causing discomfort.
Check Boot Size
Start by checking the boot size carefully. Boots that are too big will feel loose even when tightened. Boots that are too small will squeeze your toes uncomfortably. Try on boots and stand up to see if your toes can move slightly. Your heel should stay in place without lifting.
Assess Boot Volume
Boot volume means the space inside the boot around your foot. Some boots have a narrow volume, while others are wider. Choose a volume that matches your foot width and shape. If the volume is too large, use volume reducers or thicker insoles to fill the space. This helps the boots tighten better around your foot.
Select Proper Socks
Wear the right socks for snowboarding. Thin, moisture-wicking socks work best. Thick socks can make your boots feel tight, but they may cause pressure points. Avoid cotton socks as they hold moisture and cause cold feet. Proper socks improve comfort and help boots fit snugly.
Credit: japan-skiguide.com
Preparing Your Boots
Preparing your snowboard boots correctly is the first step to a comfortable and secure fit. Taking time to set them up helps avoid foot pain and improves your control on the board.
Each part of the process matters. Follow simple steps to get your boots ready for tightening.
Loosen All Laces
Start by loosening all the laces or tightening systems completely. This gives your feet room to slide in easily without pressure points. It also lets you adjust the fit evenly from top to bottom.
Wear Boots Standing Up
Put on your boots while standing. This helps your feet settle naturally under your weight. Sitting or lying down can change the shape of your foot and lead to a wrong fit.
Position Foot Properly
Make sure your heel is snug in the back of the boot. Your toes should rest comfortably without being cramped. Check that your foot is centered and flat inside the boot for the best support.
Lacing Techniques
Lacing snowboard boots correctly is key to a comfortable and secure fit. Proper lacing keeps your feet stable and prevents pain during rides. Different lacing methods offer varying levels of tightness and support. Understanding these techniques helps you adjust your boots to match your needs. Below are some common and effective lacing techniques to tighten your snowboard boots.
Standard Lace Tightening
The standard lace tightening method is simple and effective. Start by pulling the laces evenly from the bottom to the top. Make sure each eyelet is snug before moving up. This method keeps pressure balanced across your foot. It reduces hotspots and keeps your boot secure without being too tight. Always tie a firm knot to prevent loosening during snowboarding.
Twist And Pull Method
The twist and pull method focuses on tightening specific sections. Begin by twisting the laces at each set of eyelets. This action locks the lace in place temporarily. Then pull the laces tight to increase pressure. This technique helps you control tightness in different boot areas. It is useful for adjusting the fit around the ankle or instep. Use this method to avoid uneven pressure and improve comfort.
Locking Laces At Key Points
Locking laces at key points prevents them from loosening. After tightening, create small loops at important areas like the ankle or top of the foot. Wrap the lace around these loops before tying the final knot. This locks the laces and keeps tension steady. It works well for long rides or rough terrain. Locking laces at key points helps maintain a consistent fit all day.
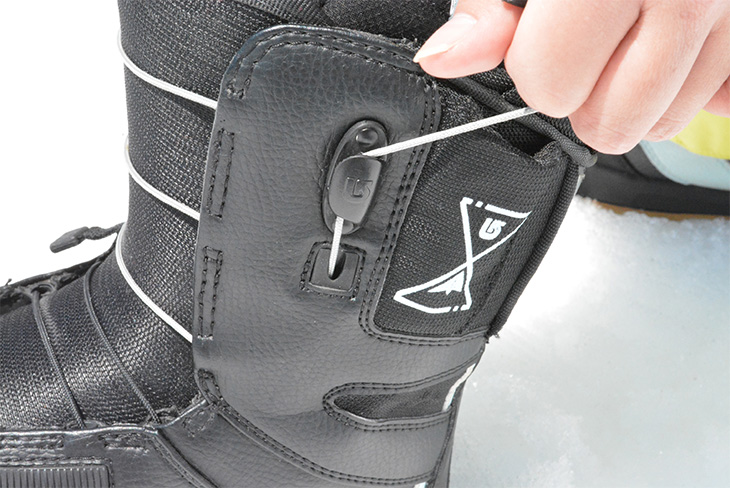
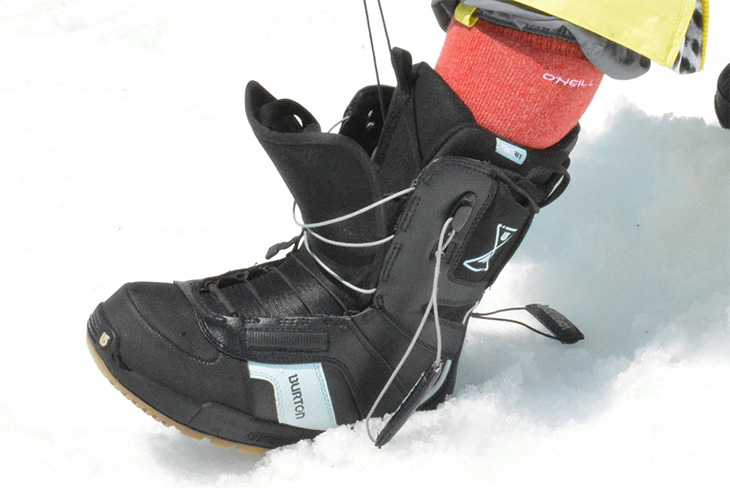
Using Boa Systems
Using BOA systems is a simple and effective way to tighten snowboard boots. This system uses a dial and strong cables to secure your foot firmly. It offers quick adjustments on the slopes without retying laces. Many riders prefer BOA for its convenience and precise fit. Follow the steps below to use your BOA system correctly and comfortably.
Engaging The Dial
Start by placing your foot inside the boot. Press down firmly to settle your foot. Turn the BOA dial clockwise to tighten the cables. You will feel the cables pull snug around your foot. Keep turning until the fit feels secure but not painful. The dial clicks to show each step of tightening. This makes it easy to find the right tension.
Adjusting Upper And Lower Zones
Many BOA systems have separate dials for upper and lower zones. Adjust each dial to fit these areas comfortably. Tighten the lower zone first around the foot’s arch. Then adjust the upper zone near the shin for added support. This two-zone adjustment helps balance comfort and control. You can fine-tune each area for the best fit.
Releasing Tension Safely
To loosen your boots, pull the BOA dial outward. This releases the cable tension quickly and safely. Do not force the dial or cables. After release, remove your foot carefully from the boot. This quick-release feature makes BOA systems very user-friendly. It also prevents damage to the cables and boot.
Adding Insoles And Volume Reducers
Tightening snowboard boots improves control and comfort on the slopes. Adding insoles and volume reducers adjusts the fit inside the boot. These tools help create a snug feeling without causing pain. Using the right insole type targets specific foot areas. Volume reducers reduce extra space for a tighter fit.
Flat Insoles For Even Tightness
Flat insoles add a thin layer under your feet. They raise your foot evenly inside the boot. This reduces loose space all around your foot. Flat insoles work well for boots that feel loose everywhere. They keep your foot steady and improve overall boot tightness. Choose insoles made of foam or gel for comfort.
Arch Cushioned Insoles For Instep Fit
Arch cushioned insoles add support under your foot’s arch. This lifts your instep and fills gaps in the boot. Arch support stops your heel from slipping up and down. It also helps keep your foot from sliding forward. These insoles make boots fit snugger around the middle of your foot. They are great for boots that feel loose on top.
Volume Reducers For Larger Boots
Volume reducers are pads placed around the foot inside the boot. They fill extra space in boots that feel too large. These pads can go on the sides, heel, or tongue area. Volume reducers help hold your foot firmly in place. They prevent your foot from moving inside the boot. Use them when thick socks or insoles are not enough.
Preventing Common Fit Issues
Properly tightening snowboard boots prevents common fit problems that reduce comfort and control. Ill-fitting boots cause pain, blisters, and poor performance. Understanding how to adjust your boots helps avoid these issues. Focus on key areas like heel lift, toe pressure, and overall boot pain for a better ride.
Avoiding Heel Lift
Heel lift occurs when your heel moves up inside the boot. This reduces control and can cause blisters. To stop this, tighten the boot laces firmly around the ankle. Use the boot’s inner liner to lock your heel in place. Adding heel pads or thicker socks can also help fill extra space. Make sure the boot fits snugly but not too tight to cut circulation.
Managing Toe Pressure
Too much pressure on your toes causes pain and numbness. Your toes should lightly touch the front of the boot without being squeezed. Loosen the toe area if you feel discomfort. Adjust the lacing system to spread pressure evenly across your foot. Wearing thinner socks can reduce tightness in the toe box. Check that your boots are not too small for your feet.
Dealing With Boot Pain
Pain in your boots often means poor fit or tightness. Identify the pain spots and adjust laces or straps accordingly. Use custom insoles to improve support and cushioning. Try heat molding liners if your boots allow it; this shapes them to your feet. Take breaks to relieve foot pressure and prevent long-term discomfort. Proper fit keeps your feet comfortable all day on the slopes.
Maintaining Tightness On The Slopes
Keeping your snowboard boots tight on the slopes is key to control and comfort. Boots can loosen after long rides or from cold weather. Maintaining the right tightness helps prevent foot pain and improves your balance. A loose fit can cause slipping inside the boot, reducing your performance and increasing injury risk.
Check your boots regularly during the day. Small adjustments can make a big difference. Carry a simple tool or be ready to fix laces quickly. Staying aware of your boots’ fit keeps your ride smooth and safe.
Re-tightening Tips
Stop and tighten your boots after every few runs. Pull the laces or straps firmly but not too tight. Start from the toes and move upward. Make sure the heel stays locked in place. Avoid over-tightening to keep blood flow steady. A good rule is to feel snug but comfortable.
Handling Laces In Cold Weather
Cold makes laces stiff and harder to handle. Use gloves with good grip or take them off briefly. Warm your hands before adjusting laces. Slow and steady movements prevent snapping or breaking. If laces freeze, warm them up gently with your hands or inside your jacket.
Quick Adjustments During Riding
Sometimes, boots loosen mid-ride. Use quick-pull systems like BOA or Velcro straps for fast fixes. Stop on a flat spot to adjust safely. Tighten only enough to feel secure again. Avoid long stops that cool your feet too much. Small tweaks keep your ride comfortable and safe.
Credit: japan-skiguide.com
Credit: www.rei.com
Frequently Asked Questions
How Do I Make My Boots Fit Tighter?
Add cushion insoles or volume reducers to snug the fit. Tighten laces or BOA dials firmly, focusing on upper and lower boot areas. Use thinner socks for better fit.
How To Fix Snowboard Boots Too Big?
Use volume reducers or thicker insoles to snug the fit. Try thinner socks or footbeds. Tighten laces or BOA dials firmly for better hold.
Are My Snowboard Boots Too Loose?
Your snowboard boots are too loose if your heel lifts or your foot slides inside. To check, stand and flex; your toes should just touch the front without cramping. Tighten laces or use insoles to improve fit and control.
How To Keep Snowboard Boot Laces Tight?
Twist snowboard boot laces tightly like starting to tie shoes. Pull firmly, then lace up through each eyelet. Use BOA dials if available.
Conclusion
Tightening snowboard boots improves control and comfort on the slopes. Start by adjusting laces or BOA systems evenly. Use insoles or volume reducers to fix loose fit issues. Check your boots often to avoid discomfort or injuries. Properly tightened boots help you ride better and stay safe.
Keep practicing these steps before every ride. Enjoy your snowboarding experience with boots that fit just right.

Madison Clark is a footwear expert and the voice behind MyStyleGrid.com. She specializes in honest shoe reviews, style tips, and practical guides to help readers find the perfect pair for any occasion. With years of experience in blogging and content creation, Madison makes footwear knowledge simple, stylish, and easy to follow.