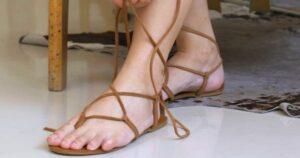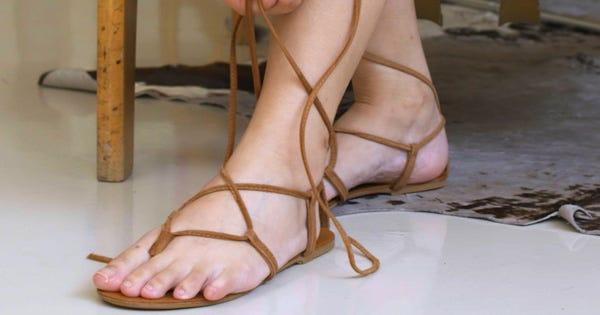
Tie gladiator sandals by crossing the straps evenly, wrapping them securely, and finishing with a firm, comfortable knot.
Gladiator sandals can look stylish, but the straps may feel confusing at first. The best fit keeps the sandal snug without squeezing your foot or cutting into your skin. This guide explains how to tie gladiator sandals with simple steps, useful styling tips, and comfort checks that work for flat, ankle-wrap, and knee-high designs.
Understand Your Gladiator Sandals
Gladiator sandals use several straps to hold the foot in place. Some styles stop at the ankle, while others wrap around the calf or reach near the knee. The tying method depends on the strap length, buckle design, and sandal shape.
Before you learn how to tie gladiator sandals, identify the main parts:
• Footbed: The base that sits under your foot.
• Toe strap: The strap near your toes. It helps stop your foot from sliding forward.
• Cross straps: Straps that pass over the top of your foot.
• Ankle straps: Straps that secure the sandal around your ankle.
• Wraparound straps: Long straps that wind around your ankle or lower leg.
• Ties or buckles: The fasteners that hold the sandal in place.
Place the sandal on the correct foot first. The sandal should match the shape of your arch and toes. Your heel should sit inside the back edge, and your toes should not hang over the front.
A good gladiator sandal should feel like a supportive hand, not a tight band. If a strap leaves deep marks within a few minutes, loosen it or try a larger size.

How to Tie Gladiator Sandals Step by Step
Learning how to tie gladiator sandals becomes easy when you work from the foot upward. Do not pull every strap tight at once. Start with a balanced fit, then make small changes.
1. Place your foot correctly
Stand or sit with your heel fully against the back of the sandal. Keep your foot flat on the footbed. Your toes should point forward and rest naturally.
Check that your foot does not slide sideways. If it does, the sandal may be too wide or the straps may need a better adjustment.
2. Secure the toe area
Fasten the lowest strap first. It should sit across the base of your toes or the widest part of your foot. Leave enough space to move your toes.
The strap should not press on the joints of your toes. A small gap is useful because feet often swell during warm weather or after long walks.
3. Adjust the middle straps
Move upward and secure each strap across the top of your foot. Keep the tension even on both sides. The straps should hold your foot down without stopping normal movement.
Try the simple finger test. You should be able to slide one finger under most straps. For a thin strap, use lighter pressure because narrow material can feel tighter than a wide strap.
4. Cross long straps at the ankle
If your sandals have long ties, bring each strap toward the opposite side of your ankle. Cross them once in front or behind the ankle, depending on the design.
This cross pattern helps spread pressure. It also reduces the chance of the straps slipping down as you walk.
5. Wrap the straps around your ankle
Wrap the straps around the narrowest comfortable part of your ankle. Keep each turn flat. A twisted strap can rub the skin and create a sore spot.
For a cleaner look, wrap the straps in the same direction. For extra support, use one cross at the front before wrapping the remaining length around the ankle.
6. Tie a secure knot
Finish with a flat knot, small bow, or the closure recommended by the brand. A double knot can help during walking, but avoid tying it so tightly that you cannot loosen it easily.
Place the knot where it will not rub against your ankle bone. Many people find the front or outer side of the ankle more comfortable than the back.
7. Walk and check the fit
Walk for two or three minutes on a safe, clean surface. Notice whether your heel lifts, your toes grip the footbed, or the straps move.
If you feel rubbing, stop and adjust the sandal. It is better to fix a small issue at home than deal with a blister halfway through the day.
Three Ways to Tie Gladiator Sandals
Different looks call for different wrapping methods. These methods work best with sandals that have long leather, fabric, or synthetic straps.
The classic ankle wrap
The classic ankle wrap is simple and works well for short gladiator sandals.
-
Cross the straps over the top of your foot.
-
Bring them around the ankle.
-
Cross them once at the front.
-
Tie a small bow on the outer ankle.
-
Tuck the loose ends under the nearest wrap.
This style looks neat with shorts, jeans, skirts, and casual dresses. Keep the bow small so it does not catch on furniture or brush against the other foot.
The crisscross leg wrap
The crisscross leg wrap creates a bold look for sandals with longer straps.
-
Start with the straps at the ankle.
-
Cross the right strap toward the left side of the leg.
-
Cross the left strap toward the right side.
-
Repeat the pattern as you move upward.
-
Finish with a flat knot below the widest part of the calf.
Keep the crossings loose and even. Do not wrap over the widest part of your calf if the straps feel tight. That area changes in size as you move, and tight straps can become uncomfortable.
The low double wrap
The low double wrap keeps the focus near the ankle.
-
Cross the straps once above the foot.
-
Wrap them around the ankle twice.
-
Tie the ends at the outer side.
-
Tuck away any long tails.
This method suits minimal outfits and short dresses. It also works well when the upper leg is bare and you want a clean, simple finish.

How Tight Should Gladiator Sandals Be?
A secure sandal should hold your foot in place but should not cause pain. The correct tension can change during the day, especially in hot weather.
Use these checks after you tie gladiator sandals:
• Your toes can move freely.
• Your heel stays on the footbed while you walk.
• The straps do not leave dark or deep marks.
• You do not feel tingling, numbness, or burning.
• The sandal does not slide from side to side.
• You can loosen the straps without removing the sandal.
Your feet may swell after standing or walking for a long time. This is common, but swelling can make tight straps feel much worse. If you plan to wear gladiator sandals for several hours, leave a little room when you first put them on.
People with diabetes, reduced foot feeling, circulation problems, or recurring foot pain should take extra care. A podiatrist can offer personal advice because the best sandal fit depends on foot shape and health.
Common Mistakes to Avoid
Many problems come from tying the sandals too quickly. A few simple changes can improve both comfort and appearance.
Tying the straps too tightly
Tight straps may seem more secure, but they can press on nerves and soft tissue. They may also cause red marks and swelling.
Tie gladiator sandals so the straps rest against the foot without digging into it. If the sandal slips even when the straps feel tight, the size or shape may be wrong.
Leaving the straps twisted
Twisted straps create narrow pressure points. They can also make the sandal look uneven.
Run your fingers along each strap before tying it. Smooth the material so it lies flat against your skin.
Placing the knot at the back
The back of the ankle moves often during walking. A bulky knot there may rub against the Achilles area.
Try the outer ankle or front side instead. Test the placement with a short walk before wearing the sandals for a full event.
Wrapping too high
Long straps should not be wrapped tightly near the knee or over the widest part of the calf. The leg needs room to move, and the strap may slowly slide down.
Stop at the highest point that feels secure and comfortable. Style should never come before circulation or easy movement.
Ignoring the first warning signs
Warmth, tingling, stinging, and sharp rubbing are signs to adjust the sandal. Do not wait for a blister to form.
In my own sandal-fitting tests, the most common mistake has been focusing on the bow while ignoring the middle straps. A neat knot cannot correct a poor fit across the foot.

How to Make Gladiator Sandals More Comfortable
Comfort starts with the sandal, but the way you tie it also matters. These tips can help during daily wear.
• Break them in slowly: Wear the sandals at home for 15 to 30 minutes before taking them outside.
• Use skin protection: Apply a small amount of anti-chafing balm to areas that rub. Do not apply products that make the footbed dangerously slippery.
• Choose smooth materials: Soft leather and flexible fabric often feel gentler than stiff synthetic straps.
• Check the sole: A cushioned footbed may feel better for walking than a very thin, flat sole.
• Match the sandal to the activity: Save delicate sandals for short events. Choose supportive soles for sightseeing or long shopping trips.
• Carry a backup option: A small pair of foldable flats can be useful at weddings, festivals, or travel days.
If you already have a blister, cover it with a clean blister pad and avoid more rubbing until the skin heals. Do not continue wearing footwear that causes open wounds.
Styling Tips for Tied Gladiator Sandals
Gladiator sandals are easy to style because they can look relaxed, modern, or dramatic. The height and strap pattern affect the balance of your outfit.
Try these combinations:
• Ankle-wrap sandals with cropped jeans: The exposed ankle shows the straps and keeps the outfit casual.
• Flat gladiator sandals with a shirt dress: This creates an easy daytime look.
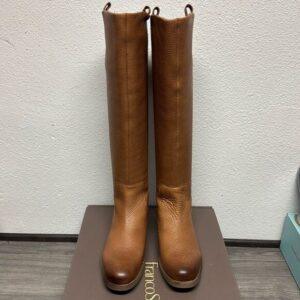
• Knee-high gladiator sandals with a short skirt: Keep the clothing simple so the sandals remain the main feature.
• Metallic sandals with a plain dress: Gold or silver straps can add interest without extra jewelry.
• Brown leather sandals with linen: Natural colors work well with summer fabrics.
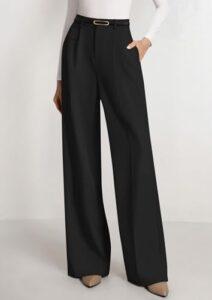
When you tie gladiator sandals, match the strap placement to your clothing. Long straps can compete with wide-leg pants or a busy print. In that case, a low wrap or ankle style may look more balanced.
The knot itself also affects the outfit. A small side bow feels soft and casual. A tucked knot gives a cleaner, more polished finish.
Choosing the Right Gladiator Sandal
The best tying method cannot fix a sandal that does not fit. Measure your feet at the end of the day, when they are often at their largest. Compare your measurements with the brand’s size chart because sizing can differ between brands.
Look for these features:
• Adjustable straps across the toes and ankle.
• A footbed that supports your arch.
• A heel area that keeps the foot centered.
• Flexible straps with smooth edges.
• A sole that bends near the toes, not through the middle.
• Enough toe room for natural movement.
If one foot is larger, fit the sandal to the larger foot. You can adjust the smaller side more easily than forcing the larger foot into a tight space.
Also consider your walking surface. Smooth soles may work indoors but can feel less stable on wet pavement. A textured outsole can provide better grip, though no sandal is completely slip-proof.
Care and Storage Tips
Proper care helps straps stay flexible and easier to tie. Dirt and sweat can make some materials stiff over time.
Wipe the sandals with a soft, damp cloth after wearing them. Follow the care instructions for leather, suede, or synthetic materials. Keep leather away from heavy soaking, direct heat, and strong household cleaners.
Store the sandals in a cool, dry place. Loosely wrap long straps instead of folding them sharply. This helps prevent permanent creases and makes the next tying session easier.
Before each wear, inspect the straps, stitching, buckles, and sole. Stop using the sandals if a strap is tearing or the sole is separating. A weak strap can fail without warning while you walk.

Frequently Asked Questions About How to Tie Gladiator Sandals
Should gladiator sandals be tied above or below the ankle?
Tie short gladiator sandals around the narrowest comfortable part of your ankle. Long styles can be wrapped higher, but they should not feel tight over the widest part of your calf.
How do you stop gladiator sandal straps from slipping?
Cross the straps once before wrapping them, keep each turn flat, and finish with a secure knot. If they still slip, the straps may be too smooth, too long, or poorly suited to your leg shape.
Can you tie gladiator sandals around your calves?
Yes, if the straps are designed for calf wrapping and do not restrict movement. Leave enough space for comfort, and avoid tying over areas where the straps create pressure or numbness.
How do you tie gladiator sandals without getting blisters?
Smooth every strap, avoid tight knots, and break in the sandals with short indoor wear. Anti-chafing balm or a protective blister pad can help reduce friction in sensitive areas.
Where should the knot go on gladiator sandals?
The outer ankle is often a comfortable place because it has less rubbing during walking. You can also place the knot at the front, but keep it small and flat.
Can gladiator sandals be worn for long walks?
Some supportive styles can work for moderate walking, especially when they have a cushioned footbed and stable sole. Thin fashion sandals may lack enough support for long distances, so choose footwear based on the activity.
Conclusion
Learning how to tie gladiator sandals is mainly about balance. Start at the toes, adjust the middle straps, cross the ankle ties, and finish with a secure knot that does not rub. Keep every strap flat, leave room for natural movement, and walk briefly to test the fit.
With these steps, you can wear ankle-wrap or tall gladiator sandals with more comfort and confidence. Try the method at home, adjust the tension to your feet, and share your favorite gladiator sandal styling tip in the comments.

Rubel Miah is the Senior Editor at MyStyleGrid.com, where he brings a sharp editorial eye and an unshakable love for fashion to everything he does. A true style addict, Rubel lives and breathes trends, from streetwear to high fashion, and has a knack for turning inspiration into impactful stories. With years of experience in fashion journalism and digital media, he curates content that empowers readers to express themselves through style. When he’s not editing features or forecasting the next big thing, you’ll find him hunting down vintage pieces or capturing street style moments around the city.