To make rope sandals, shape a sole, wrap strong rope, stitch each layer, and test the fit.
Learning how to make rope sandals is a simple craft with useful results. With the right rope, a firm sole, strong thread, and careful measuring, you can create sandals that feel personal and look handmade. This guide explains the full process, from choosing materials to adding straps and checking safety.

What Are Rope Sandals?
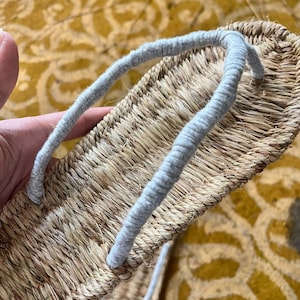
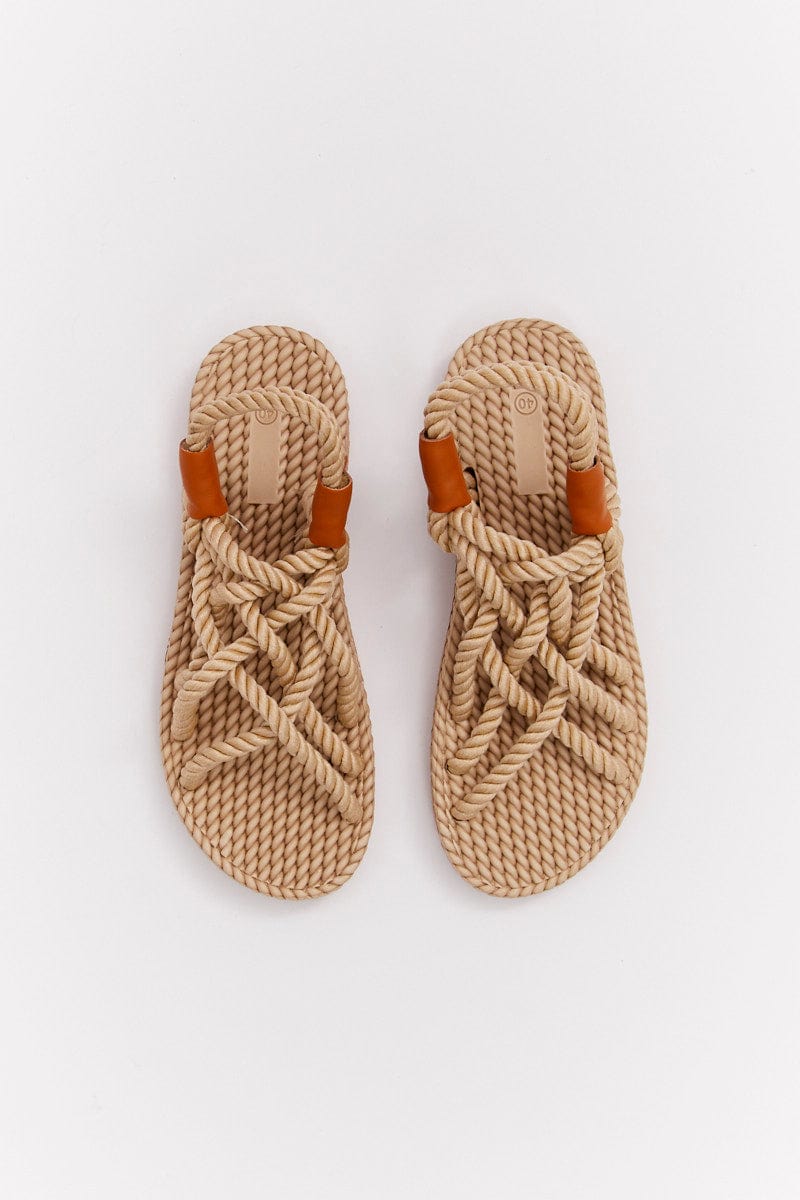
Rope sandals are handmade shoes that use rope as the main upper material. Some designs also use rope for the sole, while others attach rope straps to a sole made from leather, rubber, cork, or recycled rubber.
The basic design is much like a small boat. The sole supports your foot, and the rope works like the structure that holds everything in place. Good rope sandals should bend slightly, grip the ground, and stay secure without squeezing your toes.
There are two common styles:
• Rope sole sandals use tightly coiled rope to form the entire base.
• Rope strap sandals use a separate sole with rope woven through it to create straps.
For beginners, rope strap sandals are often easier. They need less shaping and usually offer better support. Full rope soles can look beautiful, but they require more care to keep the sole flat and strong.

Materials and Tools You Need
Before you learn how to make rope sandals, gather all your supplies. A clean work area also helps. Rope fibers can shed, and glue can spread quickly if the surface is not protected.
Basic materials
• Cotton, nylon, polyester, or braided polypropylene rope
• A flat sole template
• Rubber sheet, leather, cork, or an old flip-flop sole
• Strong waxed thread or upholstery thread
• Contact cement or flexible shoe adhesive
• Thin leather, webbing, or extra rope for straps
• Cardboard or thick paper for tracing your feet
• Fine sandpaper
• Water-resistant sealant, if needed
Cotton rope gives a soft, natural look. It is easy to handle but can absorb water and wear faster. Nylon and polyester resist moisture better. Polypropylene is light and often costs less, but it may feel less soft against the skin.
Useful tools
• Pencil or marker
• Scissors or a sharp utility knife
• Measuring tape
• Awl or leather punch
• Large blunt needle
• Small hammer
• Clamps or clothespins
• Ruler
• Safety glasses
A sharp blade is useful for cutting a sole, but it also raises the risk of injury. Cut away from your body and work on a stable surface. Keep glue away from your skin and use good airflow.

Choose the Right Rope
The rope affects comfort, strength, and appearance. For most handmade sandals, choose rope that is flexible but does not flatten too easily.
A rope between 6 and 10 millimeters wide works well for straps. A thicker rope can create a bold look, but it may rub between the toes. A thinner rope can feel light, yet it may cut into the skin if the sandal is pulled too tightly.
Look for these qualities:
• Soft fibers that will not scratch your skin
• A tight braid that will not unravel quickly
• Enough strength to hold your foot during walking
• A surface that will not become slippery when damp
Avoid rough utility rope for areas that touch your skin. It may seem strong, but rough fibers can cause hot spots and blisters. If you only have rough rope, cover the contact areas with soft webbing or cotton tape.
I recommend testing a short piece first. Wrap it around your hand and pull firmly. If it feels sharp, stretches too much, or sheds many fibers, choose another type.

Measure Your Feet and Draw a Template
A good template is the foundation of learning how to make rope sandals. Measure both feet because many people have one foot slightly larger than the other.
Follow these steps:
-
Place a sheet of cardboard on the floor.
-
Stand on it with your full weight evenly balanced.
-
Trace around your foot while holding the pencil upright.
-
Add about ⅜ inch to ½ inch around the outline.
-
Mark the ball of the foot, heel, big toe, and little toe.
-
Repeat the process for the other foot.
The extra space gives your toes room to move. Do not make the sole too narrow. Your little toe should not hang over the edge, even when you walk.
Cut out both templates and place them under your feet. Check them while standing, not only while sitting. Your foot spreads slightly under body weight, so a template that looks large on a chair may fit well when you stand.
Mark the strap points before cutting the real sole. A simple sandal may use one strap between the toes and two straps across the foot. You can also use a wide cross strap for a cleaner design.

Make the Sole
You can make the sole from a new rubber sheet, leather, cork, or an old pair of flip-flops. Reusing an old sole is a practical choice because it already has some flexibility.
Place the template on your sole material and trace around it. Cut slowly. A smooth edge looks better and reduces areas that may catch on clothing or furniture.
Use sandpaper to soften the edge. If the sole has a smooth bottom, lightly roughen the top surface. This helps flexible adhesive grip the material.
For a rope sole, begin with the center. Coil the rope in a flat spiral. Apply a thin line of glue between each coil, then press the turns together. Keep the spiral flat as you work.
Important points include:
• Keep the rope turns close together.
• Press each turn firmly into the glue.
• Check the shape against your foot often.
• Do not build a thick lump under the ball of your foot.
• Allow the glue to cure before adding straps.
A full rope sole can become slippery on tile or wet ground. Adding a thin rubber layer underneath improves traction. It also protects the rope from rough pavement.
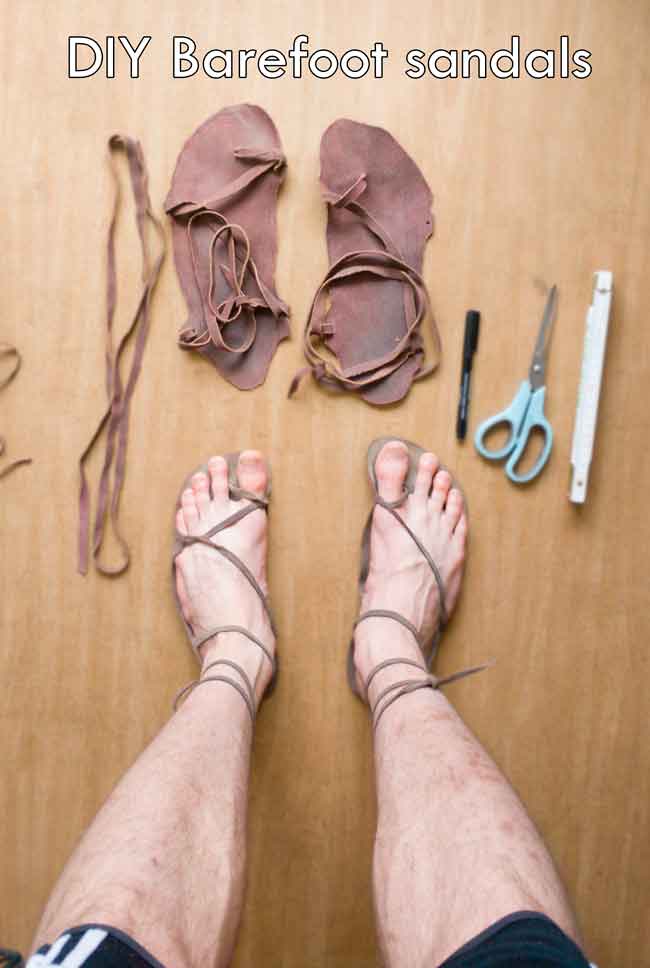
How to Make Rope Sandals Step by Step
The following method uses a separate sole and rope straps. It is one of the easiest ways to make rope sandals at home.
Step 1: Plan the strap layout
Put the sole template under your foot and mark where the straps should sit. The first strap point should rest between the big toe and second toe. The other points should sit near the inner and outer sides of the foot.
Avoid placing a strap directly over a toe joint. That area bends often and can become sore. Straps should hold the foot, not press hard on it.
Step 2: Make the holes
Use an awl or leather punch to make small holes in the sole. Make the holes just large enough for the rope or thread.
If you make the holes too close to the edge, the sole may split. Leave at least ⅜ inch of material around each hole when possible.
Step 3: Cut and prepare the rope
Cut each rope piece longer than you think you need. You can trim extra rope later, but you cannot add length easily after the strap is fixed.
Seal synthetic rope ends with a small amount of heat from a lighter. Do this with care and in a safe, open area. Cotton rope should be wrapped with thread or coated with flexible glue because heat will not seal it well.
Step 4: Attach the toe post
Push the center strap through the hole from the top or bottom, depending on your design. Tie a wide knot beneath the sole, or secure the end with strong thread and adhesive.
The knot should not touch the floor. If it does, create a shallow recess in the sole or use a flat stitched connection.
Step 5: Add the side straps
Thread the rope through the side holes. Pull it firmly enough to hold the foot, but leave room for natural movement.
A useful test is the two-finger rule. You should be able to slide one or two fingers under the strap without forcing them. If the strap leaves a deep mark after a few minutes, loosen it.
Step 6: Stitch and glue the connections
Sew through the rope and sole several times. Use a strong pattern, such as a square or cross shape. Add flexible shoe adhesive around the underside connection after stitching.
Glue alone may fail under repeated bending. Stitching provides mechanical strength, while adhesive helps seal and stabilize the joint.
Step 7: Finish the rope ends
Trim loose fibers with sharp scissors. Cover the ends with a small piece of leather, webbing, or thread wrap. This improves comfort and gives the sandal a finished appearance.
Step 8: Let the sandals cure
Place the sandals on a flat surface. Follow the adhesive instructions for drying time. Many shoe adhesives need several hours, and some need a full day before heavy use.
Do not test new sandals on a long walk right away. Wear them indoors for five to ten minutes first.

How to Weave Rope Straps
If you want a more decorative style, weave rope across the top of the sandal. This method spreads pressure over a wider area than a thin strap.
Start with two long ropes. Thread them through the sole from one side to the other. Cross the ropes over the foot, then return them through the opposite holes.
You can use a simple over-and-under pattern. Keep each row even and avoid twisting the rope. The weave should lie flat against your foot.
Try these patterns:
• A crisscross weave gives strong side support.
• A ladder weave creates an open, lightweight look.
• A central braid adds texture and helps hold the foot.
• A wide band gives more comfort for people who dislike toe straps.
As you weave, check the sandal on your foot often. A pattern that looks loose on the table may feel tight when the foot bends. The upper should flex with your foot like a soft belt, not act like a rigid cage.
Fit, Comfort, and Safety Checks
The best rope sandals feel secure without feeling tight. Walk on a clean indoor floor before wearing them outdoors.
Check these areas:
• Your heel should stay on the sole.
• Your toes should not slide over the front edge.
• The rope should not rub between your toes.
• The sole should bend near the ball of your foot.
• The bottom should provide enough traction.
• No knot or stitch should press into the ground.
Walk slowly for several minutes. Look for redness, pinching, or sliding. A small red mark can become a blister after a long walk.
Homemade sandals are best for casual use at first. They may not offer the arch support, heel control, or impact protection found in commercial footwear. Do not use them for hiking, running, driving, or wet surfaces until you have tested their grip and strength.
People with diabetes, reduced foot sensation, poor circulation, or a history of foot wounds should ask a qualified health professional before wearing handmade shoes. A small pressure point may be hard to notice and can cause injury.
Common Mistakes to Avoid
Many first attempts fail because the maker focuses on appearance before fit. A beautiful rope sandal is not useful if it slips or causes pain.
Avoid these common errors:
• Using rope that feels rough on bare skin
• Making the sole too short or too narrow
• Pulling straps so tightly that they leave marks
• Relying on glue without stitching
• Placing knots under the heel or ball of the foot
• Skipping the indoor walking test
• Wearing cotton rope sandals in heavy rain
• Leaving the bottom smooth and slippery
• Cutting every strap to the exact length before testing
One mistake I often see in early sandal projects is poor tension. The maker pulls each strap tight, thinking it will create better support. In practice, a slightly relaxed strap is often more comfortable because the foot expands as you stand and walk.
Another common problem is uneven rope coils. Use clamps as you work, and check the sole from the side. If one area rises higher than the rest, your foot may feel unbalanced.
Improve Durability and Traction
Durability depends on the sole, rope, stitching, and daily use. A sandal made for indoor wear needs less protection than one used on sidewalks.
Use these improvements:
• Add a rubber outsole for better grip.
• Apply sealant to cotton rope in light layers.
• Reinforce every strap joint with stitching.
• Round sharp sole corners.
• Keep the rope dry after use.
• Replace loose thread as soon as you see it.
Do not soak rope sandals unless the materials are designed for water. Cotton can hold moisture and may develop odor or mildew if it dries slowly. Synthetic rope handles moisture better, but the adhesive and sole still need care.
Inspect the sandals before each longer walk. Check for loose rope, cracked glue, worn holes, and sole separation. Repairing a small problem is easier than rebuilding a sandal after the strap tears.
Customize Your Rope Sandals
Once you understand how to make rope sandals, you can change the color, shape, and strap design. Custom work is also a good way to make sandals fit your personal style.
Consider these options:
• Use two rope colors in a spiral or braid.
• Add a leather ankle strap for extra security.
• Stitch colored thread around the sole edge.
• Use recycled fabric strips instead of rope.
• Add a cork footbed for a softer feel.
• Create a wide upper for more coverage.
• Use natural cotton for a beach look.
• Add reflective thread for evening visibility.
Keep decoration away from pressure points. Beads, metal pieces, and thick knots may look attractive but can rub the skin. Place decorative details on the sides or outer edge instead.
For children, use bright colors and wide straps, but check the sandals often. Children grow quickly, and a sandal that fits one month may become too small soon after.
Care and Cleaning
Regular care helps handmade sandals last longer. After wearing them, place them in a cool, dry area. Avoid direct heat because it can weaken adhesive and make some soles curl.
For light cleaning:
-
Brush away dry dirt.
-
Wipe the rope with a damp cloth.
-
Use mild soap only when needed.
-
Wipe away soap with clean water.
-
Let the sandals dry fully before storing them.
Do not put rope sandals in a washing machine. The twisting motion can loosen the weave, stretch the straps, and separate the sole.
If the sandals smell, let them dry in fresh air. Baking soda can help absorb odor, but test it on a hidden area first. Strong chemicals may discolor rope or weaken the glue.
Frequently Asked Questions About How to Make Rope Sandals
What type of rope is best for making sandals?
Soft cotton, polyester, nylon, and braided polypropylene can work well. Choose rope that feels smooth against your skin and has enough strength to resist stretching.
Can I make rope sandals without sewing?
You can use strong flexible shoe adhesive, but sewing is safer for strap joints. Glue helps bond the parts, while stitches provide extra support when the sandal bends.
How much rope do I need for one pair?
The amount depends on the sole size and design. A simple pair may use about 10 to 20 feet of rope, while woven or full rope sole designs may need more.
Are rope sandals waterproof?
Most rope sandals are not fully waterproof. Synthetic rope resists water better than cotton, but the sole, glue, and stitched joints may still weaken after repeated soaking.
How do I stop rope sandals from slipping?
Add a rubber outsole or use a sole with a textured bottom. You can also roughen a smooth rubber surface lightly, but test the grip before walking outdoors.
Why do my rope sandals hurt between the toes?
The toe post may be too thick, too tight, or made from rough rope. Loosen the strap, cover the contact area with soft fabric, or move the post slightly to match your natural toe gap.
How long do handmade rope sandals last?
Their life depends on materials, weather, body weight, walking surfaces, and construction quality. With strong stitching, a durable sole, and regular care, they can last much longer than sandals held together with glue alone.
Conclusion
Learning how to make rope sandals starts with a good foot template, comfortable rope, and a sole that bends without slipping. Measure both feet, place straps with care, stitch every major joint, and test the sandals indoors before taking them outside.
Start with a simple rope strap design before trying a full coiled rope sole. Your first pair may need small changes, but each test teaches you more about fit, tension, and comfort. Gather your materials, make a template, and build your first pair today. Share your design ideas or results with other handmade footwear makers.

Rubel Miah is the Senior Editor at MyStyleGrid.com, where he brings a sharp editorial eye and an unshakable love for fashion to everything he does. A true style addict, Rubel lives and breathes trends, from streetwear to high fashion, and has a knack for turning inspiration into impactful stories. With years of experience in fashion journalism and digital media, he curates content that empowers readers to express themselves through style. When he’s not editing features or forecasting the next big thing, you’ll find him hunting down vintage pieces or capturing street style moments around the city.