Use controlled heat, rubber conditioners, and gentle oils to restore flexibility to hardened shoe rubber.
I have worked with footwear repairs and materials for years. If you want to learn how to soften hard rubber on shoes, this guide breaks down safe, tested methods and clear steps you can follow at home. I will explain why rubber hardens, how different techniques work, safety warnings, and when it’s better to replace soles. Read on for practical advice you can use right away.
Why rubber hardens on shoes
Rubber in soles stiffens from age, oxidation, heat cycles, and exposure to sunlight. Over time the polymer chains lose flexibility. Hard rubber can crack, reduce grip, and make shoes uncomfortable.
Common causes include:
- Oxidation from air and UV light.
- Loss of plasticizers and oils inside the rubber.
- Repeated flexing and drying.
- Chemical exposure or improper storage.
Knowing the cause helps choose the right method for how to soften hard rubber on shoes. If the rubber has deep cracks or missing material, softening may not restore function.

Safety first: precautions before you start
Softening rubber can involve heat, solvents, and oils. Follow simple safety steps to protect shoes and yourself.
Key precautions:
- Work in a well-ventilated area to avoid fumes.
- Test any product on a hidden area first.
- Avoid open flames and high heat that can warp or melt soles.
- Use gloves when handling solvents or oils.
- Keep pets and children away while you work.
Safety matters more than speed. If you are unsure about a product, consult a cobbler. These precautions keep attempts to learn how to soften hard rubber on shoes safe and effective.

Proven methods to soften hard rubber on shoes
Below are practical techniques I’ve tested and used. Each method targets the missing flexibility in different ways. Choose one based on the rubber condition, tools, and your comfort level.
1. Controlled heat method
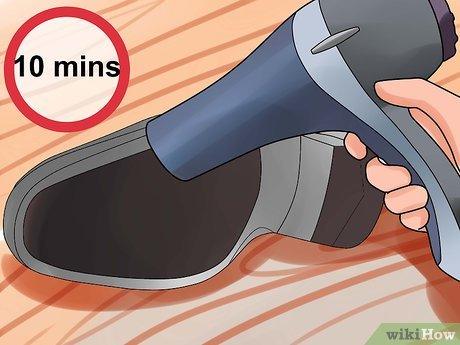
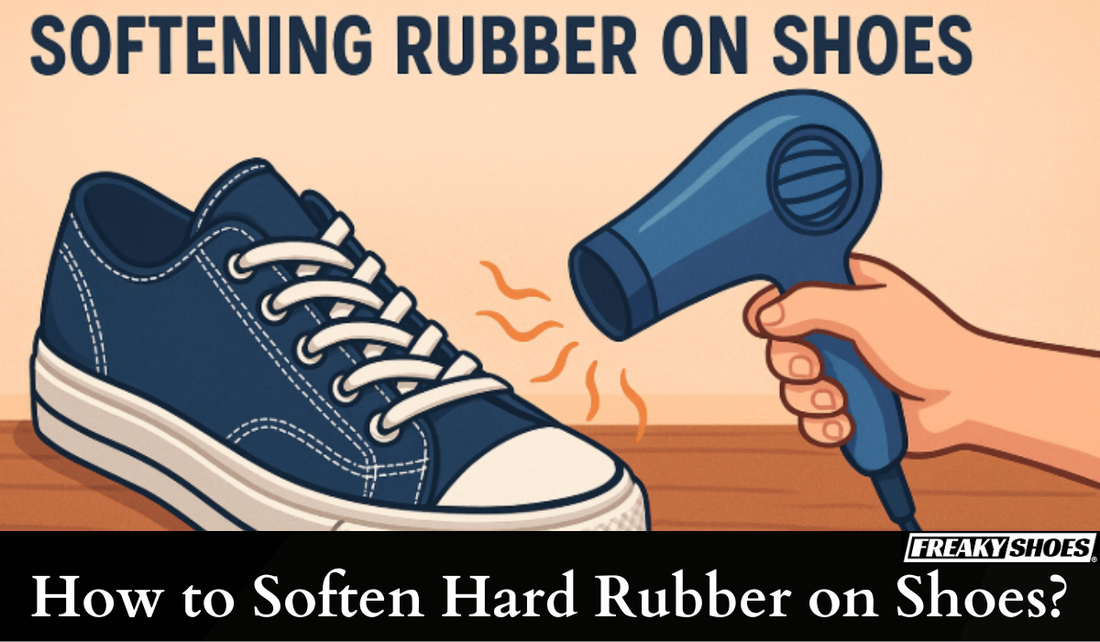
Heat relaxes rubber and helps pliability. Use low, even heat only.
Steps:
- Clean the sole with soap and water. Let dry.
- Use a hair dryer or heat gun on low, keeping it at least 6–8 inches away.
- Move the heat across the entire stiff area for short bursts of 10–20 seconds.
- Flex the shoe while warm by bending it gently with your hands.
- Repeat two or three times, allowing cooling between cycles.
Notes:
- Do not overheat; too much heat can melt glues or deform the shoe.
- This method is good for mildly hardened soles and works well when combined with conditioners.
2. Rubber conditioners and dedicated restorers
Specialty rubber conditioners replace lost oils and plasticizers.
Steps:
- Clean and dry the rubber.
- Apply a thin coat of rubber restorer or conditioner per product directions.
- Allow product to soak in 10–30 minutes.
- Wipe excess and flex the sole gently.
Notes:
- Conditioners are designed specifically for rubber and can give lasting flexibility.
- Best for mid-stage hardening where the rubber is intact but stiff.
3. Using oils and household products
Simple oils can soften rubber by reintroducing plasticizer-like compounds.
Common options:
- Mineral oil or baby oil
- Neatsfoot oil for leather/rubber blends
- Small amounts of glycerin
Steps:
- Clean the sole.
- Apply a small amount of oil using a cloth.
- Massage into the rubber and let sit 30–60 minutes.
- Wipe excess and flex the shoe.
Warnings:
- Oils can darken soles and attract dirt.
- Test first to ensure color and odor are acceptable.
4. Solvents and mild plasticizers
Some solvents can swell rubber slightly to restore flexibility. These should be used with caution.
Options:
- Small amounts of isopropyl alcohol to clean, not soften.
- Specialty plasticizer products made for rubber restoration.
Steps:
- Prefer products formulated for rubber to avoid damage.
- Apply sparingly and follow all safety directions.
Do not use harsh solvents like acetone on most shoe rubbers. They can dissolve adhesives and damage shoe structure.
5. Mechanical flexing and wear-in
Softening can also come from gentle, repeated flexing.
Steps:
- After cleaning and any product application, bend the shoe slowly.
- Walk in the shoes indoors on soft surfaces until they warm up and loosen.
- Repeat daily for gradual improvement.
This method is safe and often completes the softening process started by heat or conditioners.
How to soften hard rubber on shoes well often combines two methods, such as heat plus a rubber conditioner. That pairing speeds results and reduces the risk of damage.

Testing and maintenance after softening
Check results before regular wear. Small tests reduce surprises.
Testing routine:
- Bend the shoe to see if flexibility improved without cracking.
- Walk indoors for 10–20 minutes to test comfort and grip.
- Inspect soles for glue failure or separation.
Maintenance tips:
- Store shoes away from direct sunlight and heat.
- Use shoe trees for structured shoes and keep soles clean.
- Reapply conditioner every few months if rubber tends to harden.
These steps help your effort to learn how to soften hard rubber on shoes last longer.
When to replace rather than soften
Softening helps many issues, but not all. Replace the shoe or sole when:
- Rubber has deep cracks or large missing chunks.
- The sole separates from the upper.
- Tread is completely worn and unsafe.
If the cost of professional resoling is close to replacement, choose the option that assures safety. Softening is a fix, not always a permanent repair.

Personal experience and practical tips
I once restored a pair of rubber-soled work shoes that had stiffened after years in a garage. Heat plus a rubber restorer did the trick. I made three mistakes first:
- I overheated one sole, which softened glue and required a partial re-glue.
- I used too much oil, which collected dirt for weeks.
- I skipped testing, and one shoe felt tighter than the other until I flexed it more.
Lessons learned:
- Use gentle, repeated treatments.
- Test small areas first.
- Combine heat with a conditioner for best results.
Practical tip: keep a small bottle of rubber restorer in your toolbox. It’s handy for quick touch-ups and extends the life of soles. Regular light conditioning prevents severe hardening and reduces the need to learn how to soften hard rubber on shoes later.

Frequently Asked Questions of how to soften hard rubber on shoes
Will heat damage shoe soles?
Short bursts of low heat usually do not damage soles. Keep the heat source moving and test first to avoid melting glue or warping.
How long does a softening treatment last?
A good conditioning treatment may last months, depending on wear and exposure. Reapply as needed when stiffness returns.
Can I use household oils like olive oil?
Avoid food oils; they can go rancid and attract dirt. Use mineral oil or products made for rubber instead.
Is softening rubber safe for shoes with glued soles?
Yes if you use low heat and mild products. Avoid high heat and harsh solvents that can weaken adhesives.
When should I see a cobbler instead?
Visit a cobbler if the sole is cracked, separated, or if you are unsure about using a solvent. Professionals can resole or use industrial restorers safely.
Can I prevent rubber from hardening?
Store shoes in cool, dry places, avoid direct sun, and apply rubber conditioner periodically to maintain flexibility.
Final thoughts
Softening shoe rubber can revive comfort and extend life when done carefully. Start with cleaning, test small areas, and combine gentle heat with a rubber-specific conditioner for the best results. Be cautious with solvents and avoid overheating. If a sole is badly cracked or separated, choose replacement or professional repair.
Try a small, safe method first and check results. If this guide helped, leave a comment with your experience, or subscribe for more practical shoe care tips.

Rubel Miah is the Senior Editor at MyStyleGrid.com, where he brings a sharp editorial eye and an unshakable love for fashion to everything he does. A true style addict, Rubel lives and breathes trends, from streetwear to high fashion, and has a knack for turning inspiration into impactful stories. With years of experience in fashion journalism and digital media, he curates content that empowers readers to express themselves through style. When he’s not editing features or forecasting the next big thing, you’ll find him hunting down vintage pieces or capturing street style moments around the city.